Mazda 3 Service Manual: Brake/Taillight Bulb Removal/Installation
4SD
1. Disconnect the negative battery cable..
2. Remove the following parts:
a. Trunk mat.
b. Trunk board.
c. Trunk end trim.
3. Partially peel back the trunk side trim..
4. Remove in the order indicated in the table.
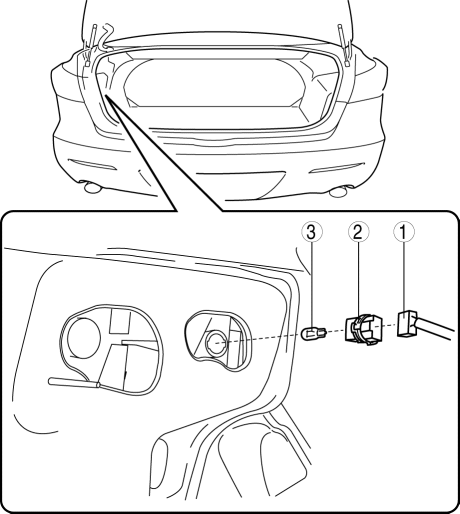
|
1 |
Connector |
|
2 |
Socket |
|
3 |
Brake/taillight bulb |
5. Install in the reverse order of removal.
5HB
1. Disconnect the negative battery cable..
2. Remove the service hole cover.
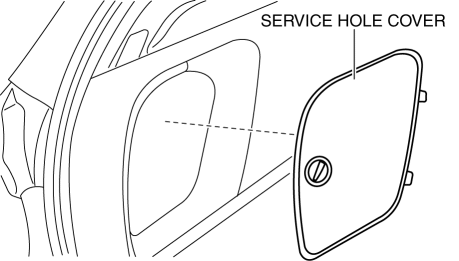
3. Remove in the order indicated in the table.
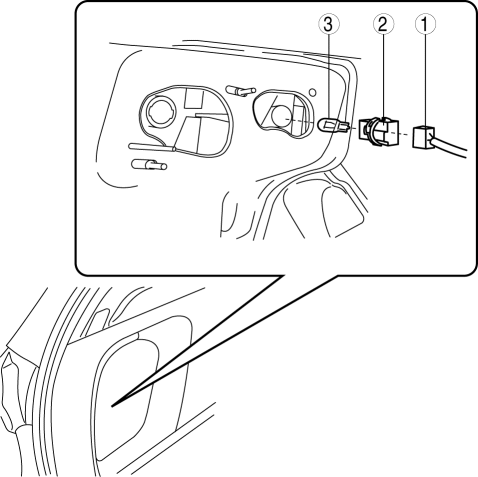
|
1 |
Connector |
|
2 |
Socket |
|
3 |
Brake/taillight bulb |
4. Install in the reverse order of removal.
 Brake Pedal Removal/Installation
CAUTION:
The clearance between the brake switch and the brake pedal is automatically
adjusted to the correct amount when the brake switch is inserted into the installation
hole on the br ...
 Brakes SST
49 D043 0A0
Adapter set
49 U043 0A0A
Oil pressure gauge set
49 0221 600C
Disc brake expand tool
...
Other materials:
Engine Coolant Temperature (ECT) Sensor Removal/Installation [Mzr 2.0, Mzr 2.5]
WARNING:
When the engine is hot, it can badly burn. Turn off the engine and wait until
it is cool before removing the ECT sensor.
ECT Sensor No.1
1. Remove the battery cover..
2. Disconnect the negative battery cable..
3. Drain the engine coolant..
4. Remove the battery and b ...
Hood
Opening the hood
1. Потягніть важіль відкривання капота в салоні
Subaru Solterra.
Капот трохи підніметься.
2. Перемістіть додатковий фіксатор вліво та
підніміть капот.
3. ...
Front Fog Light Bulb Removal/Installation
Except Mazdaspeed3
1. Disconnect the negative battery cable..
2. Slightly bend back the mudguard..
3. Disconnect the connector.
4. Rotate the front fog light bulb in the direction of the arrow shown in the
figure.
5. Remove the front fog light bulb.
CAUTION:
A haloge ...
