
Mazda 3 Service Manual: Cowl Grille Removal/Installation
1. Remove the windshield wiper arm and blade..
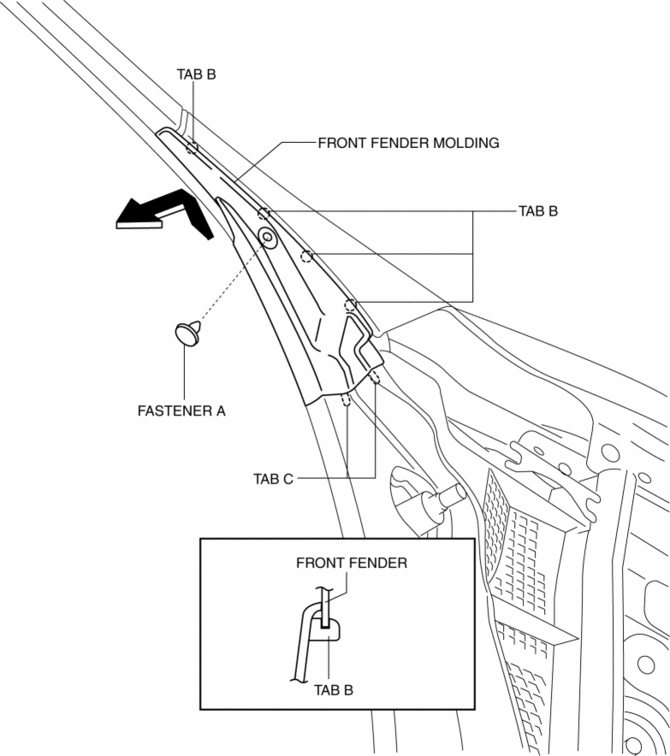
2. Remove the fastener A.
3. Pull the front fender molding in the direction of the arrow shown in the figure and remove it while remove the tab B and tab C.
4. Disconnect the windshield washer hose from the joint pipe A..
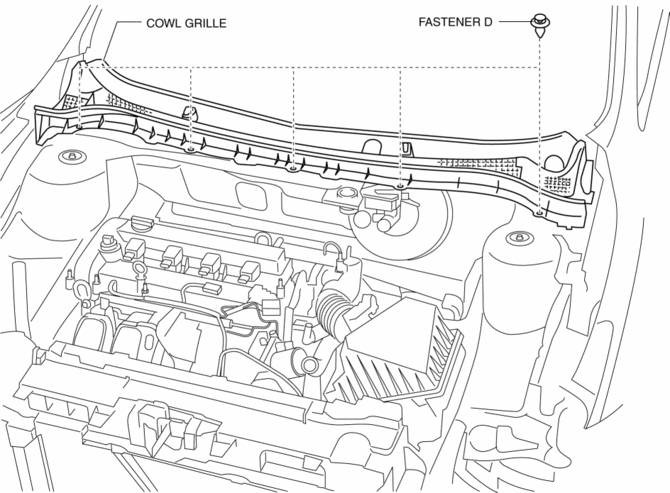
5. Remove the fasteners D.
6. Pull the cowl grille in the direction of arrow, then remove the tabs E from the windshield.
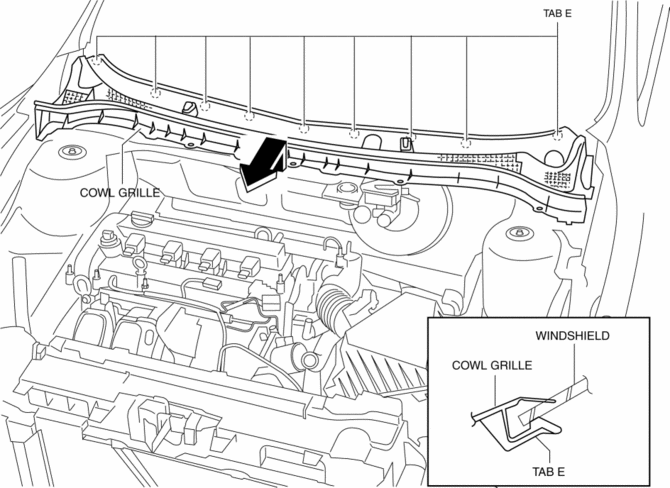
7. Remove the cowl grille.
8. Remove the fasteners.
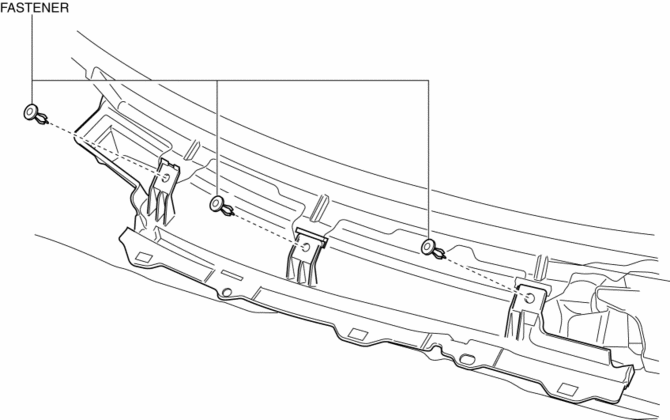
9. Push the tab in the direction of arrow (1) shown in the figure, then remove the clips.
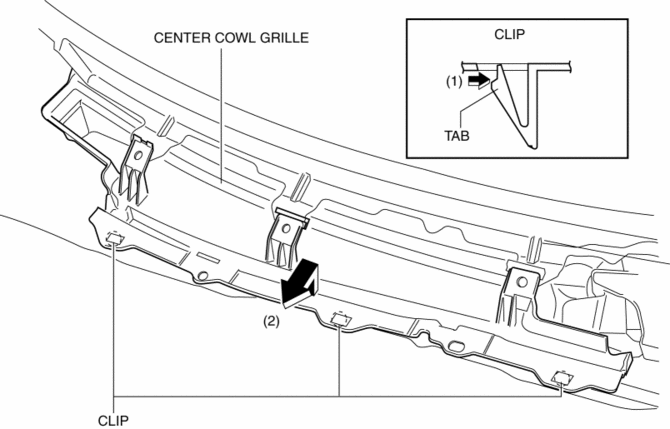
10. Remove the center cowl grille in the direction of arrow (2) shown in the figure.
11. Install in the reverse order of removal.
 Aerodynamic Under Cover No.2 Removal/Installation
Except SKYACTIV-G 2.0
1. Lift up the vehicle.
2. Remove the fasteners and bolts.
3. Move the aerodynamic under cover No.2 in the direction of the arrow shown
in the figure and remove it.
...
 Cowl Panel Removal/Installation
1. Disconnect th negative battery cable..
2. Remove the windshield wiper arm and blade..
3. Remove the front fender molding..
4. Remove the cowl grille..
5. Remove the washer hose grommet from ...
Other materials:
Ventilator Grille Removal/Installation
Side Ventilator grille
1. Through the wiring harness into the position shown in the figure, remove the
side ventilator grille in the direction of arrow.
2. When installing the side ventilator grille, push it for the dashboard.
Center Ventilator grille
1. Disconnect the negative battery c ...
Parking/Front Side Marker/Front Turn Light Bulb Removal/Installation
1. Disconnect the negative battery cable..
2. Slightly bend back the front mudguard..
3. Rotate the parking/front side marker/front turn light socket in the direction
of the arrow shown in the figure.
4. Remove the parking/front side marker/front turn light bulb.
5. Install in the ...
Electric Vehicle system features
The Subaru Solterra represents a new generation of mobility, where
battery electric vehicle technology significantly differs from traditional gasoline-powered
vehicles in both operation and driving experience.
Instead of relying on internal combustion, the Subaru Solterra uses
energy stored i ...
