Mazda 3 Service Manual: Aerodynamic Under Cover No.2 Removal/Installation
Except SKYACTIV-G 2.0
1. Lift up the vehicle.
2. Remove the fasteners and bolts.
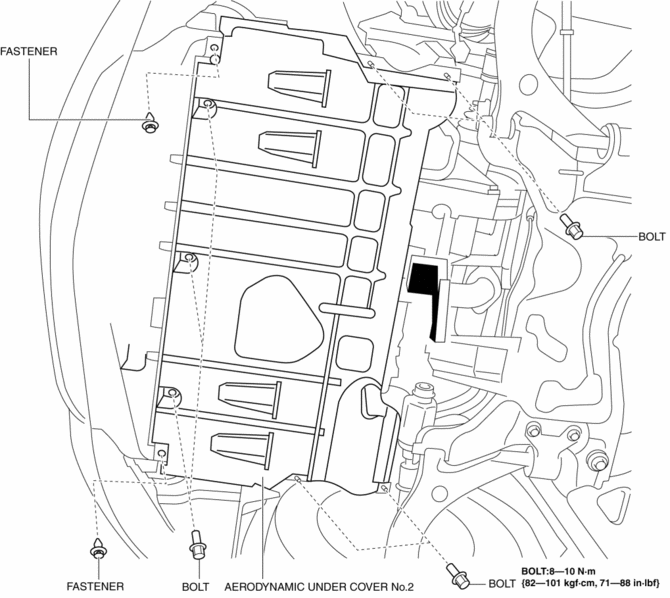
3. Move the aerodynamic under cover No.2 in the direction of the arrow shown in the figure and remove it.
CAUTION:
-
Be careful not to damage the aerodynamic under cover No.2 during removal.
4. Install in the reverse order of removal.
SKYACTIV-G 2.0
1. Lift up the vehicle.
2. Peel off the front mudguard..
3. Remove the fasteners and bolts.
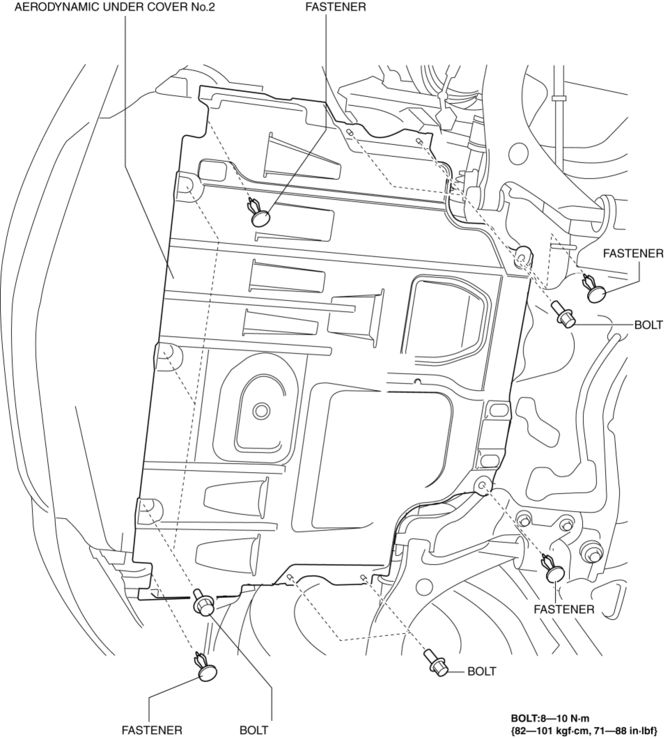
4. Move the aerodynamic under cover No.2 in the direction of the arrow shown in the figure and while remove tabs A and B.
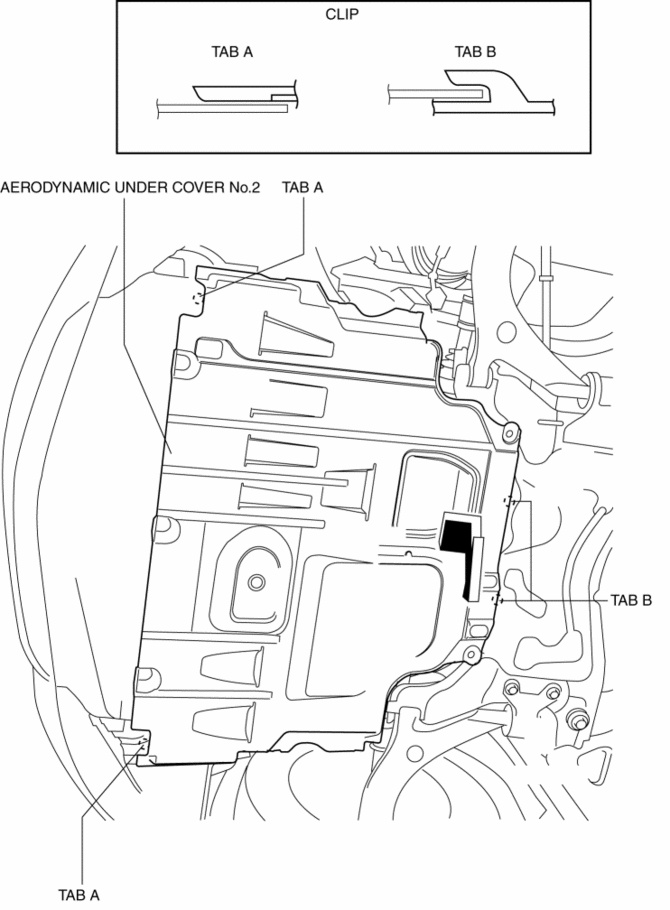
CAUTION:
-
Be careful not to damage the aerodynamic under cover No.2 during removal.
5. Remove the aerodynamic under cover No.2.
6. Install in the reverse order of removal.
 Aerodynamic Under Cover No.1 Removal/Installation
1. Remove the aerodynamic under cover No.2..
2. Peel off the front mudguard..
3. Remove the bolts and fastener.
4. Remove the aerodynamic under cover No.1 in the direction of the arrow shown ...
 Cowl Grille Removal/Installation
1. Remove the windshield wiper arm and blade..
2. Remove the fastener A.
3. Pull the front fender molding in the direction of the arrow shown in the figure
and remove it while remove the tab B a ...
Other materials:
Front Door Speaker Inspection
1. Disconnect the negative battery cable..
2. Remove the inner garnish..
3. Remove the front door trim..
4. Remove the front door speaker..
5. Verify the resistance between the front door speaker terminals.
If not within the specification, replace the front door speaker.
...
Rear Turn Light Bulb Removal/Installation
4SD
1. Disconnect the negative battery cable..
2. Remove the following parts:
a. Trunk mat.
b. Trunk board.
c. Trunk end trim.
3. Partially peel back the trunk side trim..
4. Remove in the order indicated in the table.
1
Connector
2
...
AUX/USB/iPod mode
Audio can be heard from the vehicle's
speakers by connecting a commerciallyavailable
portable audio unit to the
auxiliary jack.
A commercially-available, non-impedance
(3.5 ) stereo mini plug cable is required.
Contact an Authorized Mazda Dealer for
details.
In addition, audio can be p ...
