Mazda 3 Service Manual: Aerodynamic Under Cover No.1 Removal/Installation
1. Remove the aerodynamic under cover No.2..
2. Peel off the front mudguard..
3. Remove the bolts and fastener.
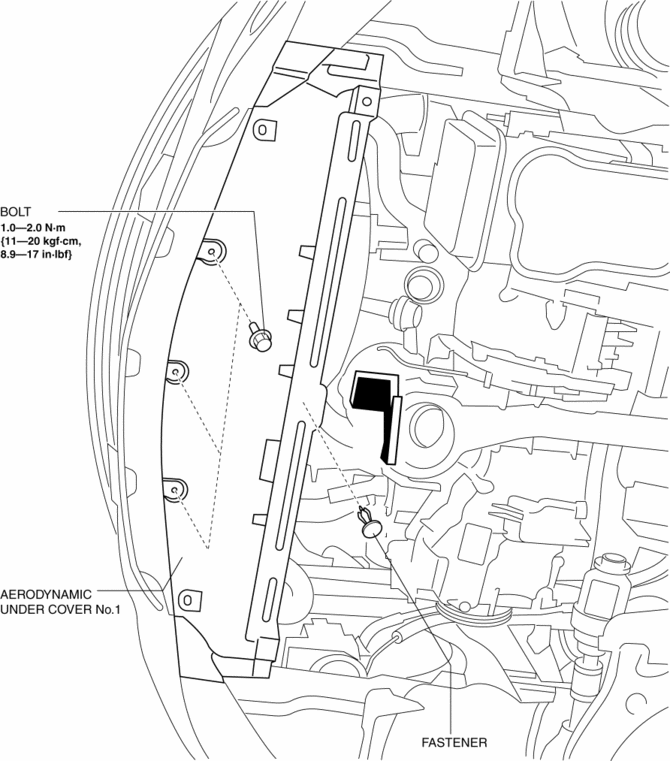
4. Remove the aerodynamic under cover No.1 in the direction of the arrow shown in the figure.
CAUTION:
-
Be careful not to damage the aerodynamic under cover No.1 during removal.
5. Install in the reverse order of removal.

 Aerodynamic Under Cover No.2 Removal/Installation
Except SKYACTIV-G 2.0
1. Lift up the vehicle.
2. Remove the fasteners and bolts.
3. Move the aerodynamic under cover No.2 in the direction of the arrow shown
in the figure and remove it.
...
Other materials:
Brake Hose (Rear) Removal/Installation [Mzr 2.0, Skyactiv G 2.0]
CAUTION:
If the brake hose is installed to the caliper on the vehicle, the tool cannot
be installed correctly resulting in brake fluid leakage due to improper installation.
Therefore, remove the caliper and brake hose as a single unit when removing
the brake hose, and tighten the br ...
Transaxle Oil Inspection [G35 M R]
1. Park the vehicle on level ground.
2. Remove the aerodynamic under cover No.2..
3. Remove the oil level plug and washer.
4. Verify that the oil is near the brim of the plug port.
If the oil level is lower than the low level, add the specified amount and
type of oil through the ...
ABS HU/CM Inspection
1. Disconnect the ABS HU/CM connector..
2. Connect the negative battery cable..
3. Attach the tester lead to the ABS HU/CM wiring harness-side connector and
inspect the voltage, continuity, or resistance according to the standard (reference
value) in the table below.
Standard (reference)
...
