Mazda 3 Service Manual: Engine Oil Replacement [Mzr 2.0, Mzr 2.5]
WARNING:
-
Hot engines and engine oil can cause severe burns. Turn off the engine and wait until it and the engine oil have cooled.
-
A vehicle that is lifted but not securely supported on safety stands is dangerous. It can slip or fall, causing death or serious injury. Never work around or under a lifted vehicle if it is not securely supported on safety stands.
-
Continuous exposure to USED engine oil has caused skin cancer in laboratory mice. Protect your skin by washing with soap and water immediately after working with engine oil.
CAUTION:
-
If engine oil is spilled on the exhaust system, wipe it off completely. If you fail to wipe the spilled engine oil, it will produce fumes because of the heat.
1. Position the vehicle on level ground.
2. Remove the oil filler cap.
3. Remove the oil pan drain plug.
4. Drain the engine oil into a container.
5. Install the oil pan drain plug with a new gasket.
-
Oil pan drain plug tightening torque
-
30—41 N·m {3.1—4.1 kgf·m, 23—30 ft·lbf}
NOTE:
-
The amount of residual oil in the engine can vary according to factors such as the replacement method and oil temperature. Verify the oil level after engine oil replacement.
6. Refill with the following type and amount of the engine oil. Engine oil specification
|
Item |
U.S.A. and CANADA |
Except U.S.A. and CANADA |
|
Engine oil grade |
|
|
|
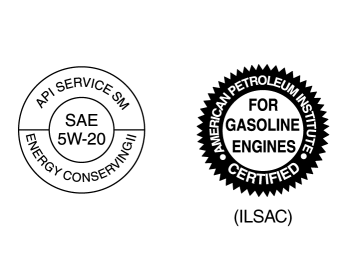
API SM or ILSAC |
||
|
Engine oil viscosity |
0W-20 |
5W-20 (If SAE 5W-20 engine oil is not available in your market, use SAE 5W-30 engine oil.) |
-
Engine oil capacity [MZR 2.0] (approx. quantity)
-
Oil replacement: 3.9 L {4.1 US qt, 3.4 Imp qt}
-
Oil and oil filter replacement: 4.3 L {4.5 US qt, 3.8 Imp qt}
-
Total (dry engine): 4.6 L {4.9 US qt, 4.0 Imp qt}
-
Engine oil capacity [MZR 2.5] (approx. quantity)
-
Oil replacement: 4.6 L {4.9 US qt, 4.0 Imp qt}
-
Oil and oil filter replacement: 5.0 L {5.3 US qt, 4.4 Imp qt}
-
Total (dry engine): 5.5 L {5.8 US qt, 4.8 Imp qt}
7. Install the oil filler cap.
8. Start the engine and confirm that there is no oil leakage.
-
If there is oil leakage, repair or replace the applicable part.
9. Inspect the oil level..
 Engine Oil Level Inspection [Mzr 2.0, Mzr 2.5]
1. Position the vehicle on level ground.
2. Warm up the engine.
3. Stop the engine and allow at least 5 min before continuing.
4. Remove the dipstick, wipe it cleanly, and reinstall it fully.
...
 Front Oil Seal Replacement [Mzr 2.0, Mzr 2.5]
1. Remove the battery cover..
2. Disconnect the negative battery cable..
3. Remove the plug hole plate..
4. Disconnect the wiring harness.
5. Remove the ignition coils..
6. Remove the spark ...
Other materials:
Vehicle Speed Sensor (VSS) Removal/Installation [FS5 A EL]
CAUTION:
If foreign materials are stuck to the sensor, disturbance by magnetic flux
can cause sensor output to be abnormal and thereby negatively affect control.
Make sure that foreign materials such as iron filings are not stuck to the sensor
during installation.
1. Perform t ...
Front Seat Back Trim Removal/Installation
WARNING:
Handling a front seat (with built-in side air bag) improperly can accidentally
operate (deploy) the air bag, which may seriously injure you. Read the service
warnings before handling a front seat (with built-in side air bag)..
CAUTION:
After removing a front seat ...
Coolant Reserve Tank Removal/Installation [Mzr 2.0, Mzr 2.5]
WARNING:
Never remove the cooling system cap or loosen the radiator drain plug while
the engine is running, or when the engine and radiator are hot. Scalding engine
coolant and steam may shoot out and cause serious injury. It may also damage
the engine and cooling system.
Tu ...
