Mazda 3 Service Manual: Front Door Trim Disassembly/Assembly
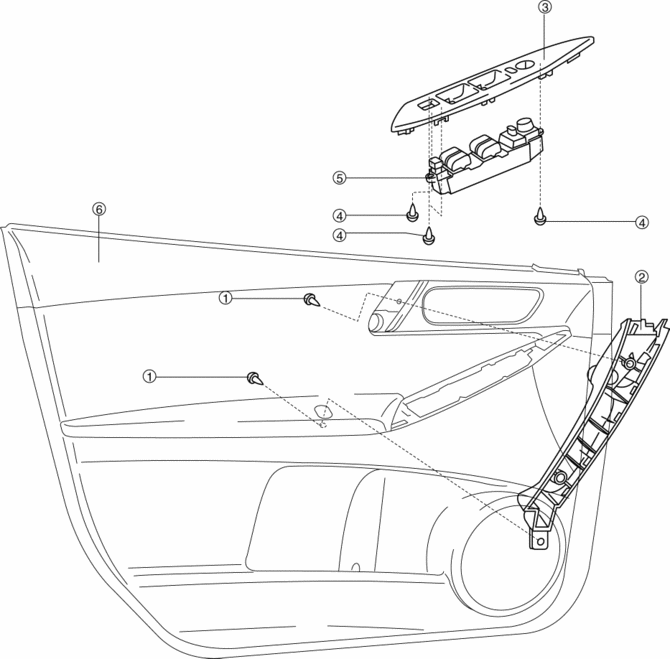
Driver-side
1. Disassemble in the order shown in the figure.
|
1 |
Screw A |
|
2 |
Assist handle |
|
3 |
Switch panel cover |
|
4 |
Screw B |
|
5 |
Power window main switch |
|
6 |
Front door trim |
2. Assemble in the reverse order of disassembly.
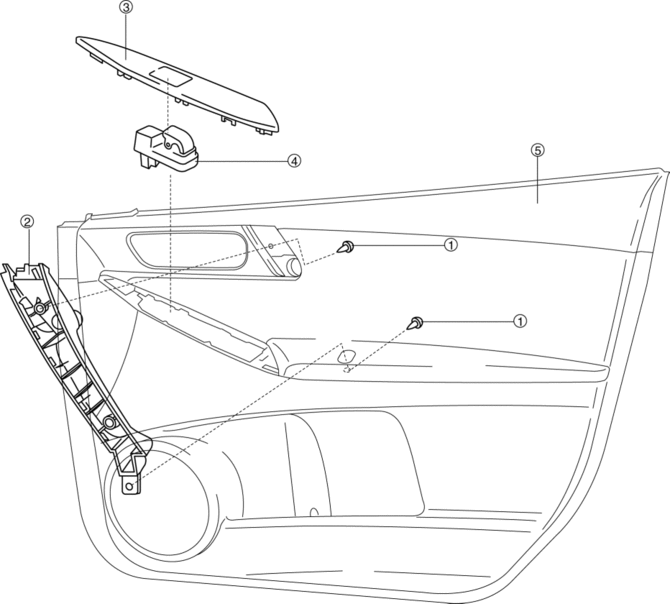
Passenger-side
1. Disassemble in the order shown in the figure.
|
1 |
Screw |
|
2 |
Assist handle |
|
3 |
Switch panel cover |
|
4 |
Power window subswitch |
|
5 |
Front door trim |
2. Assemble in the reverse order of disassembly.
 Trunk Lid Opener Switch Removal/Installation
1. Disconnect the negative battery cable..
2. Remove the trunk lid trim..
3. Remove the high-mount brake light..
4. Remove the screw.
5. Install in the reverse order of removal. ...
 Front Door Trim Removal/Installation
1. Disconnect the negative battery cable..
2. Remove the inner garnish..
3. Move the hook in the direction of arrow shown in the figure using a tape-lapped
flathead screwdriver and detach it fro ...
Other materials:
Aerodynamic Under Cover No.2 Removal/Installation
Except SKYACTIV-G 2.0
1. Lift up the vehicle.
2. Remove the fasteners and bolts.
3. Move the aerodynamic under cover No.2 in the direction of the arrow shown
in the figure and remove it.
CAUTION:
Be careful not to damage the aerodynamic under cover No.2 during removal.
4. ...
Drive Belt Auto Tensioner Inspection [Mzr 2.3 Disi Turbo]
1. Remove the aerodynamic under cover No.2 and splash shield as a single unit..
2. Remove the drive belt..
3. Verify that the drive belt auto tensioner moves smoothly in the operational
direction.
Replace the drive belt auto tensioner if necessary..
4. Rotate the drive belt ...
Auxiliary Jack/Usb Port Inspection
Auxiliary jack inspection
1. Disconnect the negative battery cable..
2. Remove the following parts:
a. Upper panel.
b. Shift lever knob (MTX).
c. Selector lever knob (ATX).
d. Shift panel.
e. Side wall.
f. Console.
g. Auxiliary jack/USB port.
3. Connect a commercially-available pl ...
