Mazda 3 Service Manual: Front Door Trim Removal/Installation
1. Disconnect the negative battery cable..
2. Remove the inner garnish..
3. Move the hook in the direction of arrow shown in the figure using a tape-lapped flathead screwdriver and detach it from the front door trim.
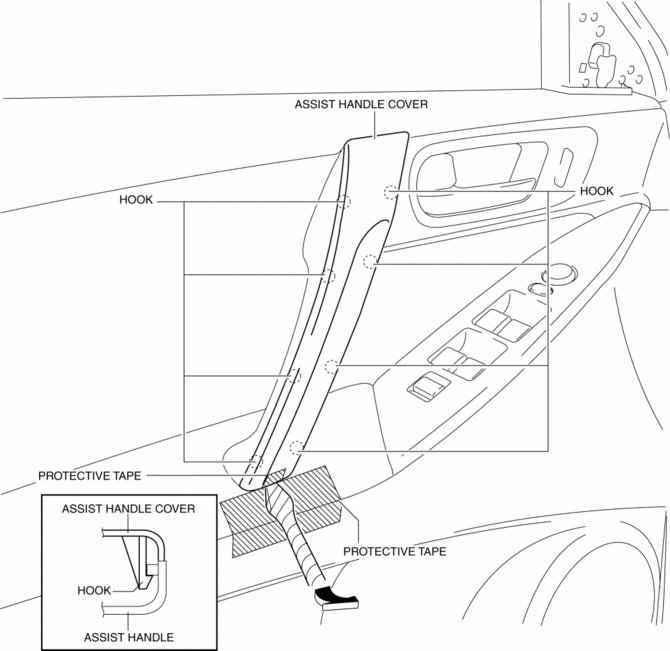
CAUTION:
-
Affix protective tape to the front door trim and assist handle cover to prevent damage.
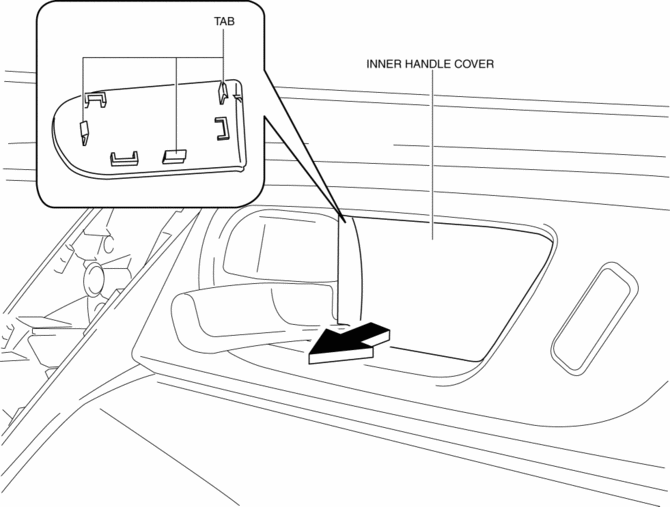
4. Pull the inner handle cover in the direction of arrow and remove it while detaching tabs.
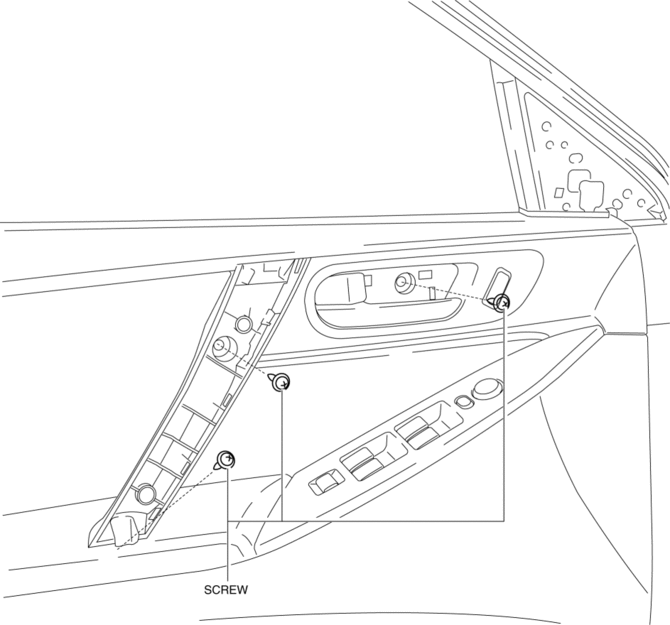
5. Remove the screws.
6. Pull in the direction of the arrow (1), (2), (3) shown in the figure and remove clips from the door inner panel using a fastener remover.
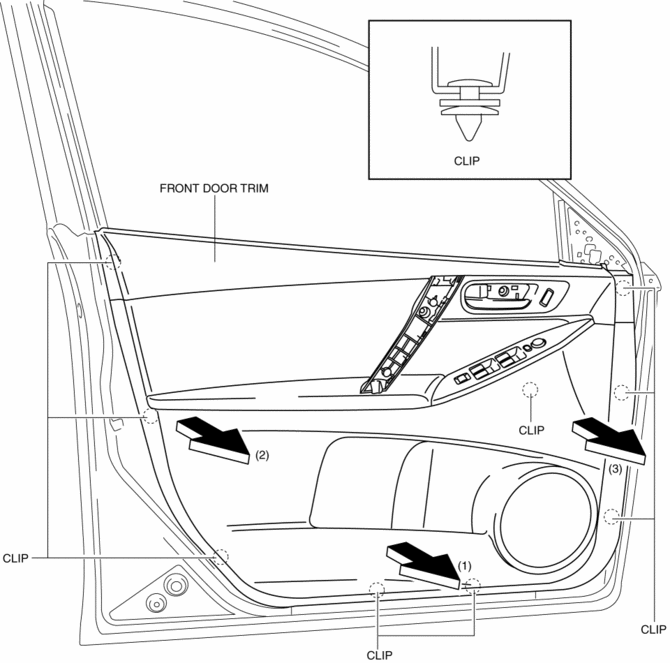
7. Remove the front door trim in the direction of the arrow shown in the figure.
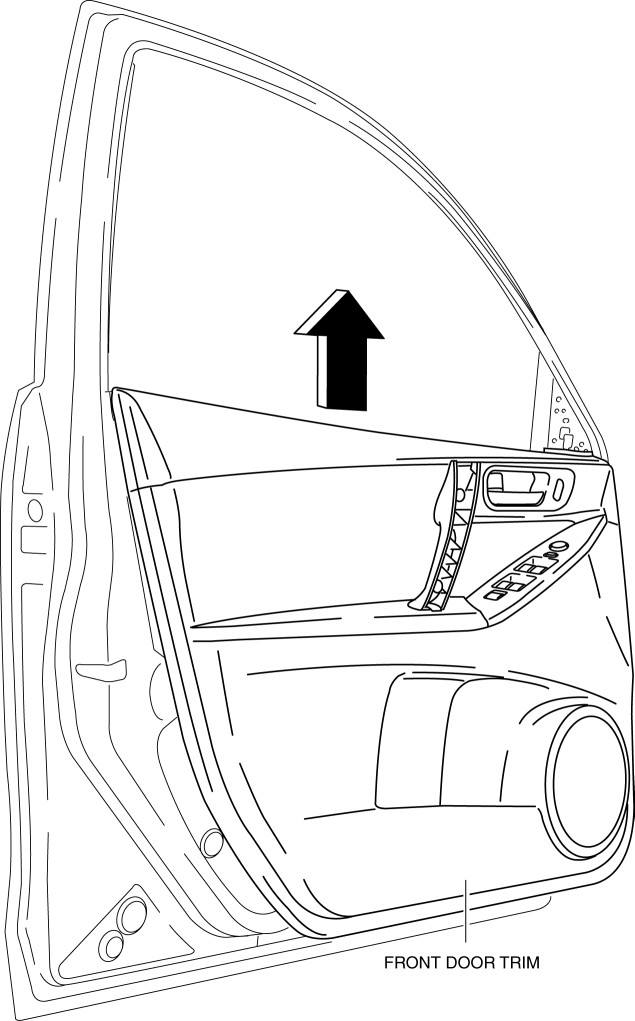
8. Remove the inner handle and move the front door trim shown in the figure.
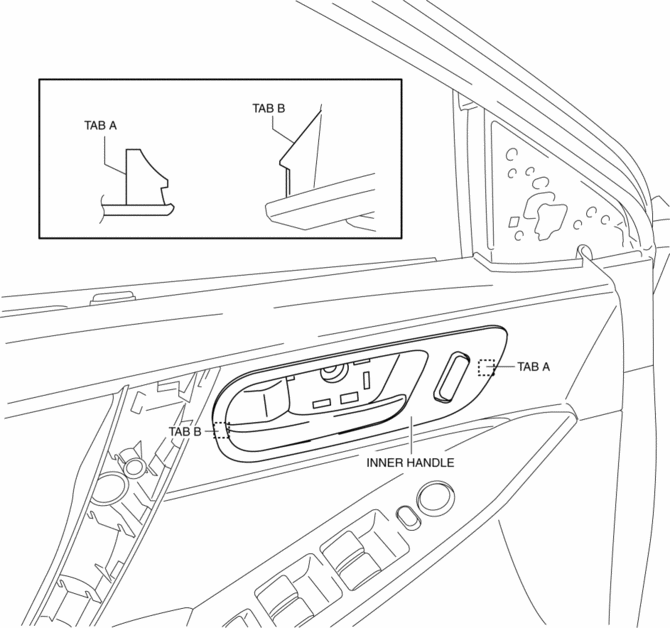
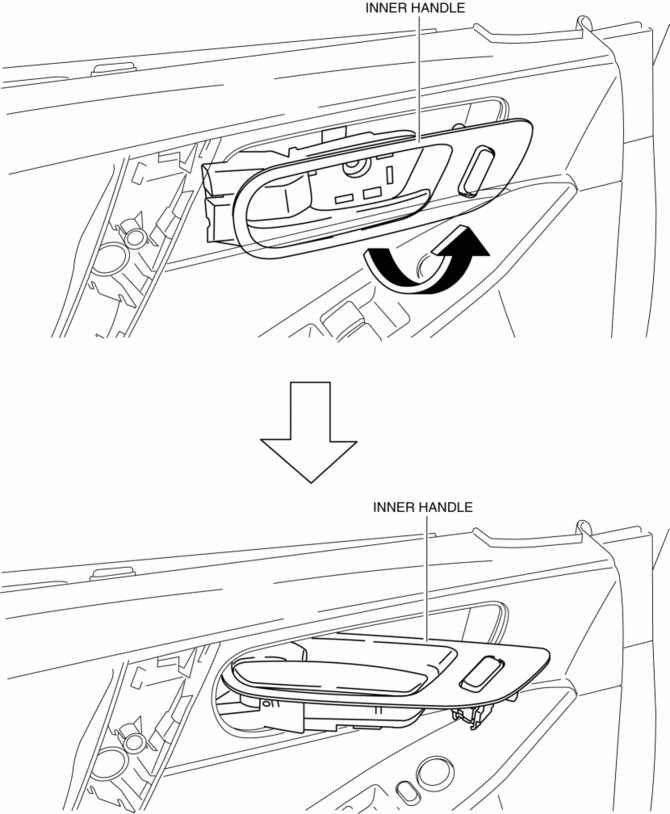
9. Turn the inner handle 90° in the direction of the arrow and remove it from the front door trim.
10. Disconnect the driver-side power outer mirror switch connector and driver-side power window main switch connector.
11. Install in the reverse order of removal.
 Front Door Trim Disassembly/Assembly
Driver-side
1. Disassemble in the order shown in the figure.
1
Screw A
2
Assist handle
3
Switch panel cover
...
 Rear Door Trim Disassembly/Assembly
1. Disassemble in the order shown in the figure.
1
Screw
2
Assist handle
3
Switch panel cover
4
...
Other materials:
How the SRS Air Bags Work
Your Mazda is equipped with the following types of SRS air bags. SRS air bags
are
designed to work together with the seat belts to help to reduce injuries during
an accident.
The SRS air bags are designed to provide further protection for passengers in
addition to the
seat belt functions. ...
Front Combination Light Bracket Replacement
NOTE:
Verify that the front combination light is not damaged before using the repair
bracket for installation when the original brackets are damaged. If the front
combination light component is damaged, replace the light as a single unit.
1. Cut off the front combination light br ...
If your vehicle overheats
If the message "EV System overheated Output power reduced" appears
on the multi-information display of your Subaru Solterra, it indicates that the
system temperature has risen beyond optimal limits and immediate action is required
to prevent potential damage.
NOTICE
■ Cooling system coolan ...
