Mazda 3 Service Manual: Rear Door Trim Disassembly/Assembly
1. Disassemble in the order shown in the figure.
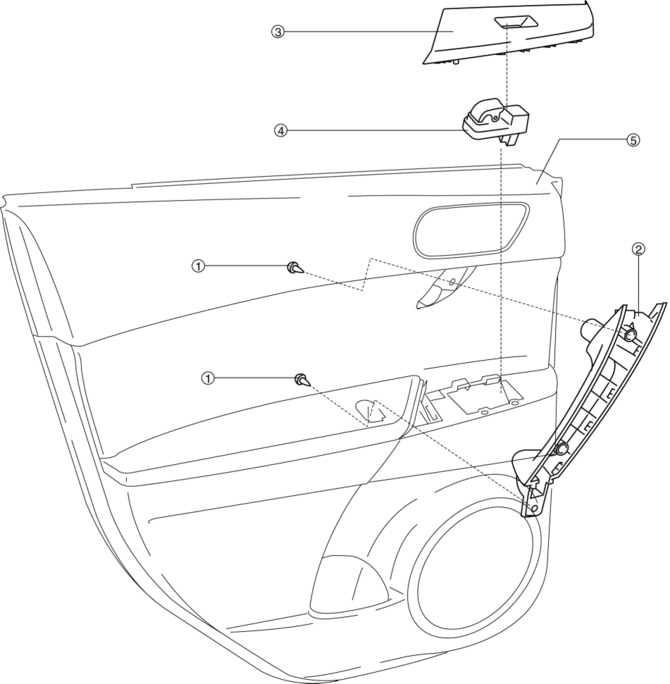
|
1 |
Screw |
|
2 |
Assist handle |
|
3 |
Switch panel cover |
|
4 |
Power window subswitch |
|
5 |
Rear door trim |
2. Assemble in the reverse order of disassembly.
 Front Door Trim Removal/Installation
1. Disconnect the negative battery cable..
2. Remove the inner garnish..
3. Move the hook in the direction of arrow shown in the figure using a tape-lapped
flathead screwdriver and detach it fro ...
 Rear Door Trim Removal/Installation
1. Disconnect the negative battery cable..
2. Move the hook in the direction of arrow shown in the figure using a tape-lapped
flathead screwdriver and detach it from the rear door trim.
CAUT ...
Other materials:
Generator Removal/Installation [Mzr 2.0, Mzr 2.5]
WARNING:
Remove and install all parts when the engine is cold, otherwise they can
cause severe burns or serious injury.
When the battery cables are connected, touching the vehicle body with generator
terminal B will generate sparks. This can cause personal injury, fire, and ...
Drive Plate Removal/Installation [FS5 A EL]
1. Remove the transaxle..
2. Remove in the order indicated in the table.
1
Drive plate installation bolts
(See Drive Plate Installation Bolts Removal Note.)
(See Drive Plate Installation Bolts Installation Note.)
2
Backing plate
...
Filament Repair
1. Clean the filament using isopropyl alcohol.
2. Attach tape to both sides of the filament.
3. Using a small brush or marking pen, apply silver paint.
4. After 2—3 min, carefully remove the tape without damaging the applied
area.
CAUTION:
Do not operate the rear window defro ...
