Mazda 3 Service Manual: Ion Sensor Inspection [Skyactiv G 2.0]
DTC Inspection
NOTE:
-
Because the ion sensor is integrated in the ignition coil, replacing the ion sensor includes replacement of the ignition coil/ion sensor.
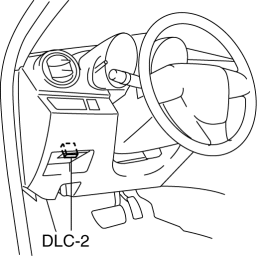
1. Connect the M-MDS to the DLC-2.
2. Perform the DTC inspection using the M-MDS..
-
If any DTC related to the ignition coil/ion sensor is present, repair the malfunctioning location according to the applicable DTC troubleshooting..
Visual Inspection
NOTE:
-
Because the ion sensor is integrated in the ignition coil, replacing the ion sensor includes replacement of the ignition coil/ion sensor.
1. Remove the battery cover..
2. Disconnect the negative battery cable..
3. Remove the plug hole plate..
4. Remove the ignition coil/ion sensor..
5. Verify that there is no damage to the ignition coil/ion sensor, and no corrosion and damage to the connector.
-
If there is a malfunction, replace the ignition coil/ion sensor..
 Front Seat Belt Removal/Installation [Two Step Deployment Control System]
WARNING:
Handling the front seat belt (pre-tensioner seat belt) improperly can accidentally
deploy the pre-tensioner seat belt, which may seriously injure you. Read the
air bag system se ...
 Neutral Switch Inspection [Mzr 2.0, Mzr 2.5]
Continuity Inspection
1. Remove the battery cover..
2. Disconnect the negative battery cable..
3. Disconnect the neutral switch connector..
4. When the shift lever is in neutral and in a positi ...
Other materials:
General Procedures (Front And Rear Axles)
Wheel and Tire Installation
1. When installing the wheels and tires, tighten the wheel nuts in a criss-cross
pattern to the following tightening torque.
Tightening torque
88—118 N·m {9.0—12 kgf·m, 65—87 ft·lbf}
Connector Disconnection
1. Disconnect the negative batte ...
Locking and unlocking AC charging connector
When the AC charging connector is properly inserted into the charging
inlet of the Subaru Solterra, it is automatically secured in place to prevent accidental
disconnection during the charging process. This locking mechanism ensures a stable
and safe connection while charging is in progress.
...
PID/Data Monitor Inspection [Blind Spot Monitoring (Bsm)]
1. Connect the M-MDS (IDS) to the DLC-2.
2. After the vehicle is identified, select the following items from the initialization
screen of the IDS.
a. Select “DataLogger”.
b. Select “Modules”.
c. Select “BSML” or “BSMR”.
3. Select the applicable PID from the PID table. ...
