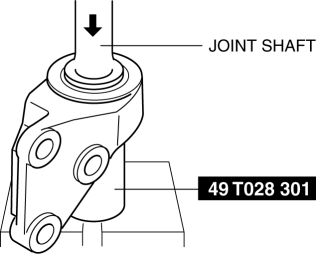
Mazda 3 Service Manual: Joint Shaft Assembly [Mzr 2.5 (ATX)]
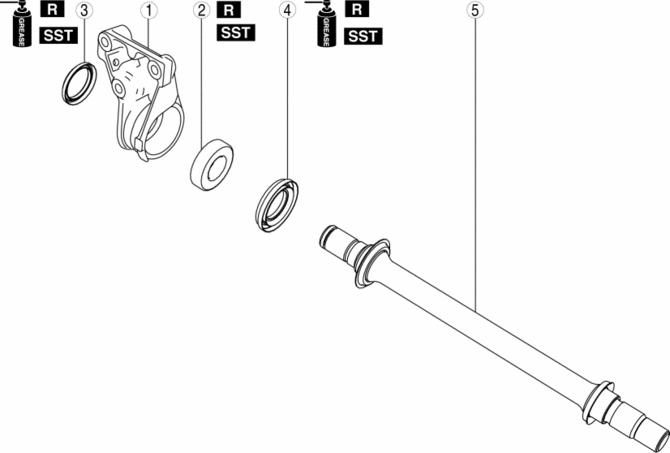
1. Assemble in the order indicated in the table.
|
1 |
Bracket |
|
2 |
Bearing . |
|
3 |
Dust seal (RH) . |
|
4 |
Dust seal (LH) . |
|
5 |
Joint shaft . |
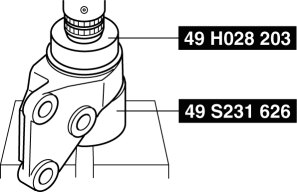
Bearing Assembly Note
1. Install a new bearing using the SSTs
.
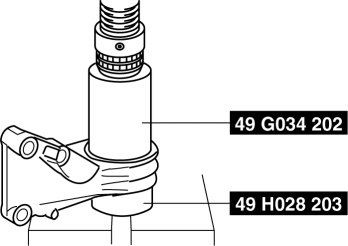
Dust Seal (RH) Assembly Note
1. Apply grease to a new dust seal lip.
2. Install the dust seal (RH) using the SSTs
.
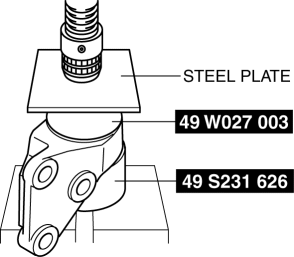
Dust Seal (LH) Assembly Note
1. Apply grease to a new dust seal lip.
2. Install a new dust seal (LH) using the steel plate and the SSTs
.
Joint Shaft Assembly Note
1. Press fit the joint shaft using the SST
and a press.
 Intermediate Sensor Removal/Installation [FS5 A EL]
CAUTION:
If foreign materials are stuck to the sensor, disturbance by magnetic flux
can cause sensor output to be abnormal and thereby negatively affect control.
Make sure that foreign m ...
 Judder Upon Torque Converter Clutch (TCC) Operation [Fw6 A EL]
TROUBLESHOOTING ITEM
Judder upon torque converter clutch (TCC) operation
DESCRIPTION
Vehicle jolts when TCC is engaged.
...
Other materials:
Oil Control Valve (OCV) Removal/Installation [Mzr 2.3 Disi Turbo]
1. Remove the battery cover..
2. Disconnect the negative battery cable..
3. Remove the charge air cooler..
4. Remove the ignition coils..
5. Disconnect the ventilation hose from the cylinder head cover..
6. Remove the cylinder head cover..
7. Remove in the order indicated in the table.
...
Front seats
In the Subaru Solterra, the front seats are designed for precise
adjustment in multiple directions (forward/backward, height, and angle), allowing
the driver and passenger to achieve an optimal and ergonomically correct driving
position for comfort and safety.
Adjustment procedure
Manual sea ...
Emission Control System
This vehicle is equipped with an emission control system (the catalytic
converter is
part of this system) that enables the vehicle to comply with existing exhaust
emissions
requirements.
WARNING
Never park over or near anything fl ammable:
Parking over or near anything fl ammable ...
