Mazda 3 Service Manual: Liftgate Latch And Lock Actuator Removal/Installation
1. Disconnect the negative battery cable..
2. Remove the following parts:
a. Liftgate upper trim.
b. Liftgate side trim.
c. Liftgate lower trim.
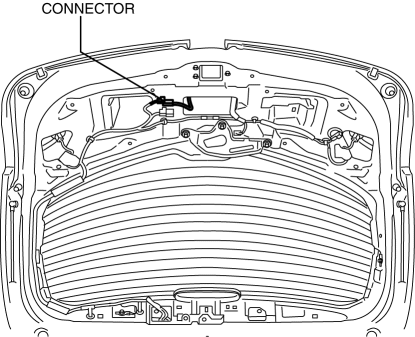
3. Disconnect the connector.
4. Remove the bolts.
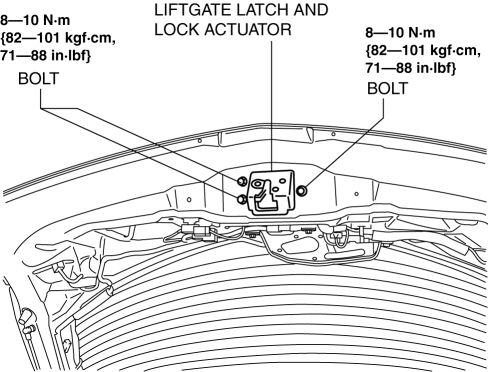
5. Remove the liftgate latch and lock actuator.
6. Install in the reverse order of removal.
 Liftgate Latch And Lock Actuator Inspection
1. The following actuator and switch are integrated with the liftgate latch and
lock actuator. Inspect the liftgate latch and lock actuator according to each inspection
procedure for the following ...
 Liftgate Latch Switch Inspection
1. Disconnect the negative battery cable..
2. Remove the following parts:
a. Liftgate upper trim.
b. Liftgate side trim.
c. Liftgate lower trim.
d. Liftgate latch and lock actuator.
3. Pre ...
Other materials:
To Turn Off an Armed System
An armed system can be turned off using
any one of the following methods:
Pressing the unlock button on the
transmitter.
Switching the ignition ON.
(With the advanced keyless function)
Pressing a request switch on the doors.
The hazard warning lights will flash twice.
NOTE
When th ...
Neutral Switch Removal/Installation [G35 M R]
1. Remove the battery cover..
2. Disconnect the negative battery cable.
3. Remove the battery component. (ex: battery, battery tray and PCM component)(See
BATTERY REMOVAL/INSTALLATION [MZR 2.0, MZR 2.5].)
4. Remove the aerodynamic under cover No.2..
5. Drain the oil from the transaxle..
...
Front Fender Panel Removal/Installation
1. Disconnect the negative battery cable..
2. Remove the following parts:
a. Front bumper.
b. Front combination light.
c. Front fender molding.
d. Side step molding.
3. Remove fasteners and bolts, then remove the front fender panel in the direction
of the arrow shown in the figure.
...
