Mazda 3 Service Manual: Lighting System Personalization Features Setting Procedure
Auto Light System
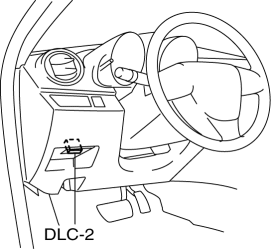
1. Connect the M-MDS (IDS) to the DLC-2.
2. After the vehicle is identified, select the following items from the initial screen of the IDS.
-
Select the “Module Programming”
-
Select the “Programmable Parameters”.
-
Select menu in the Exterior Lighting.
3. Select an item name, and then select option.
|
M-MDS display |
Function |
Initial setting |
Setting content |
Control unit |
|
Autolamp On Setting |
The auto light system sensitivity can be adjusted. |
Standard (Except Japan) |
Extra Low (Except Japan) / Low (Except Japan) / Standard (Except Japan) / High (Except Japan) / Extra High (Except Japan) |
BCM |
NOTE:
-
Other than the above conditions, an “Japan Only” command is also displayed, however, do not select the command because it is for use other than in Japan.
-
If the mode is set to “Extra High (Except Japan)” and “High (Except Japan)”, the illumination level for illuminating the TNS and headlight increases. Therefore, the TNS and headlights illuminate when the ambient light is brighter than when the level is set to “Standard (Except Japan)”. In addition, if the mode is set to “Low (Except Japan)” and “Extra Low (Except Japan)”, the illumination level for illuminating the TNS and headlights decreases. Therefore, the TNS and headlights illuminate when the ambient light is lower than when the level is set to “Standard (Except Japan)”.
Interior Light Control System / Turn Light System
-
The interior light control system and turn light system is controlled by the BCM. For the interior light control system setting, refer to the personalization function setting procedure..
 Indirect Illumination Removal/Installation
Power Window Switch (With power window switch indirect illumination)
1. Disconnect the negative battery cable..
2. Remove the assist handle cover..
3. Remove in the order indicated in the table. ...
 Rear Turn Light Bulb Removal/Installation
4SD
1. Disconnect the negative battery cable..
2. Remove the following parts:
a. Trunk mat.
b. Trunk board.
c. Trunk end trim.
3. Partially peel back the trunk side trim..
4. Remove in th ...
Other materials:
Manual Shift Mode
The manual shift mode gives you the feel
of driving a manual transaxle vehicle by
allowing you to operate the selector lever
manually. This allows you to control
engine rpm and torque to the drive wheels
much like a manual transaxle when more
control is desired.
To change to manual shift mo ...
Lane Departure Warning System (LDWS)
The LDWS notifies the driver that the vehicle may be deviating from its
lane.
The system detects the white or yellow lines on the traffic lane using the
Forward Sensing
Camera (FSC). If it determines that the vehicle may be deviating from its lane,
it notifies
the driver by flashing the L ...
Audio Unit Removal/Installation
Without Display
CAUTION:
When installing the audio unit, make sure that the wiring harness and antenna
feeder are not caught between the unit and dashboard. If the wiring harness
or the antenna feeder is caught between the unit and dashboard, it may cause
malfunctions.
Pres ...
