Mazda 3 Owners Manual: Opening and Closing the Liftgate/ Trunk Lid
Opening the liftgate (5–door)
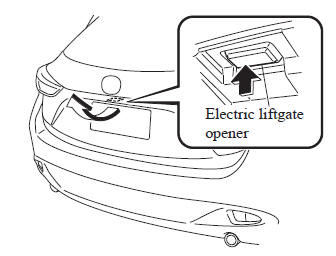
Using the electric liftgate opener Unlock the doors and liftgate, then press the electric liftgate opener on the liftgate and raise it when the latch releases.
NOTE (With the advanced keyless function)
- A locked liftgate can also be opened while the key is being carried.
- When opening the liftgate with the doors and the liftgate locked, it may require a few seconds for the liftgate latch to release after the electric liftgate opener is pressed.
- The liftgate can be closed when the doors are locked with the key left in the vehicle. However, to prevent locking the key in the vehicle, the liftgate can be opened by pressing the electric liftgate opener. If the liftgate cannot be opened despite doing this procedure, press the electric liftgate opener to fully open the liftgate after pushing the liftgate completely closed.
- When the liftgate latch is released by
pressing the electric liftgate opener,
the liftgate raises slightly to allow
it to be opened. If the liftgate is not
operated for a certain period of time
after the electric liftgate opener has
been pressed, the liftgate cannot be
raised any more from its slightly raised
position. Press the electric liftgate
opener again to fully open the liftgate.
To close the liftgate from its slightly raised position, open it first by pressing the electric liftgate opener, then close it after waiting at least 1 second.
If the liftgate is not fully closed, the driver is notified by a warning indicated in the instrument cluster.
- If the vehicle battery is dead or there is
a malfunction in the electrical system
and the liftgate cannot be unlocked, the
liftgate can be opened by performing
the emergency procedure.
Refer to When Liftgate/Trunk Lid Cannot be Opened on .
Opening the trunk lid (4–door)
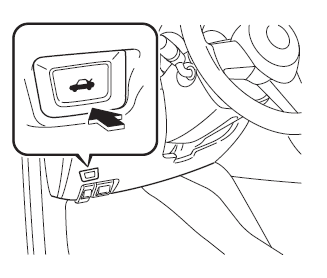
Using the remote release button
Push the release button.
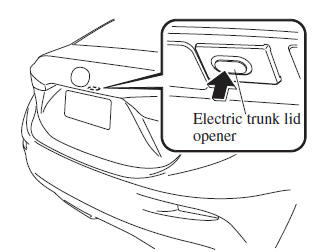
Using the electric trunk lid opener (With the advanced keyless function)
A trunk lid can also be opened while the key is being carried.
Press the electric trunk lid opener on the trunk lid, then raise the trunk lid when the latch releases.
NOTE
- When opening the trunk lid with the doors locked, it may require a few seconds for the trunk lid latch to release after the electric trunk lid opener is pressed.
- The trunk lid can be closed when the doors are locked with the key left in the vehicle. However, to prevent locking the key in the vehicle, the trunk lid can be opened by pressing the electric trunk lid opener. If the trunk lid cannot be opened despite doing this procedure, press the electric trunk lid opener to fully open the trunk lid after pushing the trunk lid completely closed.
- If the vehicle battery is dead or there
is a malfunction in the electrical
system and the trunk lid cannot be
unlocked, the trunk lid can be opened by
performing the emergency procedure.
Refer to When Liftgate/Trunk Lid Cannot be Opened on .
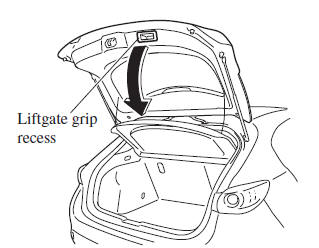
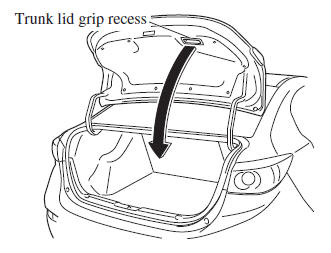
Closing the liftgate/trunk lid
Lower the liftgate/trunk lid slowly using the liftgate/trunk lid grip recess, then push the liftgate/trunk lid closed using both hands.
Do not slam it. Pull up on the liftgate/trunk lid to make sure it is secure.
(5–door)
(4–door)
 Liftgate/Trunk Lid
WARNING
Never allow a person to ride in the
luggage compartment/trunk:
Allowing a person to ride in the
luggage compartment/trunk is
dangerous. The person in the luggage
compa ...
 Luggage Compartment
Luggage compartment cover (5-door)
WARNING
Do not place anything on top of the
cover:
Placing luggage or other cargo on top
of the luggage compartment cover is
dangerous. During ...
Other materials:
Rear Seat Back Frame Removal/Installation
1. Remove the rear seat cushion..
2. Remove the rear buckle installation bolt..
3. Remove the rear seat back..
4. Remove the headrest.
5. Open the fasteners.
6. Detach the hooks.
7. Remove the child-restraint seat anchor covers in the order of (1), (2) as
shown in the figure. (5H ...
Precaution [ABS]
1. Any one or a combination of the ABS warning and brake system warning lights
illuminates even when the system is normal.
Warning lights that may illuminate and/or flash
Cases in which the light may illuminate
Conditions in which the light will go ou ...
Brake Pedal Inspection
Pedal Height Inspection
1. Measure the distance from the center of the upper surface of the pedal pad
to the floor covering and verify that it is as specified.
If not within the specification, replace the brake pedal.
Brake pedal height (reference value)
MZR 2.0, SKYACTI ...
