Mazda 3 Service Manual: Front Door Checker Removal/Installation
1. Fully close the front door glass.
2. Disconnect the negative battery cable..
3. Remove the inner garnish..
4. Remove the front door trim..
5. Remove the front door speaker..
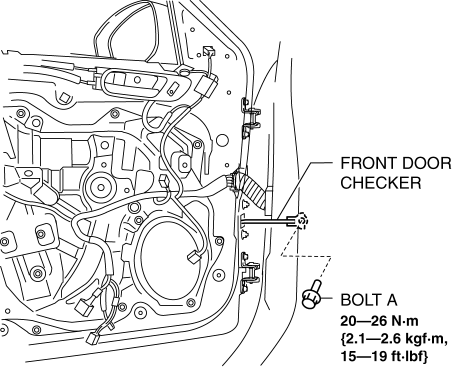
6. Remove the bolt A.

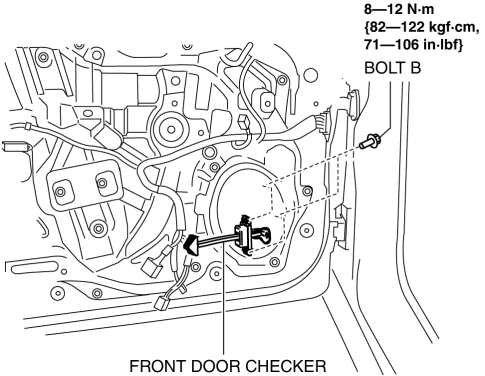
7. Remove the bolts B.

8. Pull out the front door checker from the front speaker installation hole.
9. Install in the reverse order of removal.
 Door Sash Film Removal
1. Disconnect the negative battery cable.
2. Partially peel back the glass run channel.
3. Partially peel back the door weatherstrip.
4. Remove the following parts:
a. Inner garnish.
b. Fron ...
 Front Door Hinge Removal/Installation
1. Disconnect the negative battery cable..
2. Remove the following parts:
a. Front bumper.
b. Front combination light.
c. Front fender molding.
d. Side step molding.
e. Front fender panel. ...
Other materials:
Maintenance Monitor (Type B audio)
Select the icon on the
home screen to display the “Applications” screen.
Select “Maintenance” to display the maintenance list screen.
Switch the tab and select the setting item you want to change.
You can customize settings in the setup display as follows:
...
Applicable Bluetooth ® specification
(Recommended)
Ver. 1.1/1.2/2.0 EDR/2.1 EDR/3.0
(conformity)
Response profile
A2DP (Advanced Audio Distribution
Profile) Ver. 1.0/1.2
AVRCP (Audio/Video Remote Control
Profile) Ver. 1.0/1.3/1.4
A2DP is a profile which transmits only
audio to the Bluetooth ® unit. If your
Bluetooth ® audio device c ...
Operating the Radio
Radio ON
Press a band selector button ( )
to
turn the radio on.
Band selection
Successively pressing the band selector
button ( ) switches the bands as
follows: FM1→FM2→AM.
The selected mode will be indicated.
NOTE
If the FM broadcast signal becomes weak,
reception auto ...
