Mazda 3 Service Manual: PID/Data Monitor Inspection [Blind Spot Monitoring (Bsm)]
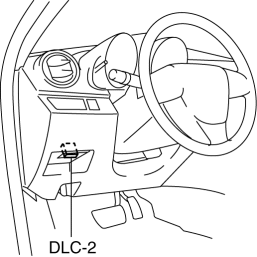
1. Connect the M-MDS (IDS) to the DLC-2.
2. After the vehicle is identified, select the following items from the initialization screen of the IDS.
a. Select “DataLogger”.
b. Select “Modules”.
c. Select “BSML” or “BSMR”.
3. Select the applicable PID from the PID table.
4. Verify the PID data according to the directions on the screen.
NOTE:
-
The PID data screen function is used for monitoring the calculated value of input/output signals in the module. Therefore, if the monitored value of the output parts is not within the specification, it is necessary to inspect the monitored value of input parts corresponding to the applicable output part control. In addition, because the system does not display an output part malfunction as an abnormality in the monitored value, it is necessary to inspect the output parts individually.
-
When detecting DTCs, PIDs related to a malfunctioning system may not display even if the module is normal. Therefore, if a PID is not displayed, it is necessary to verify the DTC, perform malfunction diagnosis of the DTC that was detected, and do repairs.
 No.7 Bsm Indicator Light Does Not Flash While Under Bsm Indicator Light Flashing
Conditions (With Combination Switch Operation (Turn Signal Switch)) [Blind Spot
Monitoring (Bsm)]
No.7 Bsm Indicator Light Does Not Flash While Under Bsm Indicator Light Flashing
Conditions (With Combination Switch Operation (Turn Signal Switch)) [Blind Spot
Monitoring (Bsm)]
7
BSM indicator light does not flash while under BSM indicator light-flashing
conditions (with combination switch operation (turn signal switch))
Desc ...

Other materials:
Information Display Removal/Installation
CAUTION:
When replacing the information display, the configuration procedure must
be performed before removing the information display. The information display
will not operate normally if it is replaced without performing the configuration
procedure.
1. Perform the informatio ...
Clock Spring Inspection [Standard Deployment Control System]
1. Disconnect the negative battery cable..
2. Remove the driver–side air bag module..
3. Remove the steering wheel..
4. Remove the column cover.
5. Remove the clock spring..
6. Verify that the continuity is as indicated in the table.
If not as indicated in the table, replace the ...
Neutral Switch Removal/Installation [G35 M R]
1. Remove the battery cover..
2. Disconnect the negative battery cable.
3. Remove the battery component. (ex: battery, battery tray and PCM component)(See
BATTERY REMOVAL/INSTALLATION [MZR 2.0, MZR 2.5].)
4. Remove the aerodynamic under cover No.2..
5. Drain the oil from the transaxle..
...
