Mazda 3 Service Manual: Rear Bumper Disassembly/Assembly
1. Remove the License plate lights..
2. Disassemble in the order indicated in the table.
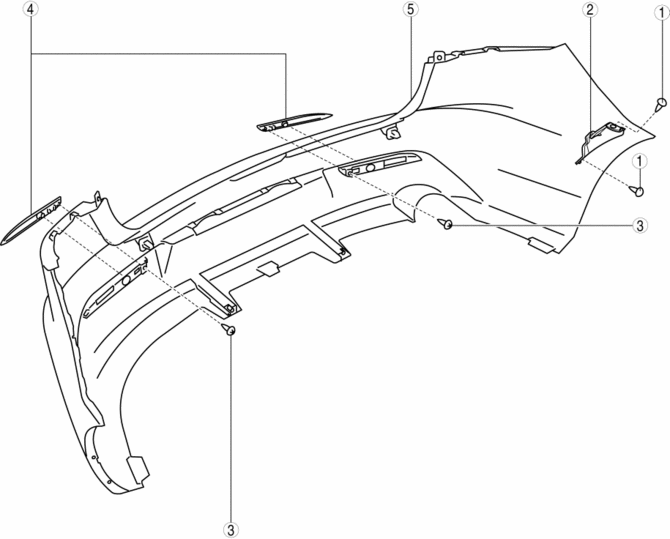
|
1 |
Fastener A |
|
2 |
Bracket |
|
3 |
Screw B |
|
4 |
Reflector (See Reflector Removal Note) |
|
5 |
Rear bumper fascia |
3. Assemble in the reverse order of disassembly.
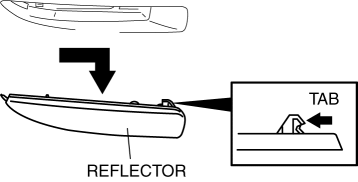
Reflector Removal Note
1. Remove the screws.
2. Lift the reflector up in the direction of the arrow, then unhook it from the rear bumper.
 Rear Beltline Molding Removal/Installation
1. Fully open the rear door glass.
2. Remove the rear door trim..
3. Remove clip A using a fastener remover and pull up the rear beltline molding
in the direction of the arrow (1) shown in the f ...
 Rear Bumper Reinforcement Removal/Installation
1. Disconnect the negative battery cable..
2. Remove the rear combination light..
3. Remove the rear bumper..
4. Remove the nuts and remove the rear bumper reinforcement.
5. Install in the ...
Other materials:
Windshield Defrosting and
Defogging
Set the mode selector dial to the
position and turn the fan control dial to the
desired speed.
In this position, the outside air position is automatically selected, and when
the fan control dial is ON, the air conditioner automatically turns on. The air
conditioner will directly dehumidify ...
Rear Door Speaker Inspection
1. Disconnect the negative battery cable..
2. Remove the rear door trim..
3. Remove the rear door speaker..
4. Verify the resistance between the rear door speaker terminals.
If not within the specification, replace the rear door speaker.
Resistance
Without Bose ...
Wheel Hub, Steering Knuckle Inspection
Wheel Bearing Excessive Play Inspection
1. Install the magnetic base and dial gauge as shown in the figure and measure
the wheel bearing axial excessive play.
If it exceeds the maximum specification, replace the wheel hub bearing.
Maximum front wheel bearing play
0.05 mm ...
