Mazda 3 Service Manual: Rear Package Trim Removal/Installation
1. Remove the following parts:
a. Rear seat cushion.
b. Rear scuff plate.
c. Tire house trim.
d. C-pillar trim.
2. Fold the rear seat back.
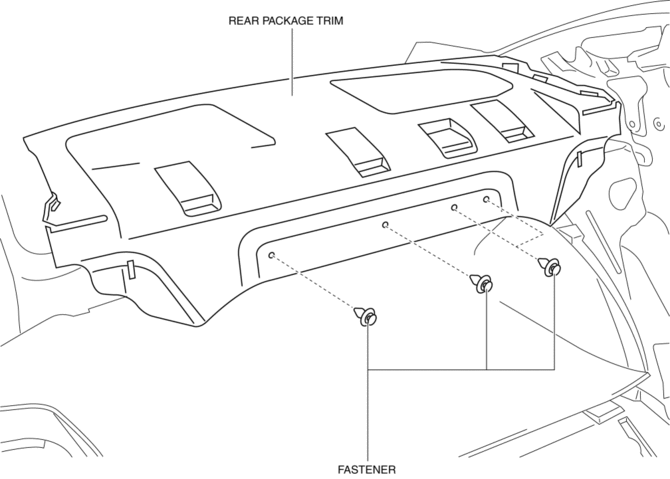
3. Remove the fasteners.
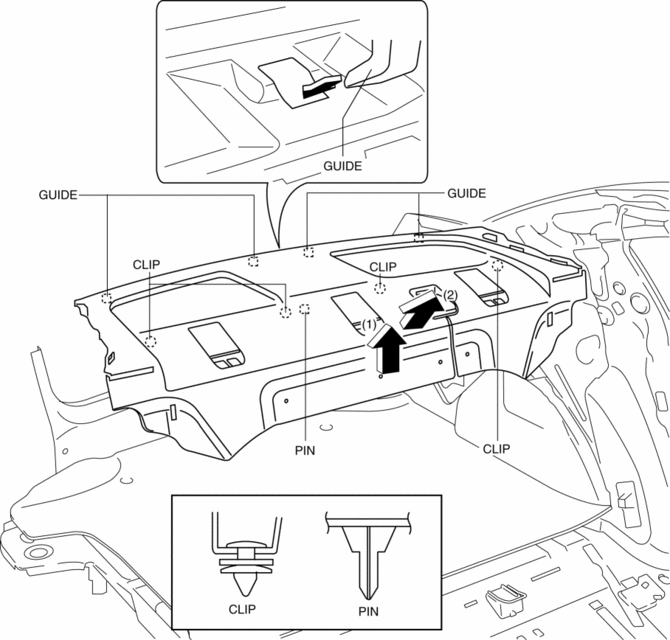
4. Pull up the rear package trim in the direction of the arrow (1) shown in the figure while remove the clips and pin, pull the rear package trim in the direction of the arrow (2), and remove it while pulling out the guides.
5. Install in the reverse order of removal.
 Lower Panel Removal/Installation
Driver-side
1. Disconnect the negative battery cable..
2. Remove the following parts:
a. Driver-side front scuff plate.
b. Driver-side front side trim.
c. Hood release lever.
d. Upper panel ...
 Rear Scuff Plate Removal/Installation
1. Detach tab A while pulling the rear scuff plate in the direction of the arrow
(1) shown in the figure, then detach hook B, clips C, pins D while pulling in the
direction of the arrow (2).
2. ...
Other materials:
Hydraulic Variable Valve Timing Actuator Inspection [Skyactiv G 2.0]
WARNING:
A hot engine can cause severe burns. Turn off the engine and wait until it
is cool before servicing.
CAUTION:
Do not disassemble the hydraulic variable valve timing actuator because it
is a precision unit.
1. Remove the battery cover..
2. Disconnect the n ...
Fuel Tank Removal/Installation [Mzr 2.0, Mzr 2.5]
WARNING:
Fuel is very flammable liquid. If fuel spills or leaks from the pressurized
fuel system, it will cause serious injury or death and facility breakage. Fuel
can also irritate skin and eyes. To prevent this, always complete the “Fuel
Line Safety Procedure”, while referring ...
Operating the Compact Disc (CD) Player
Type
Playable data
Music/MP3/WMA/
AAC CD player
Music data (CD-DA)
MP3/WMA/AAC file
NOTE
If a disc has both music data (CD-DA)
and MP3/WMA/AAC files, playback of the
two or three file types differs depending on
how the disc was reco ...
