Mazda 3 Service Manual: Rear Seat Back Frame Removal/Installation
1. Remove the rear seat cushion..
2. Remove the rear buckle installation bolt..
3. Remove the rear seat back..
4. Remove the headrest.
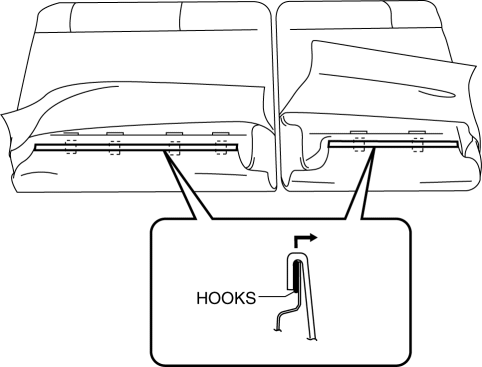
5. Open the fasteners.
6. Detach the hooks.
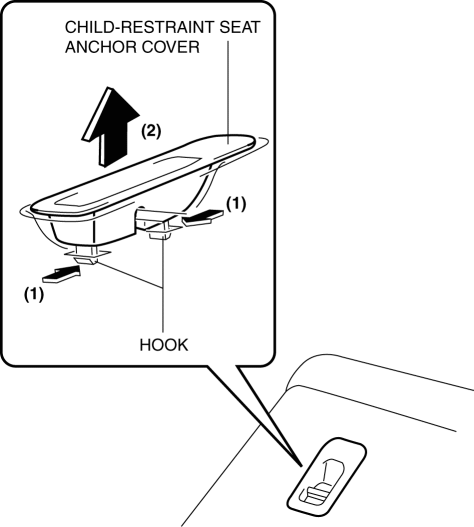
7. Remove the child-restraint seat anchor covers in the order of (1), (2) as shown in the figure. (5HB only)
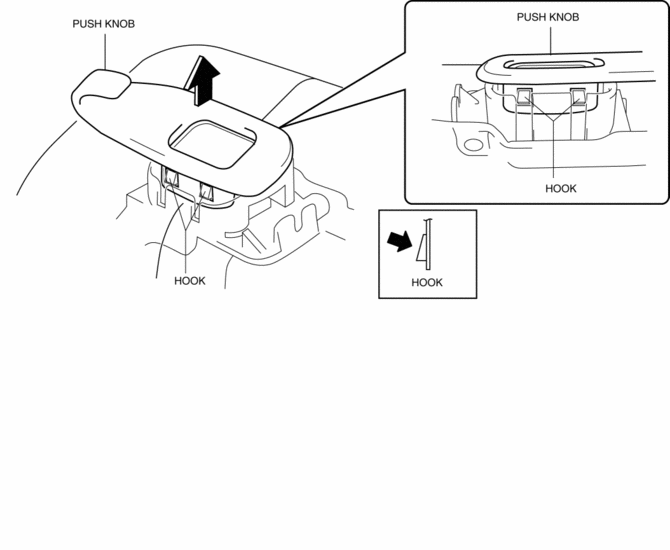
8. Remove the push knob while remove the hooks in the direction of arrow shown in the figure.
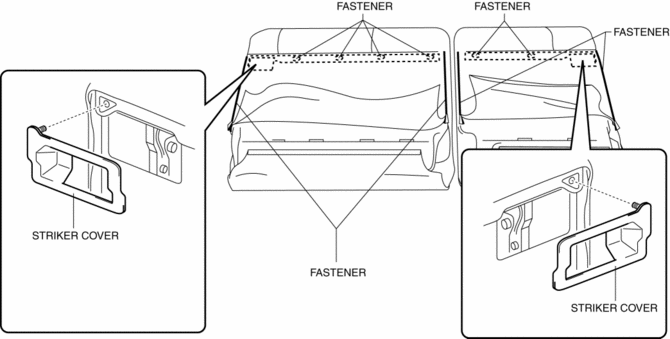
9. Open the fastener, remove the fastener and striker cover.
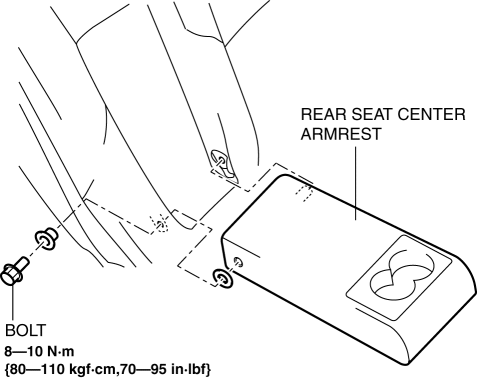
10. Remove the bolt then remove the rear seat center armrest.(Vehicles with the rear seat center armrest)
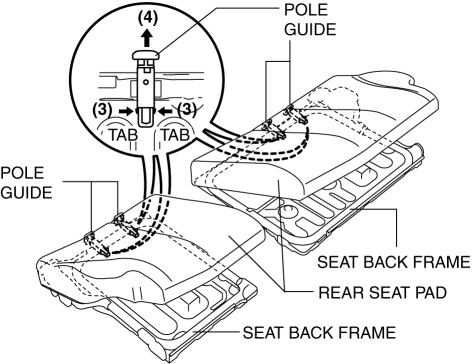
11. Peal back the rear seat pad, release the pole guide tabs in the direction of arrow (3) shown in the figure, then pull out the pole guides in the direction of arrow (4).
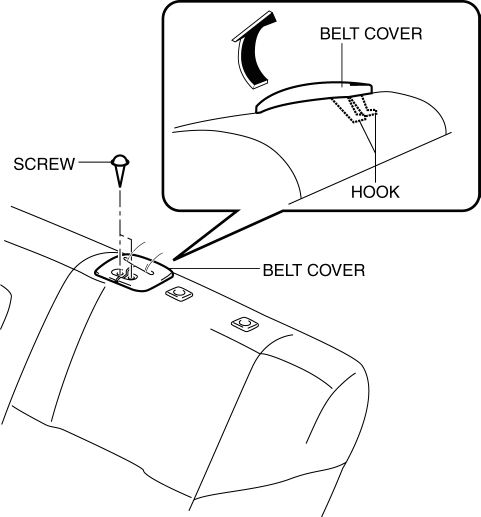
12. Remove the screws, then remove the belt cover in the direction of arrow shown in the figure.
13. Open the fasteners.
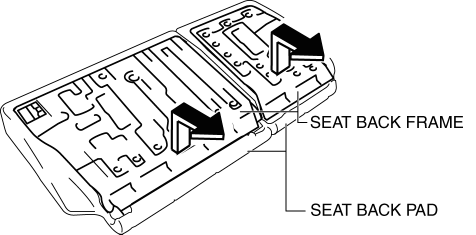
14. Remove the seat back frame from the seat back pad by pulling it in the direction of the arrow.(5HB)
15. Remove the nut, then remove the rear seat belt.
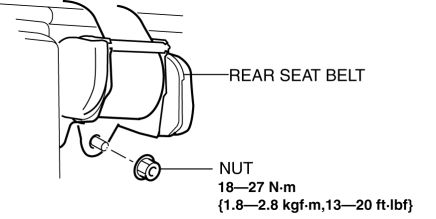
16. Install in the reverse order of removal.(5HB)
 Rear Crossmember Removal/Installation
CAUTION:
Performing the following procedures without first removing the ABS wheel-speed
sensor may possibly cause an open circuit in the wiring harness if it is pulled
by mistake. Before ...
 Theft Deterrent System Clearing Freeze Frame Data
1. Connect the M-MDS (IDS) to the DLC–2.
2. After the vehicle is identified, select the following items from the initialization
screen of the IDS.
Select “Body”.
Select "B ...
Other materials:
Restraints SST [Two Step Deployment Control System]
49 H066 002
Deployment tool
49 D066 002
Adapter harness
49 L066 002
Adapter harness
49 G066 003
Adapter harness
49 N088 0A0
Fuel and Thermometer checker
...
Steering Switch Inspection
Without Bluetooth System
WARNING:
Handling the air bag module improperly can accidentally deploy the air bag
module, which may seriously injure you. Read the air bag system service warnings
and cautions before handling the air bag module..
1. Disconnect the negative battery cabl ...
Front Lower Arm Removal/Installation
CAUTION:
Performing the following procedures without first removing the ABS wheel-speed
sensor may possibly cause an open circuit in the wiring harness if it is pulled
by mistake. Before performing the following procedures, disconnect the ABS wheel-speed
sensor wiring harness connec ...
