Mazda 3 Owners Manual: Rear View Monitor Operation
The operation of the rear view monitor when reversing the vehicle varies depending on the traffic, road, and vehicle conditions. The amount of steering and the timing also varies depending on conditions, so confirm the surrounding conditions directly with your eyes and steer the vehicle in accordance with the conditions.
Be well aware of the above cautions prior to using the rear view monitor.
NOTE Images displayed on the monitor from the rear view parking camera are reversed images (mirror images).
- Shift the shift lever to R to switch the display to the rear view monitor display.
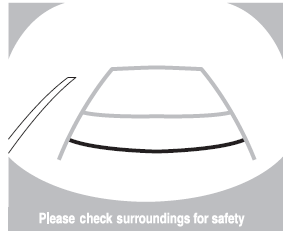
- Confirming the surrounding conditions, reverse the vehicle.
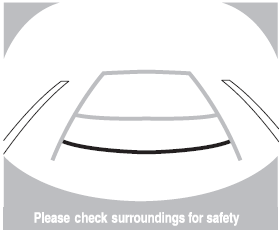
(Display condition)
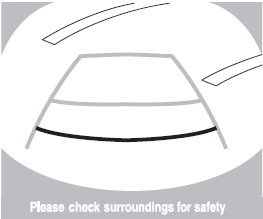
(Vehicle condition)
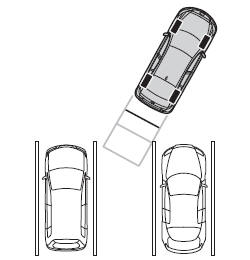
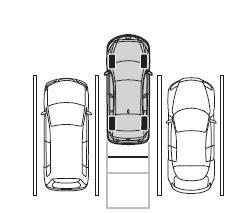
- After your vehicle begins entering the parking space, continue backing up slowly so that the distance between the vehicle width lines and the sides of the parking space on the left and right are roughly equal.
- Continue to adjust the steering wheel until the vehicle width guide lines are parallel to the left and right sides of the parking space.
- Once they are parallel, straighten the wheels and back your vehicle slowly into the parking space. Continue checking the vehicle's surroundings and then stop the vehicle in the best possible position. (If the parking space has division lines, check whether the vehicle width guide lines are parallel to them.)
(Display condition)
(Vehicle condition)
- When the shift lever is shifted from R to another shift lever position, the screen returns to the previous display.
NOTE Because there may be a difference between the displayed image, such as indicated below, and the actual conditions when parking, always verify the safety at the rear of the vehicle and the surrounding area directly with your eyes.
- In the image of the parking space (or garage) displayed below, even though the back end and distance guide lines appear parallel in the monitor, they may not actually be parallel on the ground.
- When parking in a space with a division line on only one side of the parking space, the division line and the vehicle width guide line may appear parallel on the monitor, but they may not actually be parallel on the ground.
 Viewing the Display
Guide lines which indicate the width of the vehicle (yellow) are displayed on
the screen as a
reference to the approximate width of the vehicle in comparison to the width of
the parking
space yo ...
 Variance Between Actual Road Conditions and Displayed Image
Some variance occurs between the actual road and the displayed road. Such
variance in
distance perspective could lead to an accident. Note the following conditions
that may cause
a variance in d ...
Other materials:
Dynamic radar cruise control
In the Subaru Solterra, the Dynamic Radar Cruise Control system continuously
monitors traffic ahead using radar and camera technology. It detects vehicles in
front, evaluates the current following distance, and automatically adjusts speed
to maintain a safe and comfortable gap. The Subaru Solt ...
Hole Cover Removal/Installation
With Car-navigation system
1. Disconnect the negative battery cable..
2. Remove the following parts:
a. Upper column cover.
b. Instrument cluster.
c. Center panel.
d. Center cover.
e. Dashboard upper panel.
f. Multi information display.
3. Pull the hole cover in the direction of arr ...
High Mount Brake Light Bulb Removal/Installation
4SD
1. Disconnect the negative battery cable..
2. Remove the trunk lid trim..
3. Remove in the order indicated in the table.
1
Connector
2
Socket
3
High-mount brake light bulb
4. Install in the rev ...
