Mazda 3 Service Manual: Seat Weight Sensor Calibration [Two Step Deployment Control System]
CAUTION:
-
If any of the following work is performed, perform the seat weight sensor calibration using the M-MDS.
-
Replacement with a new seat weight sensor
-
Replacement with a new seat weight sensor control module
-
Replacement with new passenger-side seat parts
-
Disassembly of the passenger-side seat
-
If any of the following work is performed, perform the seat weight sensor inspection using the M-MDS..
-
Removal of the passenger-side seat
-
Loosening and retightening of passenger’s seat fixing bolts
-
Or, the vehicle is involved in a collision
NOTE:
-
When seat weight sensor calibration is performed causing the SAS control module to detect the DTC, perform the following procedure.
1. Have two 20 kg {44 lb}
weights ready to use.
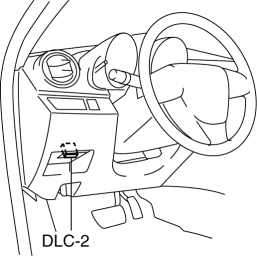
2. Connect the M-MDS (IDS) to the DLC-2.
3. After the vehicle is identified, select the following items from the initialization screen of the IDS.
a. Select “Body”.
b. Select “Restraints”.
c. Select “Passenger Seat Weight Sensor ReZero”.
4. Then, select item from the SWS Calibration screen menu in the following order.
-
Select “(1)-When you have replaced any SWS or SWS module, and/or any seat part except SWS.”
5. Perform calibration following the procedures on the M-MDS screen.
 Seat Warmer Unit Removal/Installation
Removal
WARNING:
Handling a front seat (with built-in side air bag) improperly can accidentally
operate (deploy) the air bag, which may seriously injure you. Read the service
warnings b ...
 Seat Weight Sensor Control Module Removal/Installation [Two Step Deployment
Control System]
Seat Weight Sensor Control Module Removal/Installation [Two Step Deployment
Control System]
CAUTION:
When the seat weight sensor control module is replaced with a new one, perform
the seat weight sensor calibration using the M–MDS..
1. Switch the ignition to off.
2. Disc ...
Other materials:
Gracenote Database (Type B)
When a USB device is connected to this unit and the audio is played, the
album name,
artist name, genre and title information are automatically displayed if there is
a match in
the vehicle's database compilation to the music being played. The information
stored in this
device uses database ...
High Mount Brake Light Disassembly/Assembly
4SD
1. Disconnect the negative battery cable..
2. Remove the trunk lid trim..
3. Remove the high-mount brake light..
4. Remove the high-mount brake light outer lens.
5. Remove the high-mount brake light inner lens.
6. Remove the screws (with advanced keyless entry and push button ...
Evaporator Temperature Sensor Inspection [Full Auto Air Conditioner]
NOTE:
Inspect the evaporator temperature sensor when it is installed to the A/C
unit.
1. Set the fan speed MAX HI.
2. Set the temperature control at MAX COLD.
3. Set the RECIRCULATE mode.
4. Turn the A/C switch off.
5. Close all doors and windows.
6. Wait for 5 min.
7. D ...
