
Subaru Solterra 2023-2026 Owner's Manual: Using the interior lights
Interior lights list
Location of the interior lights
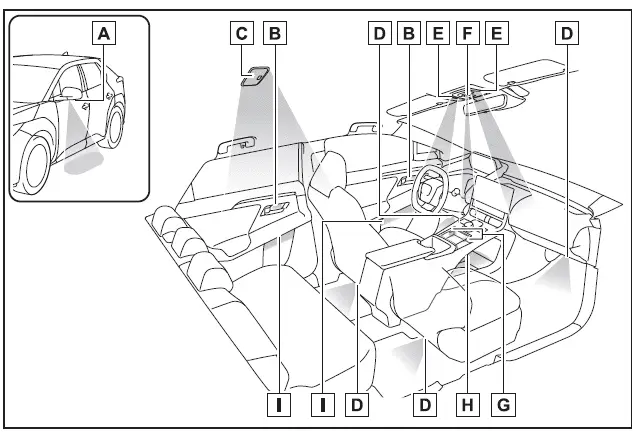
- Outer foot lights (if equipped)
- Inside door handle lights (if equipped)
- Rear interior light
- Footwell lights (if equipped)
- Front interior lights/personal lights
- Shift lights
- Auxiliary box lights (if equipped)/Wireless charger tray lights (if equipped)
- Center console light (if equipped)
- Door trim ornament lights (if equipped)
■ Personal lights/interior lights automatic on/off
- In the Subaru Solterra, the illuminated entry system automatically activates or deactivates interior lighting depending on the power switch status, key presence, door locking/unlocking, and door opening or closing.
- If interior lights are left on after the Subaru Solterra is powered off, they will automatically switch off after approximately 20 minutes to preserve battery power.
■ Automatic illumination of the interior lights
In the Subaru Solterra, the interior lighting system is designed to activate automatically in emergency situations, such as when SRS airbags deploy or during a significant rear impact. This improves visibility inside the cabin and assists occupants during critical moments.
The lights will automatically turn off after about 20 minutes. However, they can be manually switched off if necessary. For safety reasons, it is generally advisable to leave them on until the situation is fully assessed.
(Activation may vary depending on collision severity and specific conditions.)
■ Customization
The Subaru Solterra allows customization of certain lighting parameters, including the delay time before automatic shutoff, enabling a more tailored user experience.
NOTICE
■ To prevent 12-volt battery discharge
Avoid leaving the interior lights on unnecessarily when the Subaru Solterra EV system is turned off to prevent battery depletion.
Operating interior lights
■ Front interior lights
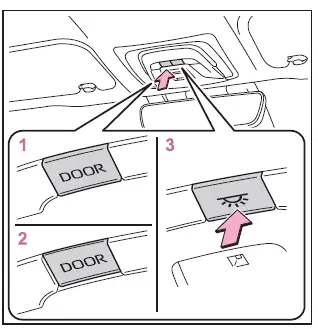
- Disables the door-linked lighting function
- Enables the door-linked lighting function (door position)
When enabled, the Subaru Solterra lights automatically respond to door activity.
- Manual light ON/OFF control
Press the switch to toggle front interior lights, personal lights, and rear interior lights simultaneously in the Subaru Solterra.
■ Rear interior light
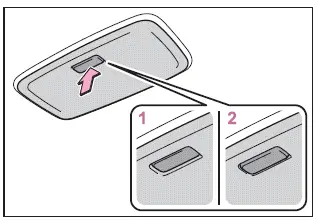
- Turns the rear light ON
- Activates door-linked lighting mode
The rear interior light operates in sync with the front lighting system and responds to door actions.
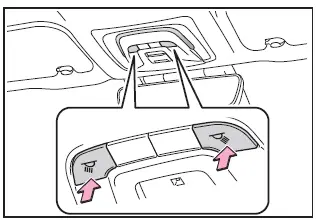
Operating personal lights
Personal lights in the Subaru Solterra can be switched on or off individually for targeted illumination.
 Heated steering wheel/seat heaters/seat ventilators/ radiant heaters
Heated steering wheel
In the Subaru Solterra, the heated steering wheel gently warms the grip area,
enhancing driver comfort during cold weather and improving overall driving experience.
S ...

Other materials:
Glass Panel Adjustment
1. Fully close the glass panel.
2. Measure the gap and height between the glass panel and body.
If not as specified, loosen the glass panel installation screws and reposition
the glass panel.
Clearance (4SD)
a: -2.4—0.2 mm {-0.09—0.01 in}
b: 0 mm {0 in}
...
Rear Scuff Plate Removal/Installation
1. Detach tab A while pulling the rear scuff plate in the direction of the arrow
(1) shown in the figure, then detach hook B, clips C, pins D while pulling in the
direction of the arrow (2).
2. Detach tab E while pulling the rear scuff plate in the direction of the arrow
(3) shown in the fig ...
Starting a Flooded Engine
If the engine fails to start, it may be
flooded (excessive fuel in the engine).
Follow this procedure:
If the engine does not start within
five seconds on the first try, wait ten
seconds and try again.
Make sure the parking brake is on.
Depress the accelerator all the way and
hold ...
