Mazda 3 Owners Manual: When Liftgate/Trunk Lid Cannot be Opened
If the vehicle battery is dead or there is a malfunction in the electrical system and the liftgate/trunk lid cannot be opened, perform the following procedure as an emergency measure to open it:
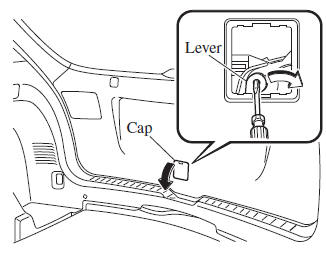
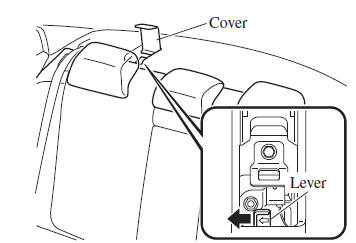
(5–door)
- Remove the cap on the interior surface of the liftgate with a flathead screwdriver.
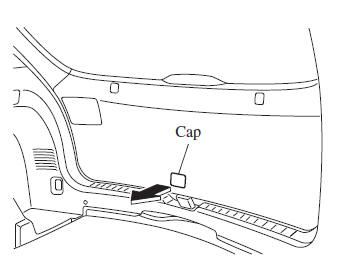
- Turn the lever to the right to unlock the liftgate
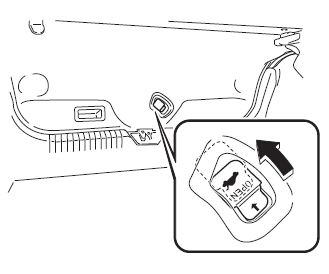
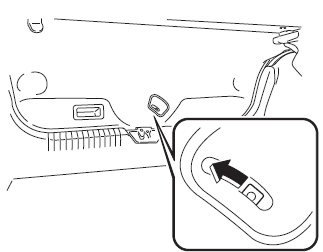
(4–door)
- Open the cover.
- Open the cap.
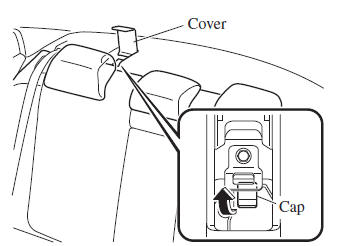
- Turn the screw counterclockwise and remove it, and then remove the inner cover.
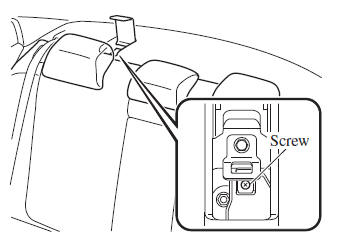
- Move the lever to the left to fold the seatback.
- Move the lever to the left to open the trunk lid.
(Type A)
(Type B)
After performing this emergency measure, have the vehicle inspected at an Authorized Mazda Dealer as soon as possible.
 Key Removed from Vehicle
Warning Beep
Key Removed from Vehicle
Warning Beep
Vehicles with advanced keyless function
If the key is taken out of the vehicle while
the ignition is not switched OFF and
all the doors are closed, the beep which
sounds outside of the vehicle wil ...
 Active Driving Display Does Not Operate
If the Active Driving
Display Does Not Operate
If the active driving display does not
operate, switch the ignition off and then
restart the engine. If the active driving
display does not operate ...
Other materials:
Brakes SST
49 D043 0A0
Adapter set
49 U043 0A0A
Oil pressure gauge set
49 0221 600C
Disc brake expand tool
49 B033 001
Installer
49 G033 102
Handle
...
Active Driving Display
WARNING
Always adjust the display brightness and position with the vehicle
stopped:
Adjusting the display brightness and position while driving the vehicle
is dangerous as
doing so could distract your attention from the road ahead and lead to
an accident.
...
Windshield Washer Hose Removal/Installation
1. Remove the following parts:
a. Windshield wiper arm and blade.
b. Front fender molding.
c. Cowl grille.
d. Front mudguard (RH).
2. Disconnect joint pipes, then remove windshield washer hose B, C and D.
3. Remove the windshield washer hose B.
4. Disconnect windshield washer hose C fr ...
