Mazda 3 Service Manual: Windshield Washer Hose Removal/Installation
1. Remove the following parts:
a. Windshield wiper arm and blade.
b. Front fender molding.
c. Cowl grille.
d. Front mudguard (RH).
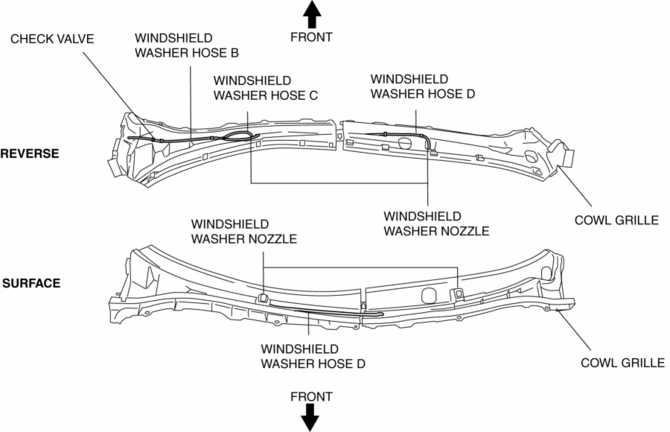
2. Disconnect joint pipes, then remove windshield washer hose B, C and D.
3. Remove the windshield washer hose B.
4. Disconnect windshield washer hose C from the washer nozzle.
5. Remove the windshield washer hose C.
6. Disconnect windshield washer hose D from the washer nozzle.
7. Remove the windshield washer hose D.
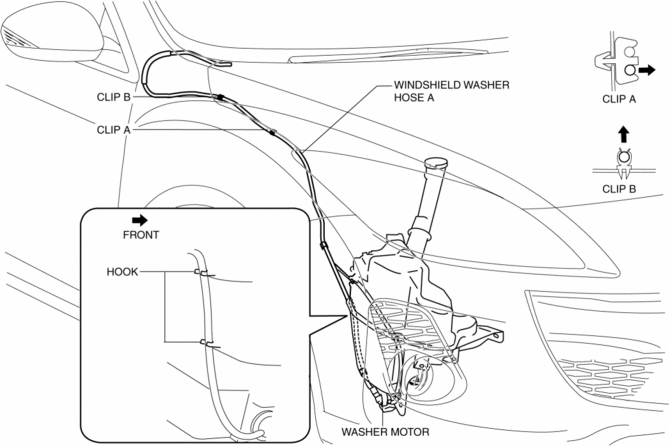
8. Disconnect the windshield washer hose A from the windshield washer motor.
9. Remove the clip A and B.
10. Disconnect joint pipes, then remove windshield washer hose A.
11. Remove the windshield washer hose A.
12. Install in the reverse order of removal.
 Washer Tank Removal/Installation
Vehicles with the washer fluid-level sensor
1. Disconnect the negative battery cable..
2. Remove the front bumper..
3. Remove in the order indicated in the table.
1
...
 Windshield Washer Nozzle Removal/Installation
1. Remove the following parts:
a. Windshield wiper arm and blade.
b. Front fender molding.
c. Cowl grille.
2. Remove the windshield washer hose from the windshield washer nozzle.
3. Squeeze ...
Other materials:
C Pillar Trim Removal/Installation
4SD
1. Remove the following parts:
a. Rear seat cushion.
b. Rear scuff plate.
c. Tire house trim.
2. Partially peel back the seaming welt.
3. Pull the C-pillar trim in the direction of the arrow (1), (2) shown in the
figure, then detaching clip A and B.
4. Cut the lead wire connec ...
Relay Block Removal/Installation [With Advanced Keyless Entry And Push Button
Start System]
1. Disconnect the negative battery cable..
2. Remove the following parts:
a. Driver-side front scuff plate.
b. Driver-side front side trim.
c. Hood release lever.
d. Upper panel.
e. Shift knob (MTX)(See MANUAL TRANSAXLE SHIFT MECHANISM REMOVAL/INSTALLATION
[G66M-R].)(See MANUAL TRANSAX ...
Fuel Injector Inspection [Mzr 2.0, Mzr 2.5]
Resistance Inspection
1. Remove the battery cover..
2. Disconnect the negative battery cable..
3. Disconnect the fuel injector connector.
4. Inspect the resistance between fuel injector terminals A and B.
Fuel injector resistance
11.4—12.6 ohms [20 °C {68 °F}]
If ...
