Mazda 3 Service Manual: DSC Sensor Initialization Procedure
WARNING:
-
If the DSC sensor initialization procedure is not completed, the DSC will not operate properly and it might cause an unexpected accident. Therefore, after replacing or removing the DSC HU/CM or SAS control module, make sure to perform the DSC sensor initialization procedure to insure proper DSC operation.
1. Inspect the wheel alignment and the tire pressure.
-
If there is any malfunction, adjust the applicable part.
2. Position the vehicle on level ground.
3. Switch the ignition to off.
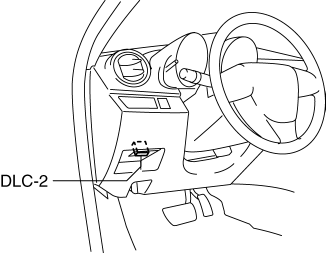
4. Connect the M-MDS (IDS) to DLC-2.
5. After the vehicle is identified, select the following items from the initial screen of the IDS.
-
Select “Chassis”.
-
Select “ABS/DSC”.
-
Select “Sensor Initialization”.
6. Perform the procedure according to the directions on the screen.
7. Drive the vehicle.
8. After 5 min or more
of driving, verify that the DSC system is normal.
 DSC Off Switch Removal/Installation
1. Remove the switch panel in the direction of the arrow shown in the figure.
2. Disconnect the connector.
3. Remove the DSC OFF switch in the direction of the arrow (2) shown in the figure
...
 Precaution [Dynamic Stability Control (DSC)]
1. The ABS warning light and/or brake system warning light and/or DSC indicator
light and/or DSC OFF light illuminate even when the system is normal.
Warning lights that may ...
Other materials:
Rear View Monitor Operation
The operation of the rear view monitor when reversing the vehicle varies
depending on
the traffic, road, and vehicle conditions. The amount of steering and the
timing also varies
depending on conditions, so confirm the surrounding conditions directly with
your eyes and
steer the vehicle in ...
Rear Door Latch And Lock Actuator Removal/Installation
1. Fully open the rear door glass.
2. Disconnect the negative battery cable..
3. Remove the following parts:
a. Rear door trim.
b. Rear inner handle.
c. Rear door speaker.
d. Rear power window motor.
e. Rear door glass.
4. Remove the screw.
5. Remove the rear door latch and loc ...
Cooling System Cap Inspection [Mzr 2.0, Mzr 2.5]
WARNING:
Never remove the cooling system cap or loosen the radiator drain plug while
the engine is running, or when the engine and radiator are hot. Scalding engine
coolant and steam may shoot out and cause serious injury. It may also damage
the engine and cooling system.
Tu ...
