Mazda 3 Service Manual: Front Fog Light Removal/Installation
Except Mazdaspeed3
1. Disconnect the negative battery cable..
2. Remove the front bumper..
3. Pull the wiring harness from the hook in the direction of the arrow shown in the figure and remove it.
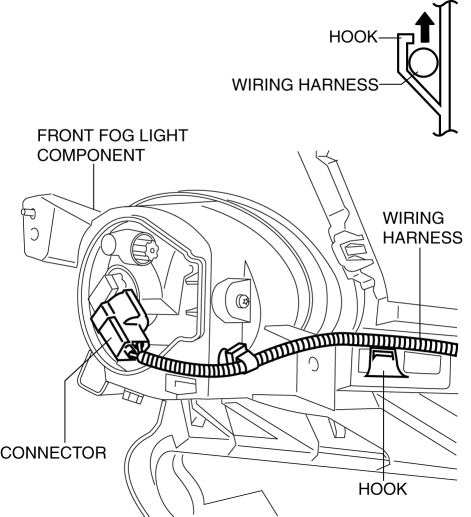
4. Disconnect the connector.
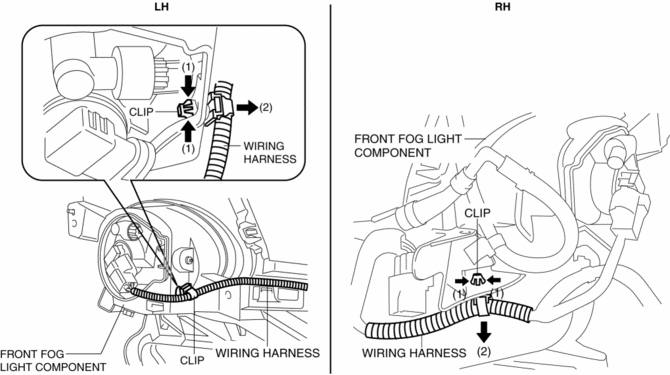
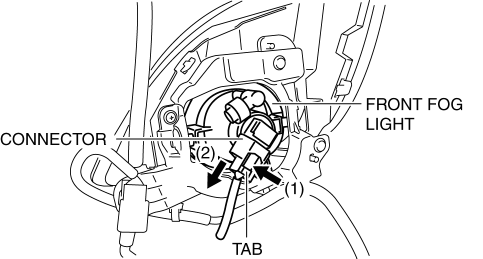
5. Pull the wiring harness in the direction of the arrow (2) shown in the figure and remove it while detaching clip in the direction of the arrow (1).
6. Remove the screw A.
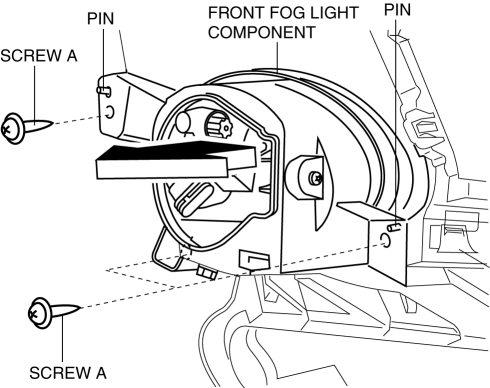
7. Pull the front fog light component in the direction of the arrow shown in the figure and remove it while remove the pins.
8. Remove the bolt.
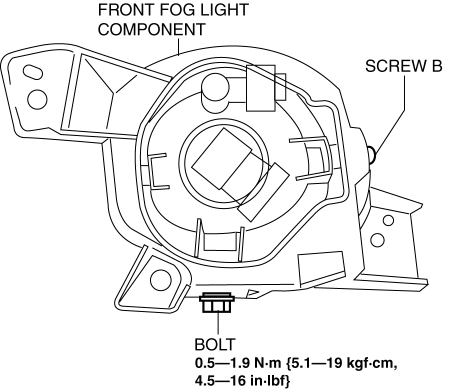
9. Remove the screw B.
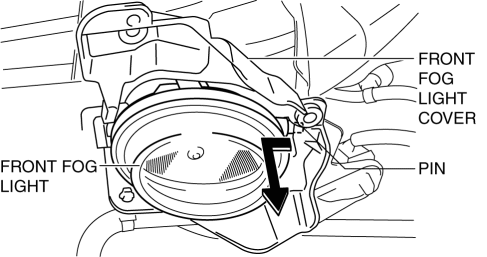
10. Pull the front fog light in the direction of the arrow shown in the figure and remove the pin from the front fog light cover.
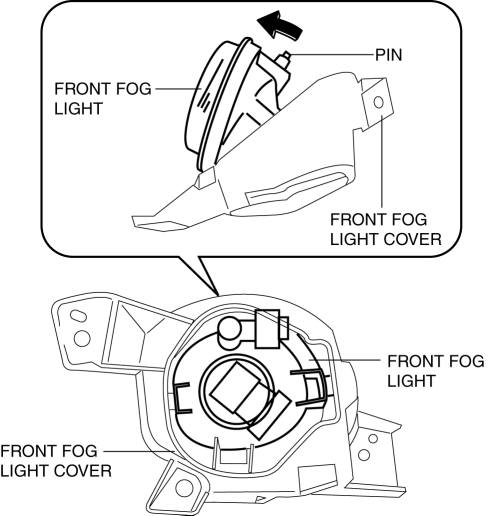
11. Remove the front fog light.
12. Install in the reverse order of removal.
13. Adjust the front fog light aiming..
Mazdaspeed3
1. Disconnect the negative battery cable..
2. Remove the fasteners and slightly bend back the mudguard.
3. While pressing the tab in the direction of arrow (1) shown in the figure, pull the connector in the direction of arrow (2) and disconnect it.
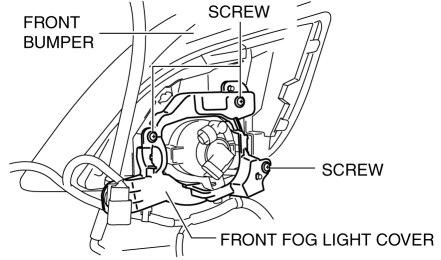
4. Remove the screws shown in the figure and remove the front fog light cover from the front bumper.
5. Remove the screw and bolt shown in the figure.
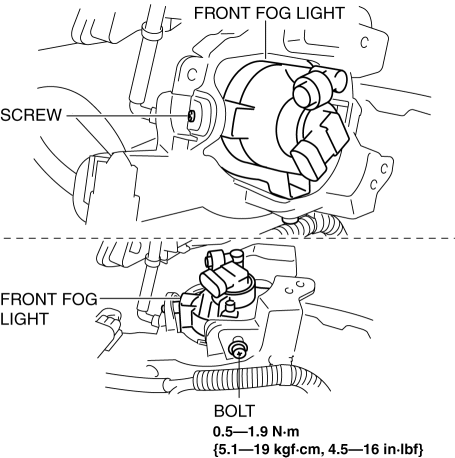
6. Pull the front fog light in the direction of the arrow shown in the figure and remove it from the front fog light cover.
7. Remove the front fog light.
8. Install in the reverse order of removal.
9. Adjust the front fog light aiming..
 Front Fog Light Relay Removal/Installation
1. Disconnect the negative battery cable..
2. Remove the front mudguard.(RH).
3. Remove the front fog light relay case.
4. Remove the cover.
5. Remove the front fog light relay.
6. Insta ...
 Front Side Marker/Front Turn Light Bulb Removal/Installation
1. Disconnect the negative battery cable..
2. Slightly bend back the front mudguard..
3. Rotate the front side marker/front turn light socket in the direction of the
arrow shown in the figure.
...
Other materials:
Troubleshooting
Mazda Bluetooth ® Hands-Free Customer Service
If you have any problems with Bluetooth ® , contact our toll-free customer
service center.
U.S.A.
Canada
Mexico
Bluetooth ® Device pairing, connection problems
*1 Setting which detects the existence of a device external to the Bluet ...
Timing Chain Removal/Installation [Mzr 2.3 Disi Turbo]
WARNING:
Fuel vapor is hazardous. It can very easily ignite, causing serious injury
and damage. Always keep sparks and flames away from fuel.
Fuel line spills and leakage are dangerous. Fuel can ignite and cause serious
injuries or death and damage. Fuel can also irritate skin ...
TCM Configuration [Fw6 A EL]
NOTE:
The TCM is built into the control valve body.
1. Verify TCM configuration implementation necessity for replacement parts.
Replacement part
Configuration necessity
Control valve body replacement
Necessary
...
