Mazda 3 Service Manual: High Mount Brake Light Removal/Installation
4SD
1. Disconnect the negative battery cable..
2. Remove the trunk lid trim..
3. Disconnect the connector.
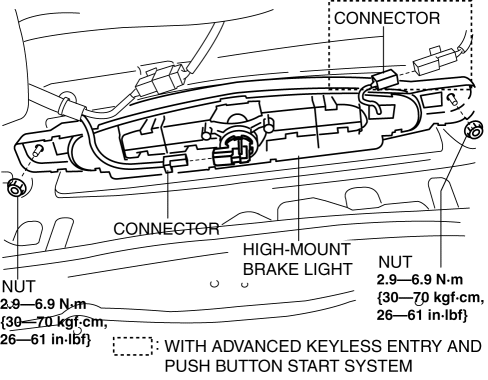
4. Remove the nuts.
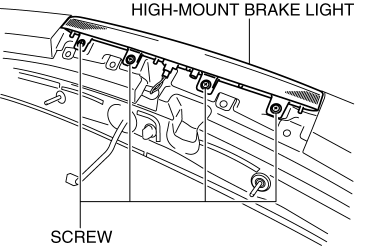
5. While pressing the tabs shown in the figure, pull the high-mount brake light outward and remove it.
6. Remove the high-mount brake light.
7. Install in the reverse order of removal.
5HB
Except Mazdaspeed3
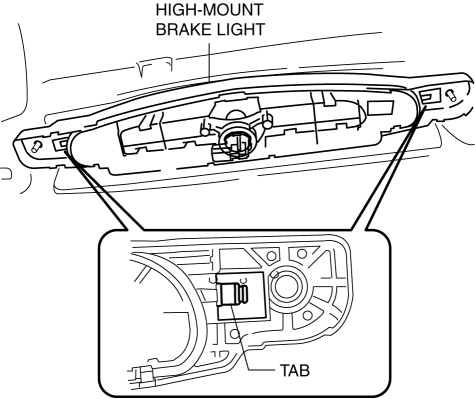
1. Disconnect the negative battery cable..
2. Remove the liftgate upper trim..
3. While pressing the tabs shown in the figure, pull the high-mount brake light outward and remove it.
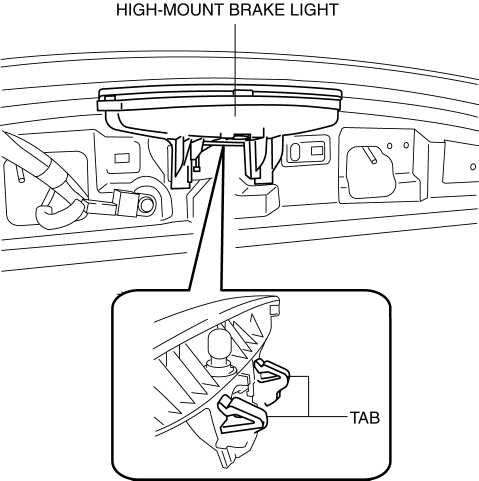
4. Remove the high-mount brake light socket.
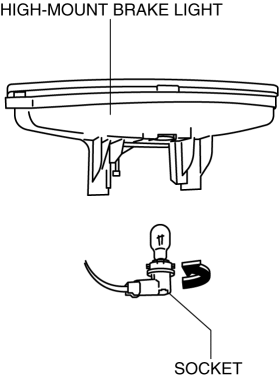
5. Remove the high-mount brake light.
6. Install in the reverse order of removal.
Mazdaspeed3
1. Disconnect the negative battery cable..
2. Remove the liftgate upper trim..
3. Remove the rear spoiler..
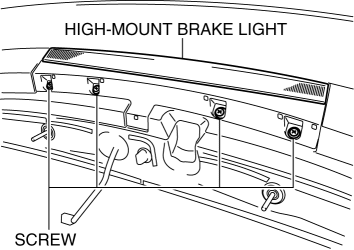
4. Remove the screws shown in the figure.
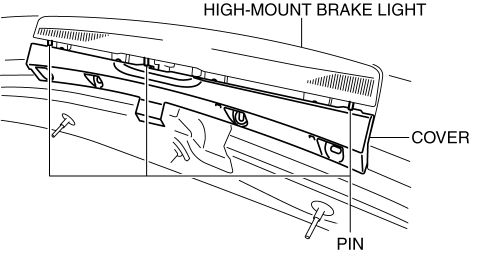
5. Set the pin aside and remove the cover.
6. Remove the screws shown in the figure.
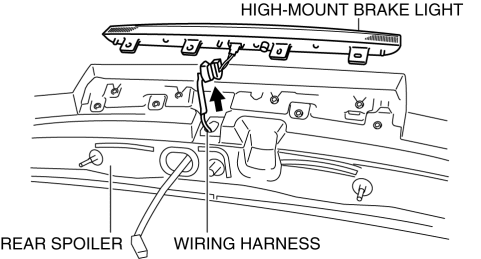
7. Pull out the wiring harness from the rear spoiler.
8. Remove the high-mount brake light.
9. Install in the reverse order of removal.
 High Mount Brake Light Disassembly/Assembly
4SD
1. Disconnect the negative battery cable..
2. Remove the trunk lid trim..
3. Remove the high-mount brake light..
4. Remove the high-mount brake light outer lens.
5. Remove the high-mo ...
 License Plate Light Bulb Removal/Installation
1. Disconnect the negative battery cable..
2. Insert a tape-wrapped fastener remover to the position shown in the figure,
release the tabs, and remove the lens.
3. Remove the license plate l ...
Other materials:
If the vehicle becomes stuck
If your Subaru Solterra becomes immobilized in mud, snow, or loose
terrain, follow the steps below to safely regain traction and mobility.
Recovering procedure
1. Turn off the EV system, apply the parking brake, and set the gear selector
to P.
2. Clear away mud, snow, or sand from around the ...
Opening, closing the windows
Power windows
Opening and closing the power windows
In the Subaru Solterra, the power window system allows effortless control of
all side windows through dedicated switches, ensuring convenience and smooth operation
for both driver and passengers.
By operating the switch, the Subaru Solterra ...
Message Indicated on Display*
If a message is displayed in the center display (type B audio), take
appropriate action (in a
calm manner) according to the displayed message.
Stop Vehicle in Safe Place Immediately
If the following messages are displayed in the center display (type B audio),
a vehicle
system may be malf ...
