Mazda 3 Service Manual: Ion Sensor Inspection [Skyactiv G 2.0]
DTC Inspection
NOTE:
-
Because the ion sensor is integrated in the ignition coil, replacing the ion sensor includes replacement of the ignition coil/ion sensor.
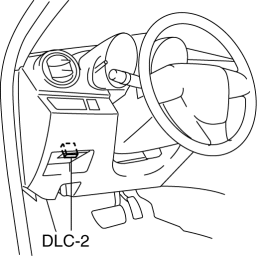
1. Connect the M-MDS to the DLC-2.
2. Perform the DTC inspection using the M-MDS..
-
If any DTC related to the ignition coil/ion sensor is present, repair the malfunctioning location according to the applicable DTC troubleshooting..
Visual Inspection
NOTE:
-
Because the ion sensor is integrated in the ignition coil, replacing the ion sensor includes replacement of the ignition coil/ion sensor.
1. Remove the battery cover..
2. Disconnect the negative battery cable..
3. Remove the plug hole plate..
4. Remove the ignition coil/ion sensor..
5. Verify that there is no damage to the ignition coil/ion sensor, and no corrosion and damage to the connector.
-
If there is a malfunction, replace the ignition coil/ion sensor..
 Front Seat Belt Removal/Installation [Two Step Deployment Control System]
WARNING:
Handling the front seat belt (pre-tensioner seat belt) improperly can accidentally
deploy the pre-tensioner seat belt, which may seriously injure you. Read the
air bag system se ...
 Neutral Switch Inspection [Mzr 2.0, Mzr 2.5]
Continuity Inspection
1. Remove the battery cover..
2. Disconnect the negative battery cable..
3. Disconnect the neutral switch connector..
4. When the shift lever is in neutral and in a positi ...
Other materials:
Customer Assistance
(Puerto Rico)
Your complete and permanent satisfaction is our business. That is why all
Authorized Mazda
Dealers have the knowledge and the tools to keep your Mazda vehicle in top
condition.
If you have any questions or recommendations for improvement regarding the
service of
your Mazda vehicle or serv ...
Relay Block Removal/Installation [With Advanced Keyless Entry And Push Button
Start System]
1. Disconnect the negative battery cable..
2. Remove the following parts:
a. Driver-side front scuff plate.
b. Driver-side front side trim.
c. Hood release lever.
d. Upper panel.
e. Shift knob (MTX)(See MANUAL TRANSAXLE SHIFT MECHANISM REMOVAL/INSTALLATION
[G66M-R].)(See MANUAL TRANSAX ...
Transaxle Fluid Temperature (Tft) Sensor Removal/Installation [FS5 A EL]
WARNING:
A hot transaxle and ATF can cause severe burns. Turn off the engine and wait
until they are cool.
1. Remove the primary control valve body.
a. Remove the battery cover..
b. Disconnect the negative battery cable.
c. Remove the aerodynamic under cover NO.2..
d. Clean ...
