Mazda 3 Service Manual: Liftgate Lower Trim Removal/Installation
1. Remove the liftgate upper trim..
2. Remove the liftgate side trim..
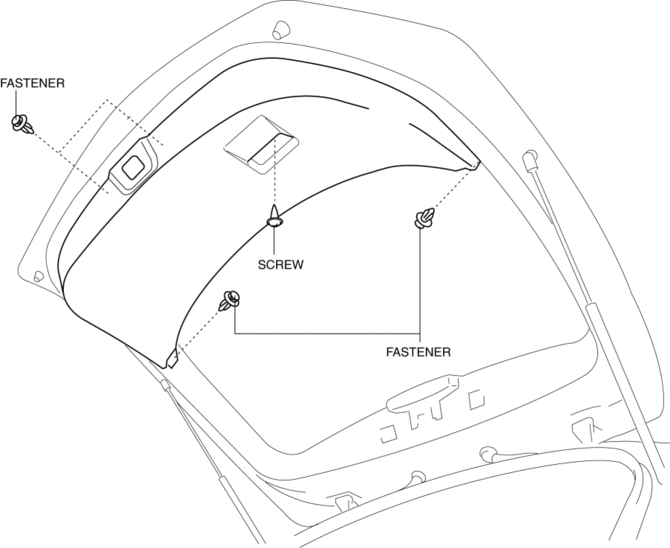
3. Remove the screw and fasteners.
4. Pull the liftgate lower trim in the direction of arrow (1), (2), (3), then detach clips A, B, pin C and D from the liftgate.
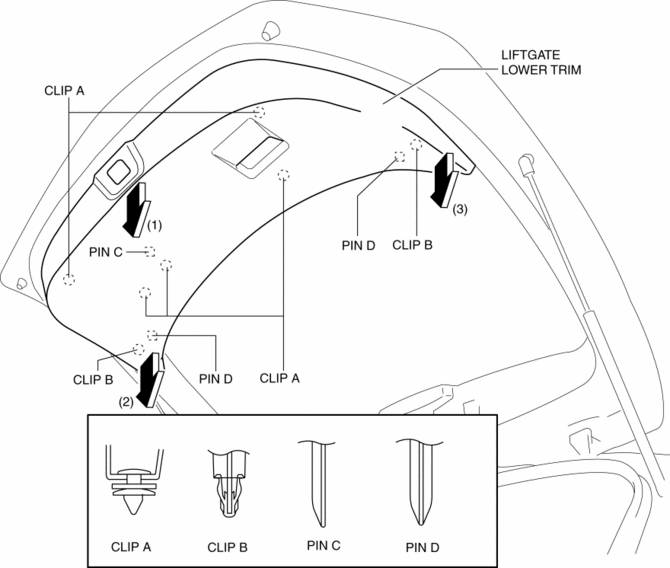
5. Remove the liftgate lower trim.
6. Install in the reverse order of removal.
 Liftgate Lock Striker Removal/Installation
1. Remove the trunk end trim..
2. Remove the bolts, then remove the liftgate lock striker.
3. Install in the reverse order of removal.
4. Adjust the liftgate lock striker.. ...
 Liftgate Opener Switch Inspection
1. Disconnect the negative battery cable..
2. Remove the following parts:
a. Liftgate upper trim.
b. Liftgate side trim.
c. Liftgate lower trim.
d. Liftgate latch and lock actuator.
e. Lif ...
Other materials:
Mass Air Flow (MAF) Sensor/Intake Air Temperature (Iat) Sensor No.1 Removal/Installation
[Skyactiv G 2.0]
CAUTION:
Be careful not to hit the sensor element or allow foreign matter to get on
it during sensor removal/installation. If the sensor element is hit or foreign
matter gets on it, an error may occur in the sensor output signal resulting
in deterioration in the engine control.
...
Door Lock Switch Inspection
1. Disconnect the negative battery cable..
2. Remove the inner garnish..
3. Remove the front door trim..
4. Remove the front inner handle..
5. Inspect for continuity between the door lock switch terminals using an ohmmeter.
If not as indicated in the table, replace the door lock ...
Automatic Transaxle Controls
Various Lockouts:
Indicates that you must depress
the brake pedal and hold in the lock-release
button to shift (The ignition must be switched ON).
Indicates the shift lever can be
shifted freely into any position.
Indicates that you must hold in
the lock-release button to shift.
NO ...
