
Mazda 3 Service Manual: Manual Transaxle Shift Mechanism Removal/Installation [G66 M R]
1. Remove the battery cover..
2. Disconnect the negative battery cable.
3. Remove the battery component. (ex: battery, battery tray and PCM component).
4. Remove the air cleaner component..
5. Remove the aerodynamic under cover NO.2..
6. Remove the tunnel member (rear)..
7. Remove the upper panel..
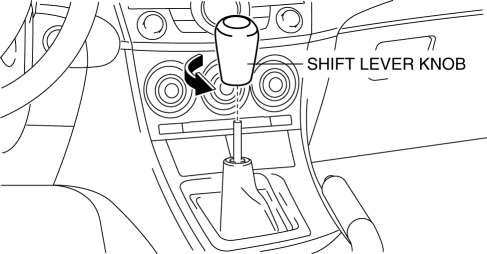
8. Remove the shift lever knob.
9. Remove the shift panel..
10. Remove the side wall..
11. Remove the console..
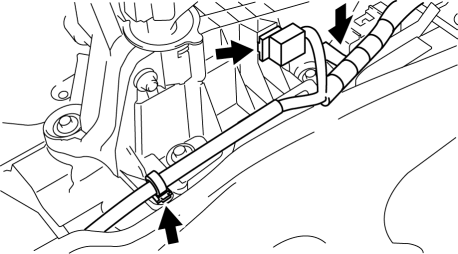
12. Detach the clip as shown in the figure.
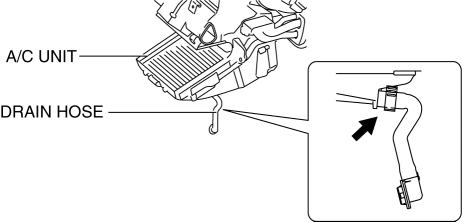
13. Disconnect the drain hose connected to A/C unit..
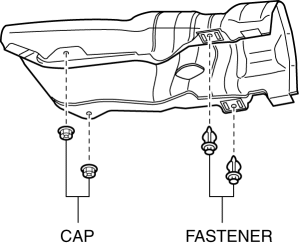
14. Remove the cap and fastener securing the insulator (front) and set the insulator (front) aside.
15. Remove in the order indicated in the table.
16. Install in the reverse order of removal.
17. After installation, verify that the shift lever can be shifted smoothly into each position.
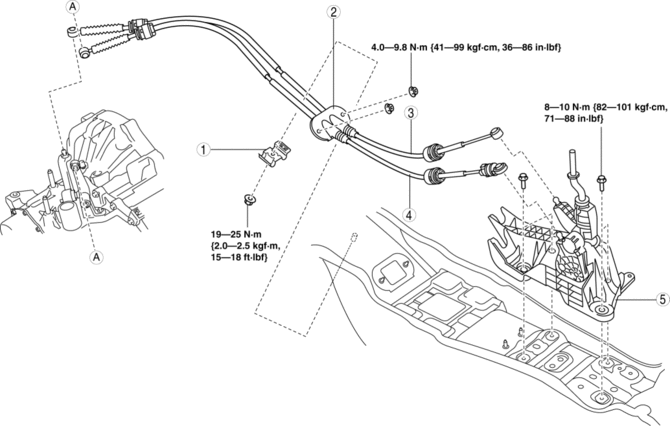
|
1 |
Clip |
|
2 |
Grommet |
|
3 |
Main shift cable (See Main Shift Cable and Main Select Cable Removal Note.) |
|
4 |
Main select cable (See Main Shift Cable and Main Select Cable Removal Note.) |
|
5 |
Shift lever component |
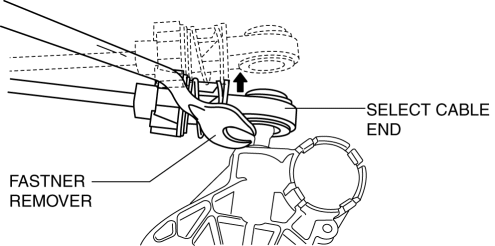
Main Shift Cable and Main Select Cable Removal Note
1. Remove the both shift cable end and select cable end using a fastener remover.
 Manual Transaxle Shift Mechanism Removal/Installation [G35 M R]
1. Remove the battery cover..
2. Disconnect the negative battery cable.
3. Remove the battery component. (ex: battery, battery tray and PCM component).
4. Remove the air cleaner component..
5 ...
 Neutral Switch Removal/Installation [A26 M R]
1. Disconnect the negative battery cable.
2. Disconnect the neutral switch connector.
3. Remove the aerodynamic under cover No.2..
4. Remove the neutral switch with the gasket.
5. Install ...
Other materials:
Manual Transaxle Shift Mechanism Removal/Installation [A26 M R]
1. Remove the battery cover..
2. Disconnect the negative battery cable.
3. Remove the battery and battery tray..
4. Remove the air cleaner and air inlet hose..
5. Remove the aerodynamic under cover NO.2..
6. Remove the tunnel member (rear)..
7. Remove the upper panel..
8. Remove the sh ...
Customer Assistance
(Puerto Rico)
Your complete and permanent satisfaction is our business. That is why all
Authorized Mazda
Dealers have the knowledge and the tools to keep your Mazda vehicle in top
condition.
If you have any questions or recommendations for improvement regarding the
service of
your Mazda vehicle or serv ...
Home screen
Icon
Function
Applications
Information such as average fuel economy, maintenance, and warnings can
be verified.
Depending on the grade and specification, the screen display may
differ.
Entertainment
Operates audio such as the radio ...
