Mazda 3 Service Manual: Manual Transaxle Shift Mechanism Removal/Installation [G35 M R]
1. Remove the battery cover..
2. Disconnect the negative battery cable.
3. Remove the battery component. (ex: battery, battery tray and PCM component).
4. Remove the air cleaner component..
5. Remove the aerodynamic under cover NO.2..
6. Remove the tunnel member (rear)..
7. Remove the upper panel..
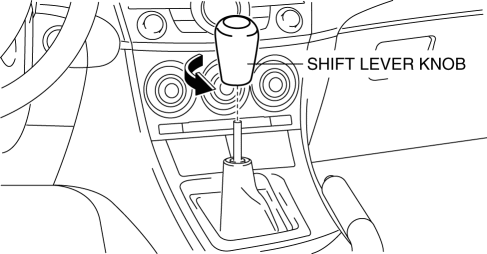
8. Remove the shift lever knob.
9. Remove the shift panel..
10. Remove the side wall..
11. Remove the console..
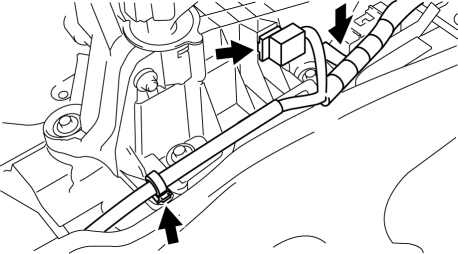
12. Detach the clip as shown in the figure.
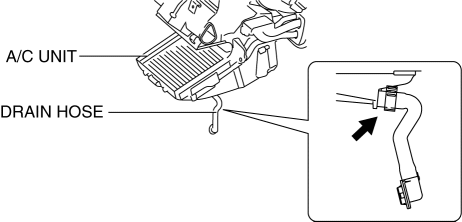
13. Disconnect the drain hose connected to A/C unit..
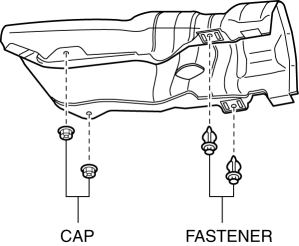
14. Remove the cap and fastener securing the insulator (front) and set the insulator (front) aside.
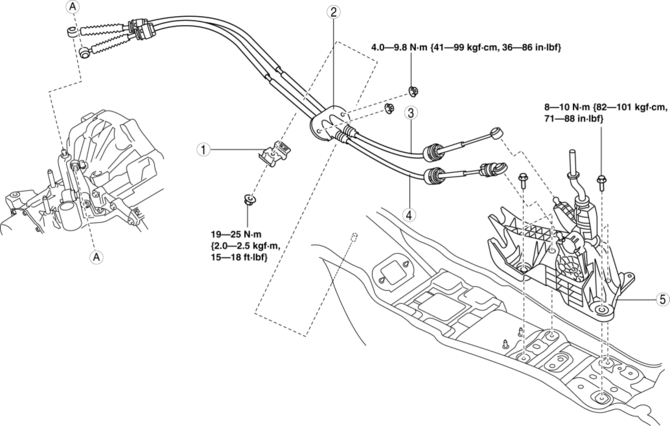
15. Remove in the order indicated in the table.
16. Install in the reverse order of removal.
17. After installation, verify that the shift lever can be shifted smoothly into each position.
|
1 |
Clip |
|
2 |
Grommet |
|
3 |
Main shift cable (See Main Shift Cable and Main Select Cable Removal Note.) |
|
4 |
Main select cable (See Main Shift Cable and Main Select Cable Removal Note.) |
|
5 |
Shift lever component |
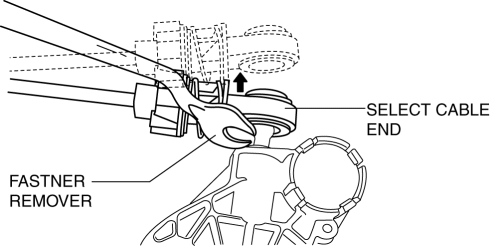
Main Shift Cable and Main Select Cable Removal Note
1. Remove the both shift cable end and select cable end using a fastener remover.
 Manual Transaxle Shift Mechanism Removal/Installation [C66 M R]
1. Remove the battery cover..
2. Disconnect the negative battery cable..
3. Remove the shift lever.
a. Remove the upper panel..
b. Remove the shift lever knob.
c. Remove the shift panel. ...
 Manual Transaxle Shift Mechanism Removal/Installation [G66 M R]
1. Remove the battery cover..
2. Disconnect the negative battery cable.
3. Remove the battery component. (ex: battery, battery tray and PCM component).
4. Remove the air cleaner component..
5 ...
Other materials:
Clock Switch Inspection
NOTE:
Clock switch built with the hazard warning switch.
1. Disconnect the negative battery cable..
2. Remove the clock switch..
3. Verify resistance between the clock switch terminals.
If the resistance is not as specified, replace the clock switch.
Between t ...
Audio Amplifier Removal/Installation
1. Slide the passenger seat rearward.
2. Remove the cover.
3. Remove the bolt.
4. Detach the clips and set the vehicle wiring harness aside.
5. Slide the passenger seat forward.
6. Disconnect the negative battery cable..
7. Remove the caps.
8. Remove the nuts.
9. Disconnect t ...
Ventilator Grille Removal/Installation
Side Ventilator grille
1. Through the wiring harness into the position shown in the figure, remove the
side ventilator grille in the direction of arrow.
2. When installing the side ventilator grille, push it for the dashboard.
Center Ventilator grille
1. Disconnect the negative battery c ...
