Mazda 3 Service Manual: Rear Center Seat Belt Removal/Installation
CAUTION:
-
The ELR (emergency locking retractor) has a spring that will unwind if the retractor cover is removed. The spring cannot be rewound by hand. If this occurs, the ELR will not work properly. Therefore, do not disassemble the retractor.
4SD
1. Remove the following parts:
a. Rear scuff plate.
b. Rear seat cushion.
c. Rear seat back.
d. Tire house trim.
e. C-pillar trim..
f. Rear package trim.
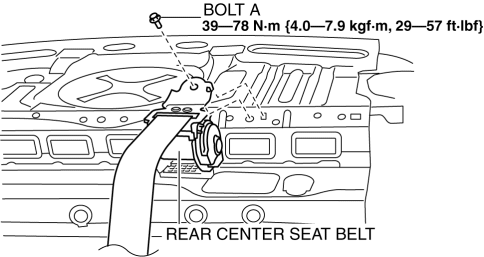
2. Remove the bolt A.
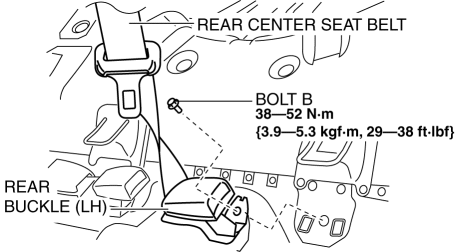
3. Remove the bolt B.
4. Remove the rear center seat belt.
5. Install in the reverse order of removal..
5HB
1. Remove the following parts:
a. Rear scuff plate.
b. Rear seat cushion.
2. Remove the bolt.
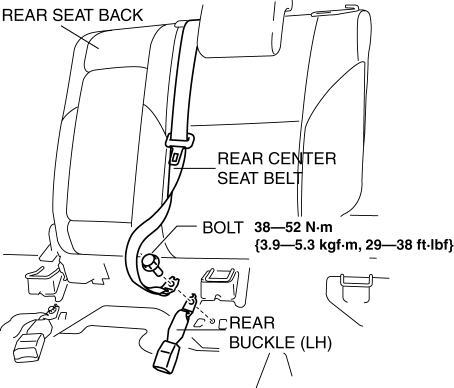
3. Remove the rear center seat belt with the rear seat back..
4. Install in the reverse order of removal..
Rear Center Seat Belt Installation Note
-
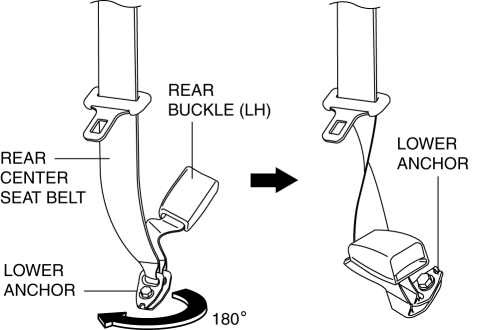
Rotate the rear center seat belt lower anchor clockwise 180° and install it.
 Drive Belt Removal/Installation [Skyactiv G 2.0]
WARNING:
A hot engine can cause severe burns. Turn off the engine and wait until it
is cool before servicing.
NOTE:
Remove/install the drive belt from the underside of the veh ...
 Timing Chain Removal/Installation [Mzr 2.0, Mzr 2.5]
1. Remove the battery cover..
2. Disconnect the negative battery cable..
3. Remove the plug hole plate..
4. Disconnect the wiring harness.
5. Remove the ignition coils..
6. Remove the spark ...
Other materials:
Component Parts
Audio unit
Microphone (hands-free)
The microphone is used for speaking voice commands or when making a
Hands-free call.
Talk button, Pick-Up button and Hang-Up button (hands-free)
The basic functions of Bluetooth ® Hands-Free can be used for such things as
making calls or
hanging up ...
Brake Fluid Pressure Sensor Inspection
1. Switch the ignition to off.
2. Install the SSTs to the master cylinder (secondary side) as shown in
the figure.
NOTE:
When installing the SST (49 D043 0A0) to the master cylinder, use
a commercially available flare nut wrench (flare nut across flat 12 mm {0.47
in}).
...
If the electronic key does not operate properly
If communication between the electronic key and the Subaru Solterra
is disrupted, or if the key cannot be used due to a depleted battery, the smart
key system and wireless remote functions will be unavailable. In such situations,
the Subaru Solterra can still be accessed and started by followi ...
