
Mazda 3 Service Manual: Rear Door Quarter Glass Removal/Installation
1. Fully lower the rear door glass.
2. Disconnect the negative battery cable..
3. Remove the rear door trim..
4. Remove the service hole cover.
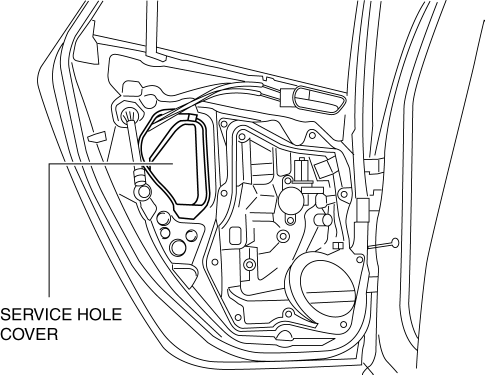
5. Remove the hole plug.
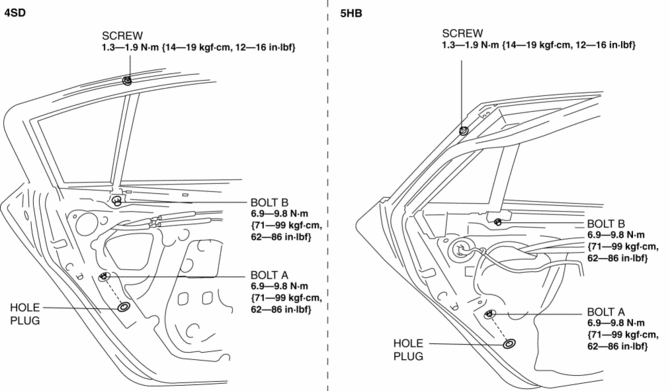
6. Remove the screw.
7. Remove the bolt A and B.
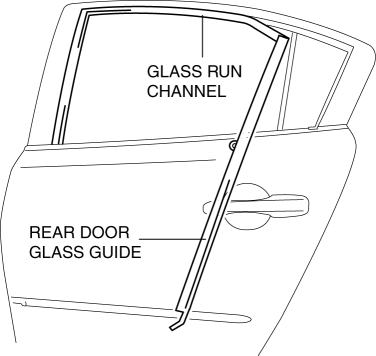
8. Remove the rear door glass guide.
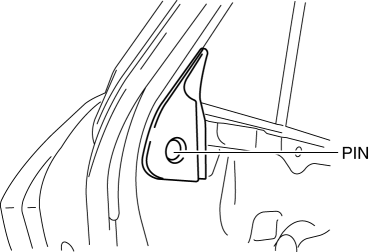
9. Remove the pin. (5HB)
10. Slide the rear door quarter glass in the direction of the arrow (1) shown in the figure.
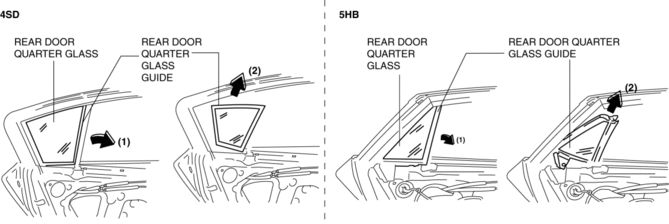
11. Remove the rear door quarter glass and rear door quarter glass guide as a single unit in the direction of the arrow (2) shown in the figure.
12. Remove the rear door quarter glass from the rear door quarter glass guide.
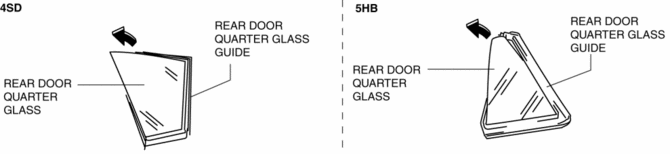
13. Install in the reverse order of removal.
 Rear Door Glass Removal/Installation
1. Fully lower the rear door glass.
2. Disconnect the negative battery cable..
3. Remove the rear door trim..
4. Remove the rear door speaker..
5. Remove the rear power window motor..
6. Rem ...
 Rear Power Window Regulator Removal/Installation
1. Fully lower the rear door glass.
2. Disconnect the negative battery cable..
3. Remove the rear door trim..
4. Remove the service hole cover.
5. Remove the rear door speaker..
6. Remov ...
Other materials:
i-ELOOP
On conventional vehicles, the kinetic energy that is generated when the
vehicle is
decelerated by applying the brakes or during engine braking ends up being
discarded as
heat. By utilizing this discarded kinetic energy to generate electricity and use
it to power the
vehicle's electrical dev ...
Accelerator Pedal Removal/Installation [Mzr 2.0, Mzr 2.5]
1. Remove the battery cover..
2. Disconnect the negative battery cable..
3. Remove the driver-side lower panel..
4. Remove in the order indicated in the table.
1
APP sensor connector
2
Accelerator pedal
5. Install in the rev ...
Cleaning and protecting the vehicle interior
For the Subaru Solterra, interior cleaning should always be performed
according to the specific material of each component in order to preserve durability,
appearance, and long-term comfort.
Protecting the vehicle interior
In the Subaru Solterra, begin cleaning by removing dust and debris u ...
