Mazda 3 Service Manual: Rear Power Window Regulator Removal/Installation
1. Fully lower the rear door glass.
2. Disconnect the negative battery cable..
3. Remove the rear door trim..
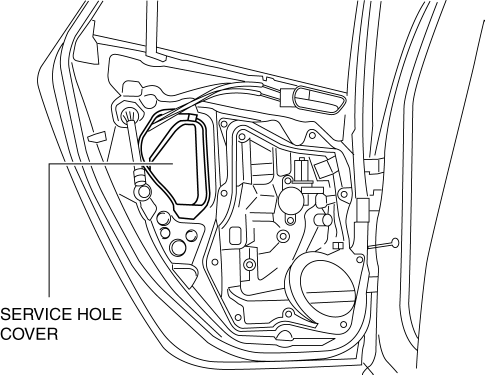
4. Remove the service hole cover.
5. Remove the rear door speaker..
6. Remove the glass guide..
7. Remove the rear power window motor..
8. Remove the rear door glass..
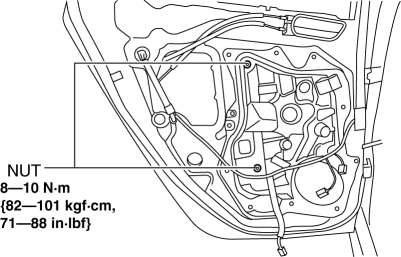
9. Remove the nuts.
10. Insert a hand through the speaker installation hole, rotate the drum housing in the direction shown in the figure to detach the tabs from the rear door module.
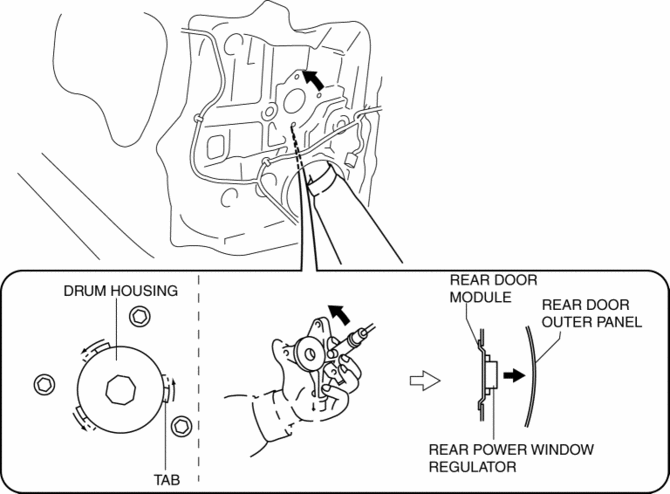
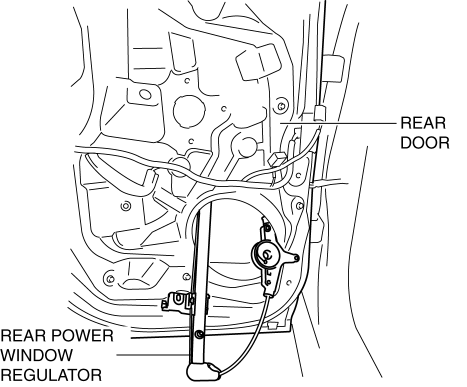
11. Remove the rear power window regulator through the speaker installation hole.
12. Install in the reverse order of removal.
CAUTION:
-
Make sure the cable does not unspool from the drum housing when installing.
 Rear Door Quarter Glass Removal/Installation
1. Fully lower the rear door glass.
2. Disconnect the negative battery cable..
3. Remove the rear door trim..
4. Remove the service hole cover.
5. Remove the hole plug.
6. Remove the ...
 Rear Window Glass Installation
WARNING:
Using a utility knife with bare hands can cause injury. Always wear gloves
when using a utility knife.
CAUTION:
Proper installation of the glass may be difficult if s ...
Other materials:
Windshield Wipers and Washer
The ignition must be switched ON to use
the wipers.
WARNING
Use only windshield washer fl uid or
plain water in the reservoir:
Using radiator antifreeze as washer
fl uid is dangerous. If sprayed on the
windshield, it will dirty the windshield,
aff ect your visibility, and ...
Check Valve (One Way) Inspection [Mzr 2.3 Disi Turbo]
1. Disconnect the vacuum hose connected between the check valve and the purge
solenoid valve from the purge solenoid valve..
2. Disconnect the vacuum hose connected between the check valve (one-way) and
the intake manifold from the intake manifold..
3. Blow through the check valve (one-way) ...
Add-On Non-Genuine Parts and
Accessories
Non-genuine parts and accessories for Mazda vehicles can be found in stores.
These may fit your vehicle, but they are not approved by Mazda for use with
Mazda
vehicles. When you install non-genuine parts or accessories, they could affect
your vehicle's
performance or safety systems; the Maz ...
