Mazda 3 Service Manual: Rear Seat Back Frame Removal/Installation
1. Remove the rear seat cushion..
2. Remove the rear buckle installation bolt..
3. Remove the rear seat back..
4. Remove the headrest.
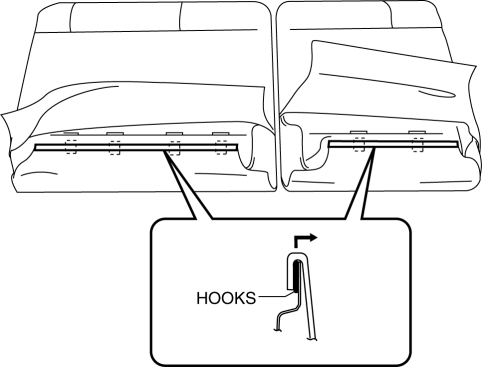
5. Open the fasteners.
6. Detach the hooks.
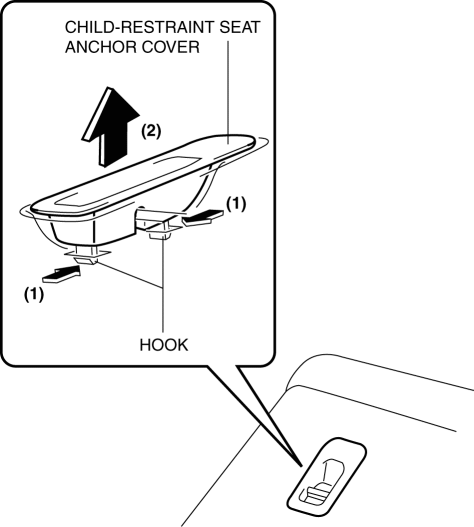
7. Remove the child-restraint seat anchor covers in the order of (1), (2) as shown in the figure. (5HB only)
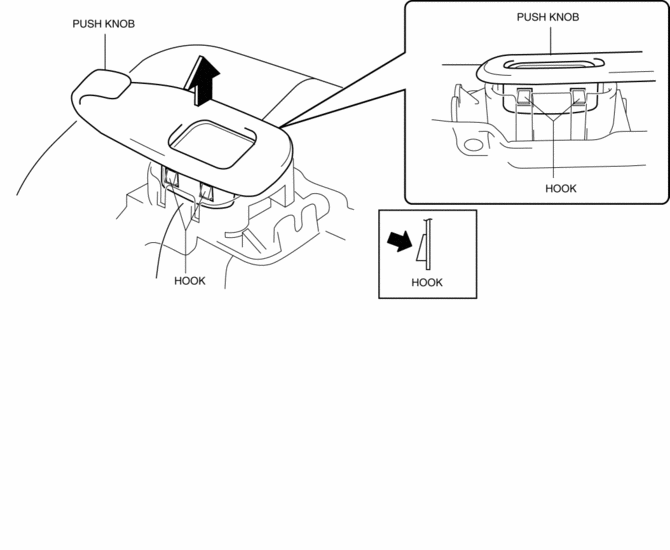
8. Remove the push knob while remove the hooks in the direction of arrow shown in the figure.
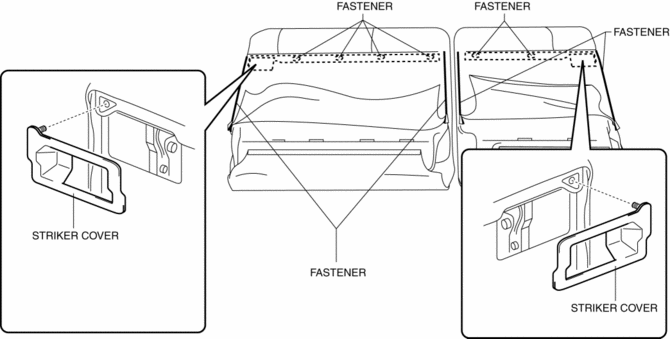
9. Open the fastener, remove the fastener and striker cover.
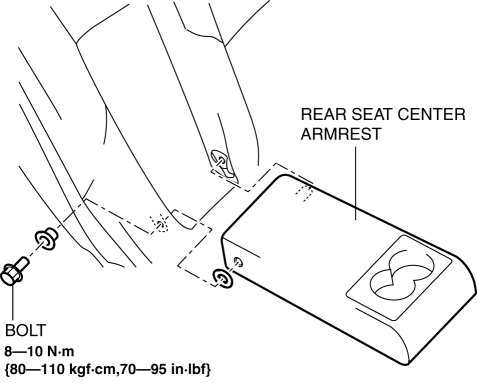
10. Remove the bolt then remove the rear seat center armrest.(Vehicles with the rear seat center armrest)
11. Peal back the rear seat pad, release the pole guide tabs in the direction of arrow (3) shown in the figure, then pull out the pole guides in the direction of arrow (4).

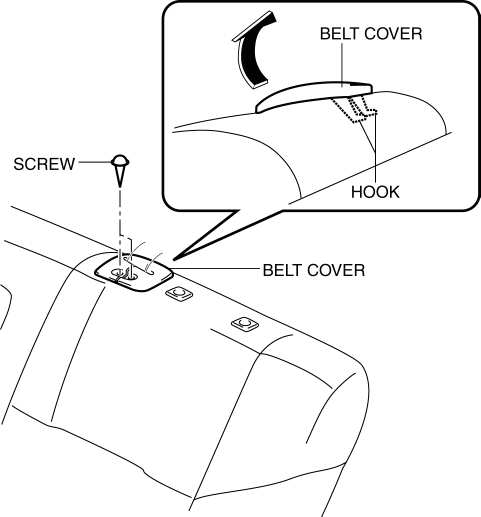
12. Remove the screws, then remove the belt cover in the direction of arrow shown in the figure.
13. Open the fasteners.
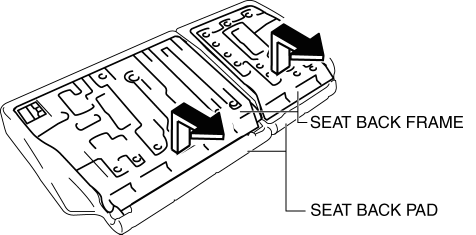
14. Remove the seat back frame from the seat back pad by pulling it in the direction of the arrow.(5HB)
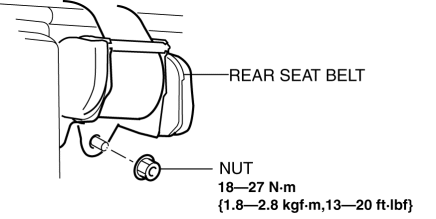
15. Remove the nut, then remove the rear seat belt.
16. Install in the reverse order of removal.(5HB)
 Rear Center Seat Belt Removal/Installation
CAUTION:
The ELR (emergency locking retractor) has a spring that will unwind if the
retractor cover is removed. The spring cannot be rewound by hand. If this occurs,
the ELR will not wor ...
 Rear Seat Back Removal/Installation
1. Remove the rear seat cushion..
2. Remove the rear buckle installation bolt..
3. Fold the rear seat back.
4. Remove the bolts.
5. Remove the rear seat back from the rear seat back br ...
Other materials:
Purge Solenoid Valve Inspection [Mzr 2.0, Mzr 2.5]
Airflow Inspection
1. Remove the battery cover..
2. Disconnect the negative battery cable..
3. Remove the purge solenoid valve..
4. Inspect airflow between the ports under the following conditions.
Measured condition
Continuity between A—B
...
Liftgate Upper Trim Removal/Installation
1. Detach tab while pulling the liftgate upper trim in the direction of the arrow
(1) shown in the figure, then detach clips and pin while pulling in the direction
of the arrow (2).
2. Detach tab while pulling the liftgate upper trim in the direction of the arrow
(3) shown in the figure, ...
Rear Door Speaker Inspection
1. Disconnect the negative battery cable..
2. Remove the rear door trim..
3. Remove the rear door speaker..
4. Verify the resistance between the rear door speaker terminals.
If not within the specification, replace the rear door speaker.
Resistance
Without Bose ...
