Mazda 3 Service Manual: Rear Seat Back Removal/Installation
1. Remove the rear seat cushion..
2. Remove the rear buckle installation bolt..
3. Fold the rear seat back.
4. Remove the bolts.

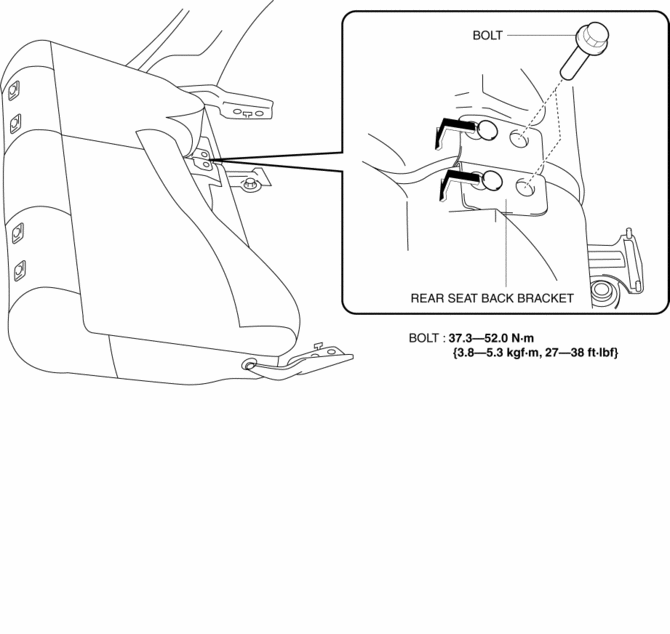
5. Remove the rear seat back from the rear seat back bracket by pulling the rear seat back in the direction of the arrow shown in the figure.
6. Remove the bolts, remove the hinge.
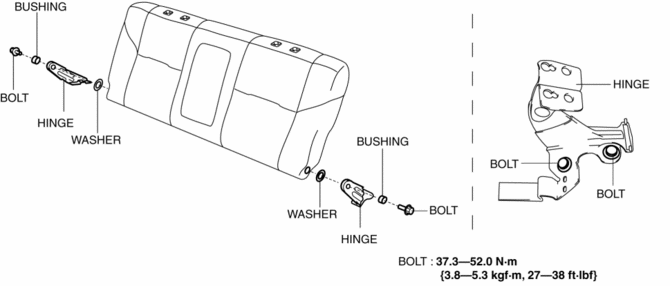
7. Install in the reverse order of removal.
 Rear Seat Back Frame Removal/Installation
1. Remove the rear seat cushion..
2. Remove the rear buckle installation bolt..
3. Remove the rear seat back..
4. Remove the headrest.
5. Open the fasteners.
6. Detach the hooks.
7. ...
 Rear Seat Back Trim Removal/Installation
1. Remove the rear seat back frame..
2. Remove rings C, then remove the seat back trim from the seat back pad.
3. Install in the reverse order of removal. ...
Other materials:
Suspension SST
49 T034 1A0
Coil spring compressor set
49 0180 510B
Preload measuring attachment
49 B034 001
Guide
49 B034 002
Guide
49 T028 3A0
Ball joint puller set
...
Registering Your Vehicle in A Foreign
Country (Except United States and
Canada)
Registering your vehicle in a foreign country may be problematic depending on
whether it
meets the specific emission and safety standards of the country in which the
vehicle will be
driven. Consequently, your vehicle may require modifications at personal expense
in order
to meet the regulat ...
Afs (Adaptive Front Lighting System) Off Switch Inspection
1. Disconnect the negative battery cable..
2. Remove the AFS OFF switch..
3. Verify that the continuity between the AFS OFF switch terminals is as indicated
in the table.
If the continuity is not as indicated in the table, replace the AFS OFF switch.
4. Apply battery po ...
