Mazda 3 Service Manual: Front Outer Handle Removal/Installation
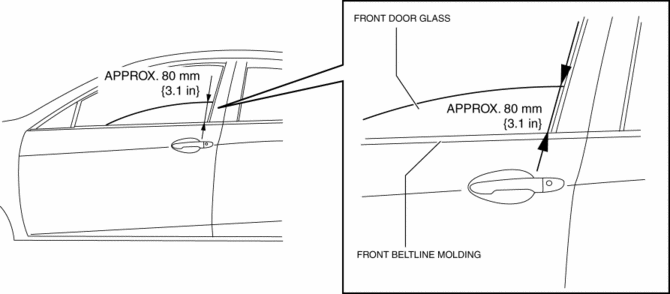
1. To access the glass installation bolt, position the front door glass so that the distance from the top of the front door glass to the upper part of the front beltline molding is approx. 80 mm {3.1 in}
.
2. Disconnect the negative battery cable..
3. Remove the following parts:
a. Inner garnish.
b. Front door trim.
c. Front door speaker.
d. Front door glass.
e. Front door module panel.
f. Front door key cylinder.
4. Disconnect the keyless antenna connector (With advanced keyless entry and push button start system).
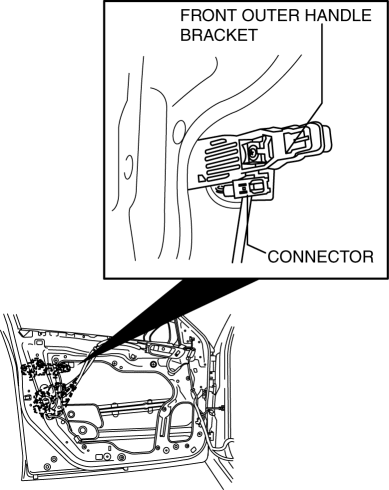
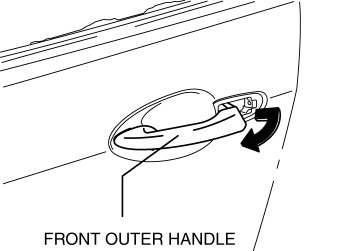
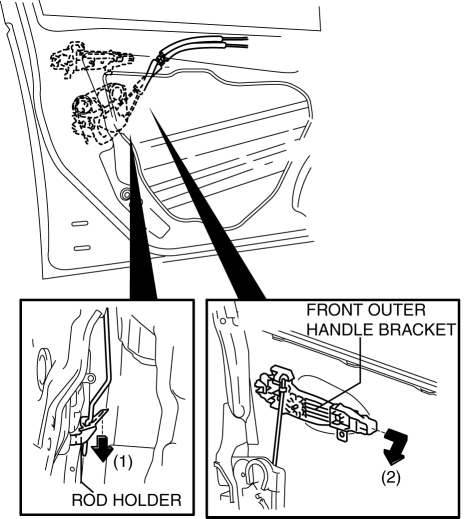
5. Remove the front outer handle.
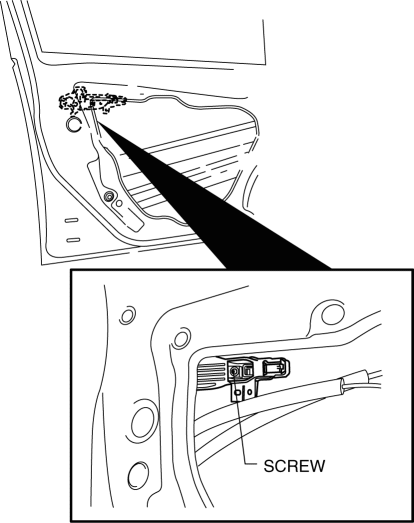
6. Remove the screw.
NOTE:
-
The screw cannot be removed because of the stopper.
7. Press down the rod holder in the direction of arrow (1) and remove the front outer handle bracket in the direction of arrow (2).
8. Install in the reverse order of removal.
 Front Door Removal/Installation
WARNING:
Removing the front door without supporting it could cause the front door
to fall and cause serious injury. Always perform the procedure with at least
another person to prevent t ...
 Hood Adjustment
Gap Adjustment
1. Verify that the gap between the hood and the body is within the specification.
Standard clearance
a: -2.8—0.8 mm {-0.11—0.03 in}
b: –1.2—1.2 mm {–0. ...
Other materials:
Oil Seal (Differential) Replacement [A26 M R]
1. On level ground, jack up the vehicle and support it evenly on safety stands.
2. Drain the oil from the transaxle..
3. Remove the front tires..
4. Remove the splash shield..
5. Remove the aerodynamic under cover No.2..
6. Separate the drive shaft and joint shaft from the transaxle..
7 ...
LDA (Lane Departure Alert)
Basic functions
In the Subaru Solterra, the Lane Departure Alert (LDA) system is designed to
assist the driver by monitoring the vehicle’s position relative to lane markings
or road boundaries*. When the system detects a potential deviation, it provides
timely warnings and can also apply ge ...
Joint Shaft Assembly [Mzr 2.3 Disi Turbo]
1. Assemble in the order indicated in the table.
1
Bracket
2
Dust seal (RH)
.
3
Bearing
.
4
Dust seal (LH)
.
5
Joint shaft
.
Dust Seal ...
