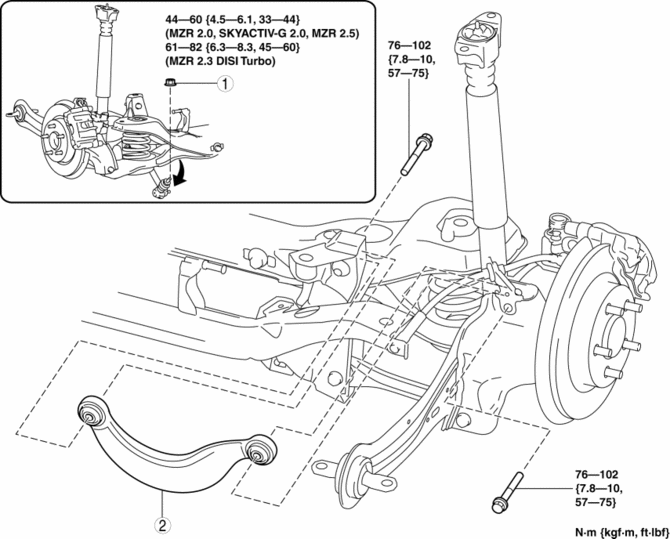
Mazda 3 Service Manual: Rear Upper Arm Removal/Installation
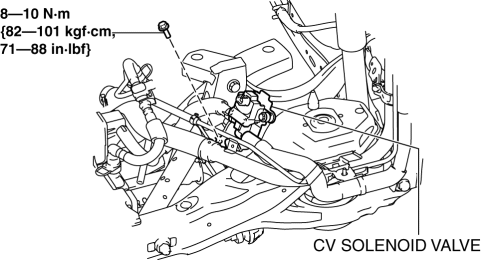
1. When working on the right side of the vehicle, disconnect the canister vent (CV) solenoid valve from the rear crossmember. (MZR 2.0 (Except Mexico), SKYACTIV-G 2.0, MZR 2.3 DISI Turbo, MZR 2.5 (Except Mexico))
2. Remove in the order indicated in the table.
3. Install in the reverse order of removal.
4. Inspect the wheel alignment and adjust it if necessary..
|
1 |
Rear stabilizer control link upper side nut |
|
2 |
Rear upper arm (See Rear Upper Arm Removal Note.) (See Rear Upper Arm Installation Note.) |
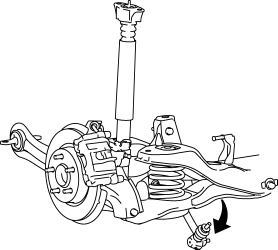
Rear Upper Arm Removal Note
1. Rotate the rear stabilizer component downwards as shown in the figure.
2. Jack up the vehicle to the unloaded condition, and support the trailing link using a jack.
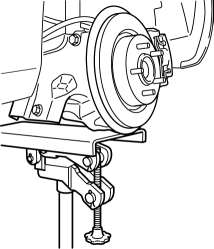
3. Remove the rear upper arm.
Rear Upper Arm Installation Note
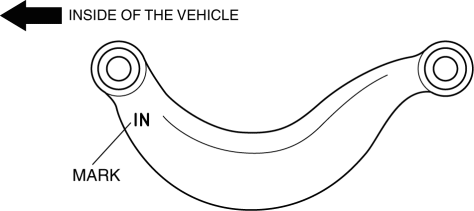
1. Install the rear upper arm so that IN mark is facing toward the inside of the vehicle.
 Rear Stabilizer Removal/Installation
1. Remove in the order indicated in the table.
2. Install in the reverse order of removal.
1
Rear stabilizer control link
2
Rear stabilizer ...
 Wheels, Tires
...
Other materials:
Antenna (5-Door)
AM/FM Radio Antenna *
The AM/FM radio antenna receives both
AM and FM signals.
(Type A)
To remove the antenna, turn it
counterclockwise.
To install the antenna, turn it clockwise.
Make sure the antenna is securely
installed.
CAUTION
To prevent damage to the antenna,
r ...
Bluetooth®
Bluetooth ® Hands-Free outline
When a Bluetooth ® device (mobile phone) is connected to the vehicle's
Bluetooth ® unit via
radio wave transmission, a call can be made or received by pressing the talk
button, pickup
button, or hang-up button on the audio remote control switch, or by operati ...
Keyless Entry System
This system uses the key buttons to
remotely lock and unlock the doors and
the liftgate/trunk lid, and opens the trunk
lid.
The system can start the engine without
having to take the key out of your purse or
pocket.
It can also help you signal for attention.
Operating the theft-deterre ...
