
Mazda 3 Service Manual: Vacuum Hose Removal/Installation [Mzr 2.0, Mzr 2.5]
1. Remove the battery and battery tray..
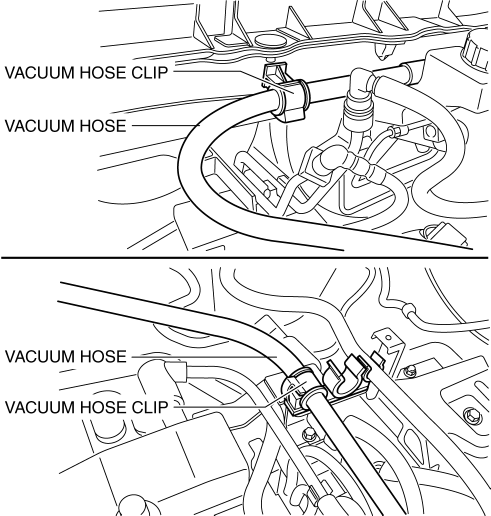
2. Remove the vacuum hose from the vacuum hose clip.
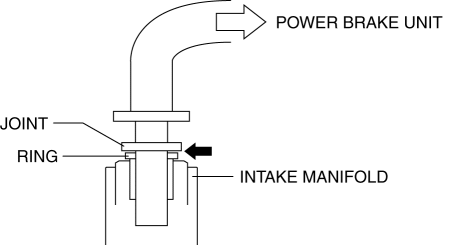
3. Insert a thin flathead screwdriver at the point indicated by the arrow in the figure, push the ring down and disconnect the vacuum hose from the intake manifold.
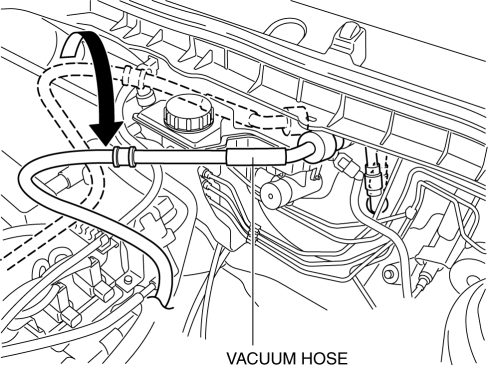
4. Move the vacuum hose as shown in the figure.
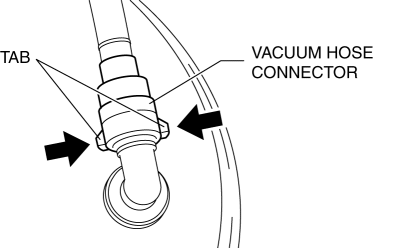
5. Disconnect the vacuum hose connector from the power brake unit while pressing the tabs of the vacuum hose connector.
6. Remove the vacuum hose.
7. Install in the reverse order of removal.
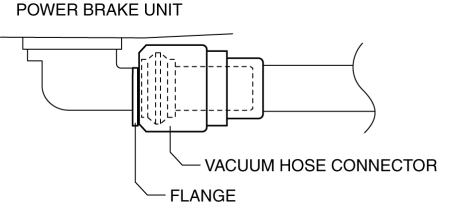
8. Insert the vacuum hose connector to the power brake unit.
9. Verify that the vacuum hose is inserted so that the connector contacts the power brake unit flange.
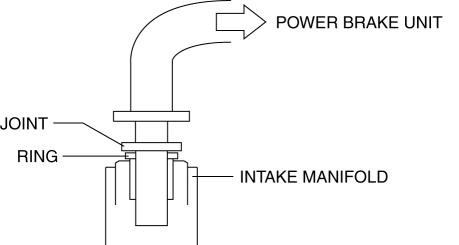
10. Verify that the vacuum hose is inserted so that the joint contacts the intake manifold ring.
 Power Brake Unit Removal/Installation [Mzr 2.3 Disi Turbo]
CAUTION:
Once the brake switch clearance has automatically been adjusted, it cannot
be adjusted again. Therefore, replace the switch with a new one when replacing
the power brake unit or ...
 Vacuum Hose Removal/Installation [Mzr 2.3 Disi Turbo]
1. Remove the charge air cooler cover..
2. Remove the charge air cooler..
3. Insert a thin flathead screwdriver at the point indicated by the arrow in
the figure, push the ring down and disconne ...
Other materials:
Input/Turbine Speed Sensor Removal/Installation [FS5 A EL]
CAUTION:
Always use a new bolt. If the removed input/turbine speed sensor installation
bolt is reused, it may cause oil leakage.
A sealant coating is applied to the input/turbine speed sensor installation
bolt to prevent oil leakage from the installation bolt hole which passes ...
Steering Wheel And Column Removal/Installation [With Advanced Keyless Entry
And Push Button Start System]
WARNING:
Handling the air bag module improperly can accidentally operate (deploy)
the air bag module, which may seriously injure you. Read the service warnings
before handling the air bag module..
1. Remove the driver-side front scuff plate..
2. Remove the driver-side front sid ...
Oil Seal (Differential) Replacement [G35 M R]
1. On level ground, jack up the vehicle and support it evenly on safety stands.
2. Remove the aerodynamic under cover No.2..
3. Drain the oil from the transaxle..
4. Remove the front splash shield..
5. Separate the drive shaft and joint shaft from the transaxle..
6. Remove the oil seals u ...
