Mazda 3 Service Manual: Vehicle Speed Sensor (VSS) Inspection [FS5 A EL]
On-Vehicle Inspection
1. Inspect the power supply circuit for the VSS.
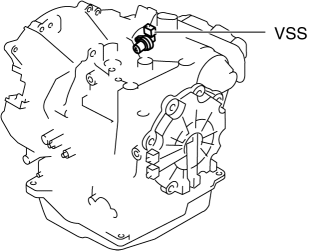
a. Remove the insulator from the transaxle.
b. Disconnect the VSS connector.
c. Switch the ignition to ON (engine off).
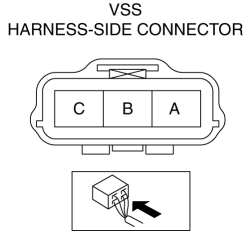
d. Measure the voltage at VSS connector terminal A (harness-side).
-
If there is any malfunction, repair wiring harness between VSS and AT main relay.
-
VSS specification
-
B+
e. Switch the ignition to off.
f. Connect the VSS connector.
2. Inspect the GND circuit for the VSS.
a. Switch the ignition to off.
b. Measure the voltage at VSS connector terminal C (harness-side).
-
If there is any malfunction, repair wiring harness between VSS and GND.
-
VSS specification
-
Below 1.0 V
3. Inspect the signal circuit for the VSS.
a. Connect the oscilloscope to the following TCM connector terminals and set it as below.
-
(+) lead: TCM terminal Z
-
(-) lead: battery negative terminal
-
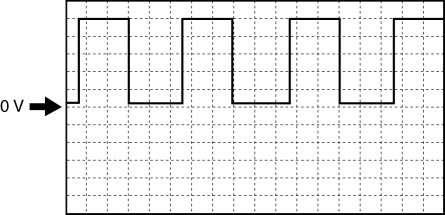
Oscilloscope setting: 1 V/DIV (Y), 2 ms/DIV (X), DC range
b. Start the engine.
c. Measure the wave form when the following conditions are met.
-
Gear position: 3GR
-
Vehicle speed: 30 km/h {19 mph}
-
If there is any malfunction, replace the VSS..

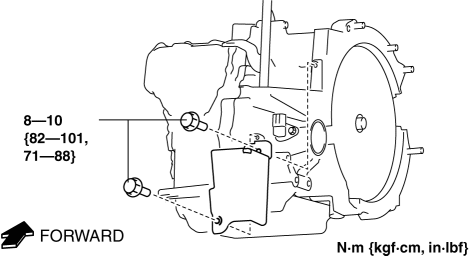
 Vehicle Speed Sensor (VSS) Removal/Installation [FS5 A EL]
CAUTION:
If foreign materials are stuck to the sensor, disturbance by magnetic flux
can cause sensor output to be abnormal and thereby negatively affect control.
Make sure that foreign m ...
Other materials:
Glass Antenna Inspection
4SD
1. Disconnect the negative battery cable..
2. Disconnect the antenna amplifier connector B..
3. Disconnect the antenna feeder No.3 connector C. (with audio unit (with display)).
4. Inspect the glass antenna for damage visually.
5. Inspect for continuity between the glass antenna termin ...
Trunk Lid Opener Cable Removal/Installation
1. Disconnect the negative battery cable..
2. Remove the following parts:
a. Front seat (LH)(See FRONT SEAT REMOVAL/INSTALLATION.)
b. Front scuff plate (LH).
c. Rear scuff plate.
d. B-pillar lower trim.
e. Rear seat cushion.
f. Rear seat back.
g. Tire house trim (LH).
h. Trunk end ...
Oil Control Valve (OCV) Inspection [Mzr 2.0, Mzr 2.5]
Coil Resistance Inspection
1. Remove the battery cover..
2. Disconnect the negative battery cable..
3. Remove the plug hole plate..
4. Disconnect the OCV connector.
5. Measure the resistance between terminals A and B using an ohmmeter.
OCV coil resistance
6.9—7.9 ohms [20°C ...
