Mazda 3 Owners Manual: Accessory Sockets
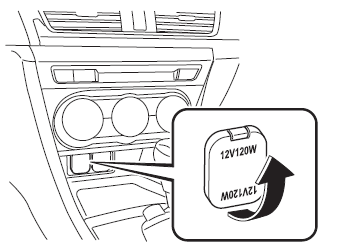
Only use genuine Mazdaaccessories or the equivalent requiring no greater than 120 W (DC 12 V, 10 A).
Type A
The accessory sockets can be used regardless of whether the ignition is on or off.
Type B *
The ignition must be switched to ACC or ON.
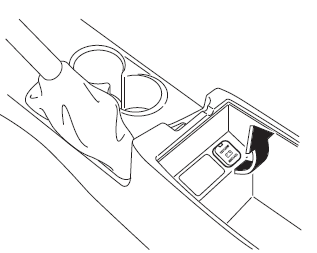
With CD Player
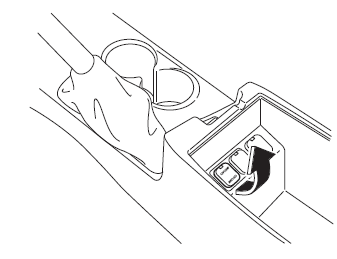
Without CD Player
CAUTION
|
NOTE To prevent discharging of the battery, do not use the socket for long periods with the engine off or idling.
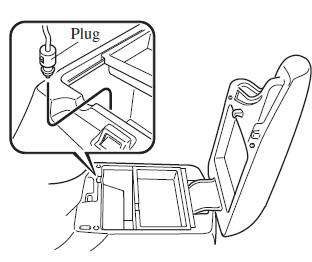
Connecting the accessory socket
- Open the lid.
- Pass the connection plug cord through the cutout of the console and insert the plug into the accessory socket.
 Illuminated Entry System
When the illuminated entry system
operates, the overhead light (switch is in
the DOOR position) turn on for:
About 30 seconds after the driver's door
is unlocked and the ignition is switched
...
 Cup Holder
WARNING
Never use a cup holder to hold hot
liquids while the vehicle is moving:
Using a cup holder to hold hot
liquids while the vehicle is moving is
dangerous. If the contents s ...
Other materials:
Neutral Switch Removal/Installation [G66 M R]
1. Remove the battery cover..
2. Disconnect the negative battery cable.
3. Remove the battery component. (ex: battery, battery tray and PCM component).
4. Remove the aerodynamic under cover No.2..
5. Drain the oil from the transaxle..
6. Remove the neutral switch.
7. Install the neu ...
Warning lights and indicators
The Subaru Solterra is equipped with a comprehensive set of warning
lights and indicators located on the instrument cluster and exterior mirrors, designed
to clearly communicate the current condition and operational status of various vehicle
systems to the driver in real time.
Warning lights ...
Identification Number Locations
Vehicle Identification Number (VIN)
Engine Type/Number
MZR 2.0, MZR 2.5
MZR 2.3 DISI Turbo
SKYACTIV-G 2.0
...
