
Mazda 3 Service Manual: Assist Handle Removal/Installation
Assist Handle Removal
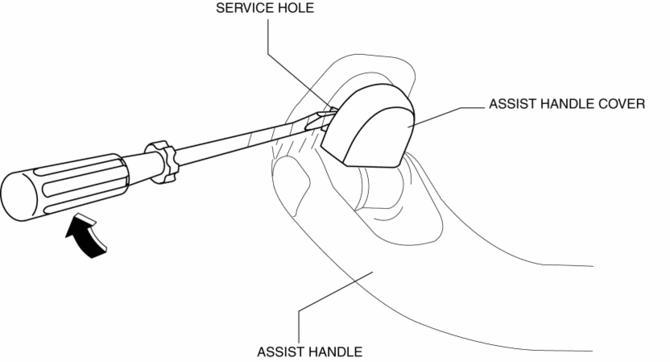
1. Insert a flathead screwdriver into the service hole and remove the assist handle covers.
2. Remove the assist handle in the direction of the arrow (1) and (2), while detach the clip.
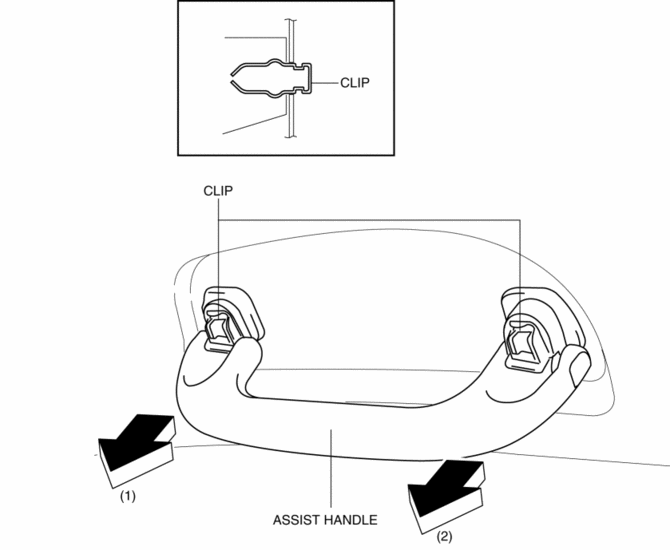
NOTE:
-
Remove the assist handle by shaking it up and down.
Assist Handle Installation
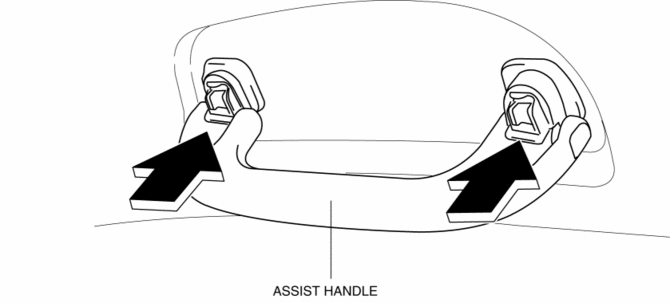
1. Push the assist handle in the direction of the arrow shown in the figure.
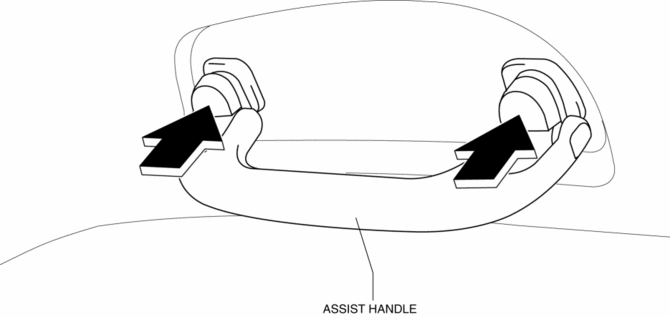
2. Push the assist handle cover assembled to install the assist handle.
 Trunk Side Upper Trim Removal/Installation
1. Remove the rear seat cushion..
2. Remove the rear scuff plate..
3. Remove the tire house trim..
4. Open the cap.
5. Remove the screw.
6. Remove the fasteners.
7. Pull the trunk side upp ...
 Console Removal/Installation
1. Disconnect the negative battery cable..
2. Remove the following parts:
a. Upper panel.
b. Shift knob (MTX).
c. Selector lever knob (ATX).
d. Shift panel.
e. Side wall.
3. Remove the b ...
Other materials:
Clock Spring Removal/Installation
1. Disconnect the negative battery cable..
2. Remove the driver-side air bag module..
3. Remove the steering wheel..
4. Remove the column cover.
5. Remove the connectors.
6. Remove the tab direction of the arrow shown in the figure.
7. Remove the screws.
8. Remove the clock spring. ...
Clock Spring Inspection [Standard Deployment Control System]
1. Disconnect the negative battery cable..
2. Remove the driver–side air bag module..
3. Remove the steering wheel..
4. Remove the column cover.
5. Remove the clock spring..
6. Verify that the continuity is as indicated in the table.
If not as indicated in the table, replace the ...
Operating Tips for OGG
OGG is the audio compression format for
Xiph. Org Foundation.
Audio data can be created and stored at a
higher compression ratio than MP3.
This unit plays files with the extension
(.ogg) as OGG files.
CAUTION
Do not use an audio fi le extension on
fi les other than audio fi le ...
