Mazda 3 Service Manual: Console Removal/Installation
1. Disconnect the negative battery cable..
2. Remove the following parts:
a. Upper panel.
b. Shift knob (MTX).
c. Selector lever knob (ATX).
d. Shift panel.
e. Side wall.
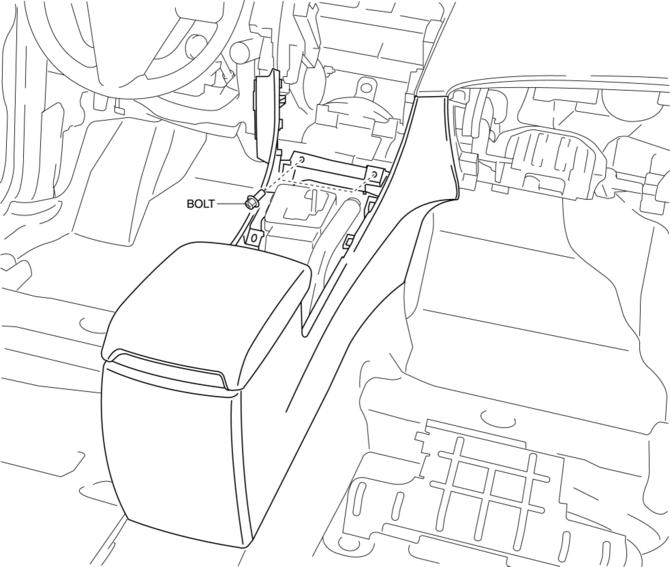
3. Remove the bolts.
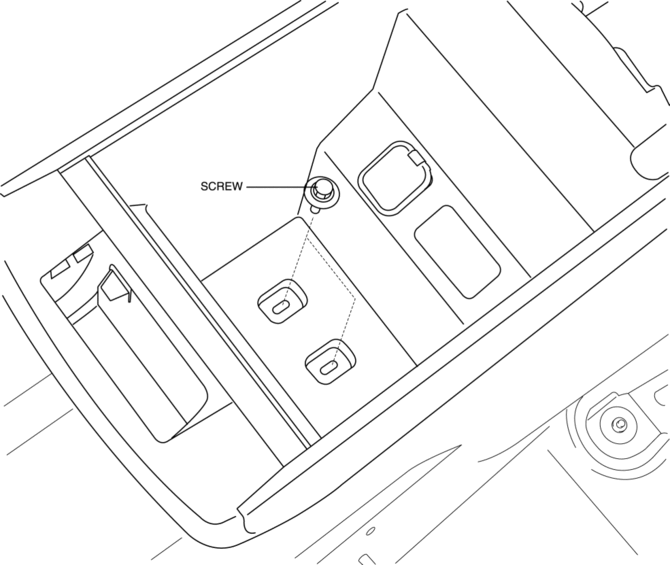
4. Remove the screws.
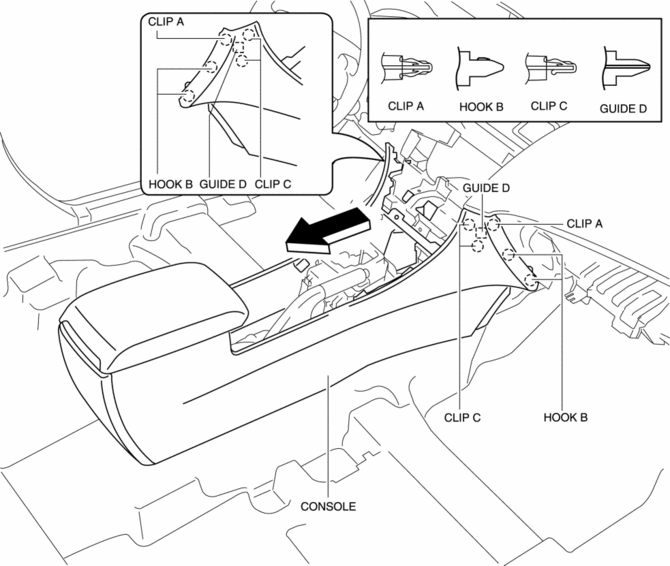
5. Pull the console in the direction of the arrow shown in the figure, then detaching clips A, C hooks B and guides D.
6. Disconnect the following connectors:
a. Rear accessory socket
b. Auxiliary jack (vehicles without USB port)
c. Auxiliary jack/USB port (vehicles with USB port)
d. Car-navigation unit (vehicles with audio unit)
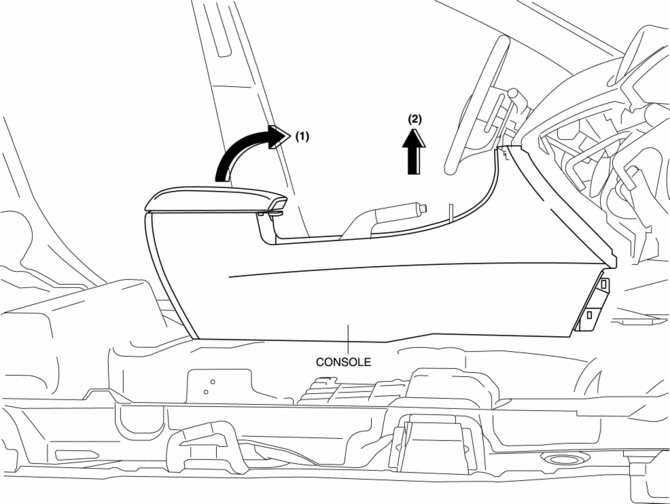
7. Pull up the console in the direction of the arrow (1) shown in the figure, move the rear console in the direction of the arrow (2), and remove it avoiding the parking brake lever.
8. Remove the following parts:
a. Rear accessory socket.
b. Auxiliary jack (vehicles without USB port).
c. Auxiliary jack/USB port (vehicles with USB port).
d. Car-navigation unit (vehicles with audio unit).
9. Install in the reverse order of removal.
 Assist Handle Removal/Installation
Assist Handle Removal
1. Insert a flathead screwdriver into the service hole and remove the assist
handle covers.
2. Remove the assist handle in the direction of the arrow (1) and (2), while ...
 Glove Compartment Light Bulb Removal/Installation
1. Disconnect the negative battery cable..
2. Remove the following parts:
a. Passenger-side front scuff plate.
b. Passenger-side front side trim.
c. Dashboard under cover.
d. Glove compartme ...
Other materials:
Starter Inspection [Mzr 2.0, Mzr 2.5]
On-vehicle Inspection
1. Verify that the battery is fully charged.
2. The starter is normal if it rotates smoothly and without any noise when the
engine is cranked.
If the starter does not operate, inspect the following:
Remove the starter, and inspect the starter unit.
...
Automatic Transaxle Controls
Various Lockouts:
Indicates that you must depress
the brake pedal and hold in the lock-release
button to shift (The ignition must be switched ON).
Indicates the shift lever can be
shifted freely into any position.
Indicates that you must hold in
the lock-release button to shift.
NO ...
Mazda Radar Cruise Control
(MRCC)
The Mazda Radar Cruise Control (MRCC) system is designed to maintain headway
control *1
according to the vehicle speed using a radar sensor (front) to detect the
distance to a vehicle
ahead, and by presetting the vehicle speed between 30 km/h (19 mph) and 145 km/h
(90
mph), the driver is fr ...
