Mazda 3 Service Manual: Center Roof Antenna Removal/Installation
4SD
1. Disconnect the negative battery cable..
2. Remove the rain sensor cover. (Vehicles with auto light/wiper system).
3. Disconnect the rain sensor connector. (Vehicles with auto light/wiper system)
4. Partially peel back the seaming welts.
5. Remove the following parts:
a. Sunroof seaming welt (vehicles with sunroof)
b. A-pillar trim.
c. Front scuff plate.
d. Rear scuff plate.
e. B-pillar lower trim.
f. Upper anchor of the front seat belt.
g. B-pillar upper trim.
h. Rear seat cushion.
i. Tire house trim.
j. C-pillar trim.
k. Map light.
l. Sunvisor.
m. Assist handle.
n. Headliner.
6. Disconnect the connector.
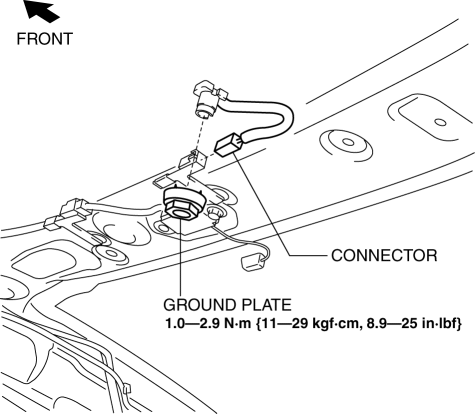
7. Remove the ground plate.
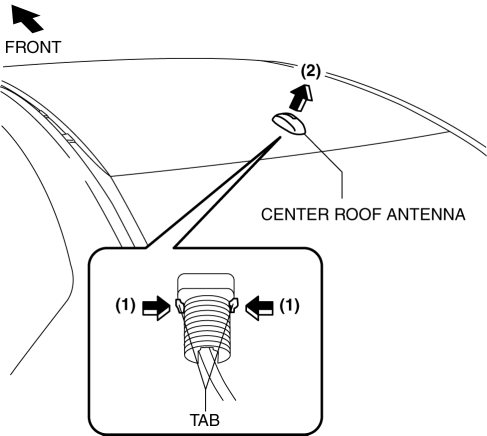
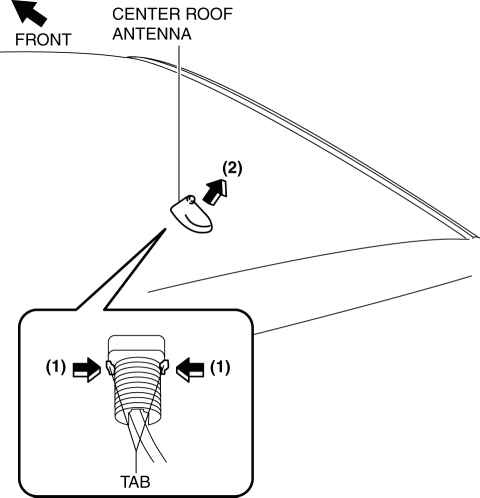
8. Remove the center roof antenna in the direction of the arrow (2) shown in the figure while pressing the center roof antenna tabs in the direction of the arrow (1).
9. Install in the reverse order of removal.
10. After installation, verify that the rubber of the center roof antenna is installed to the roof panel with no space between them.
5HB
1. Disconnect the negative battery cable..
2. Remove the rain sensor cover. (Vehicles with auto light/wiper system).
3. Disconnect the rain sensor connector. (Vehicles with auto light/wiper system)
4. Partially peel back the seaming welts.
5. Remove the following parts:
a. Sunroof seaming welt (vehicles with sunroof)
b. A-pillar trim.
c. Front scuff plate.
d. Rear scuff plate.
e. B-pillar lower trim.
f. Upper anchor of the front seat belt.
g. B-pillar upper trim.
h. Rear seat cushion.
i. Tire house trim.
j. Trunk side upper trim.
k. C-pillar trim.
l. Map light.
m. Sunvisor.
n. Assist handle.
o. Headliner.
6. Disconnect the connector.
AM/FM type
AM/FM/SIRIUS type
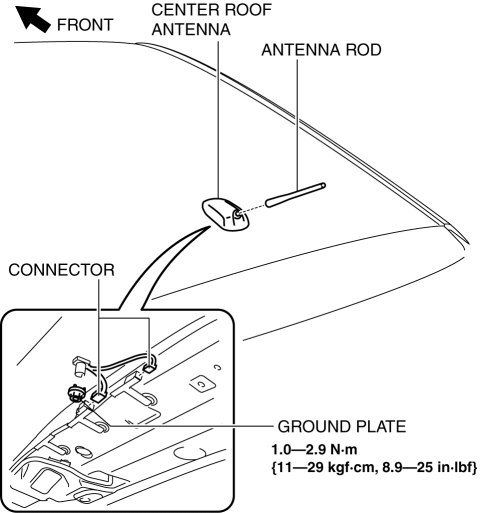
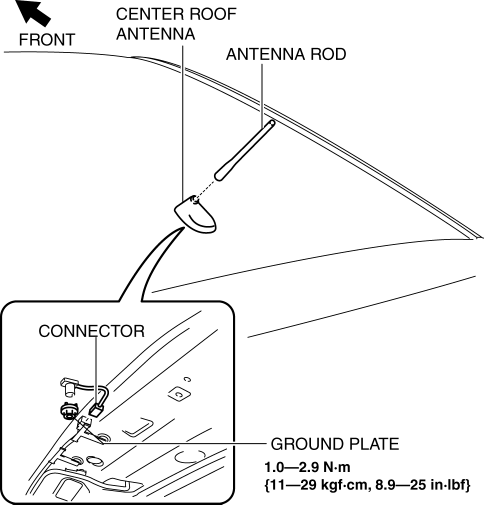
7. Remove the ground plate.
8. Remove the antenna rod.
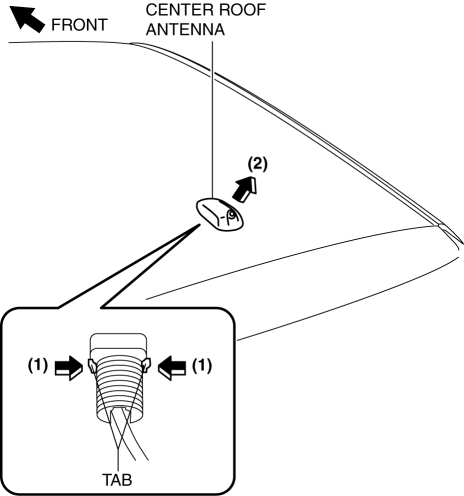
9. Remove the center roof antenna in the direction of the arrow (2) shown in the figure while pressing the center roof antenna tabs in the direction of the arrow (1).
AM/FM type
AM/FM/SIRIUS type
10. Install in the reverse order of removal.
11. After installation, verify that the rubber of the center roof antenna is installed to the roof panel with no space between them.
 Center Roof Antenna Inspection
4SD
1. Disconnect the negative battery cable..
2. Remove the rain sensor cover. (Vehicles with auto light/wiper system).
3. Disconnect the rain sensor connector. (Vehicles with auto light/wiper s ...
 Coil Antenna Removal/Installation
1. Disconnect the negative battery cable..
2. Remove the column cover..
3. Remove the key cylinder..
4. Disconnect the coil antenna connector.
5. Remove the screw.
6. Detach the coil ante ...
Other materials:
Windshield Defrosting and
Defogging
Press the windshield defroster switch.
In this position, the outside air position
is automatically selected, and the air
conditioner automatically turns on. The
air conditioner will directly dehumidify
the air to the front windshield and side
windows (on ). Airflow
amount will be increased. ...
Variable Valve Timing Actuator Inspection [Mzr 2.0, Mzr 2.5]
CAUTION:
Variable valve timing actuator can not be disassembled because it is a precision
unit.
1. Remove the battery cover..
2. Disconnect the negative battery cable..
3. Remove the plug hole plate..
4. Disconnect the wiring harness.
5. Remove the ignition coils..
6. Remo ...
Power Brake Unit Removal/Installation [Mzr 2.3 Disi Turbo]
CAUTION:
Once the brake switch clearance has automatically been adjusted, it cannot
be adjusted again. Therefore, replace the switch with a new one when replacing
the power brake unit or performing any procedure that changes the pedal stroke.
Secure the steering wheel using tap ...
