Mazda 3 Service Manual: Drive Belt Removal/Installation [Mzr 2.0, Mzr 2.5]
MZR 2.0
A/C drive belt removal
1. Remove the aerodynamic under cover No.2 and splash shield as a single unit..
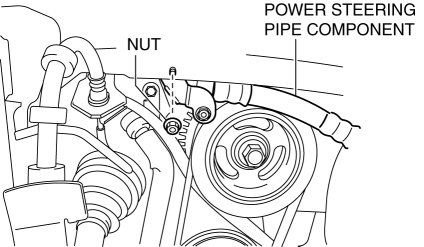
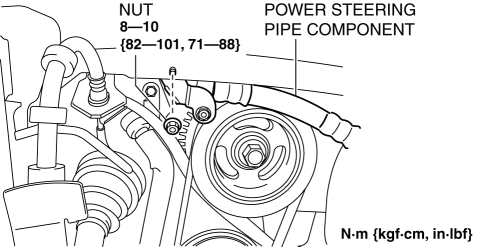
2. Remove the nut shown in the figure and set the power steering pipe component out of the way.
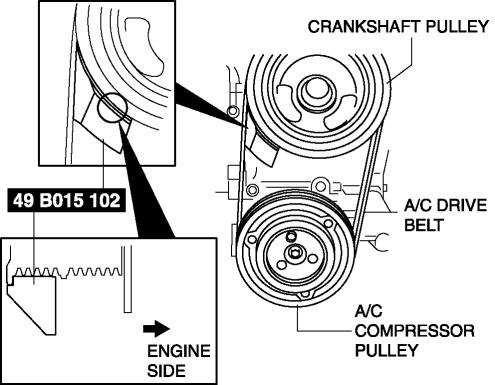
3. Set the SST
as shown in the figure.
NOTE:
-
Hold the SST
by hand until it fits between the A/C drive belt and the crankshaft pulley.
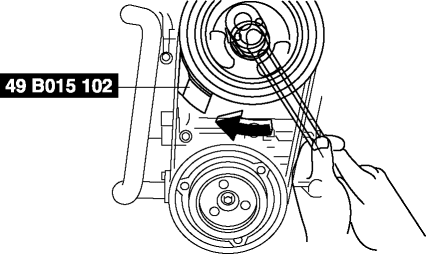
4. Rotate the crankshaft pulley clockwise using a wrench and remove the A/C drive belt.
A/C drive belt installation
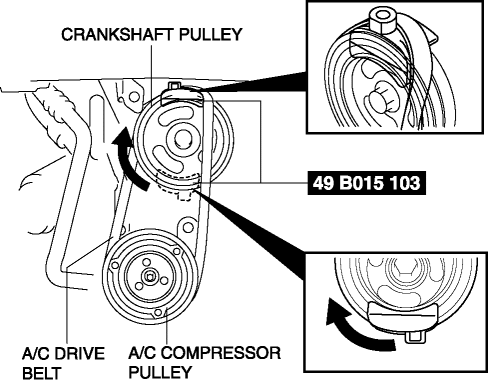
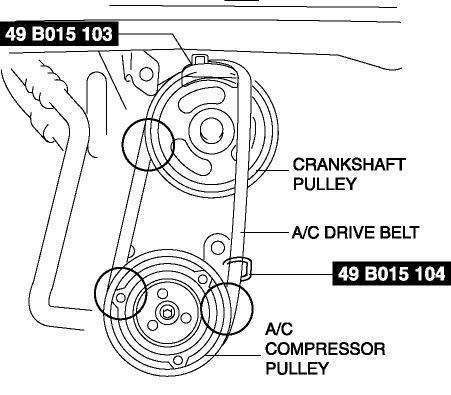
1. Set the SST
to the crankshaft pulley as shown in the figure.
NOTE:
-
Hang the A/C drive belt on to the A/C compressor pulley, then move the SST
upward along the crankshaft pulley.
2. Set the SST
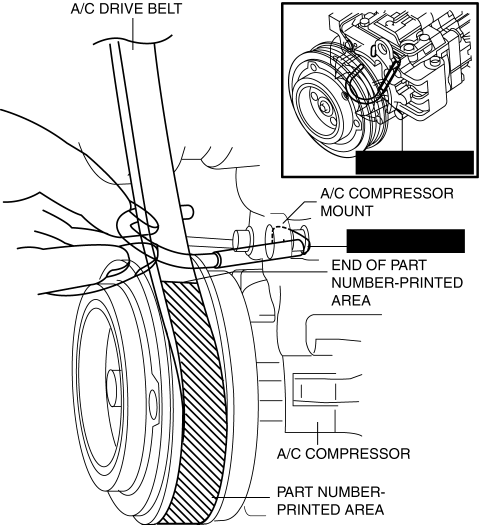
to the A/C compressor mount as shown in the figure.
NOTE:
-
During the A/C drive belt installation, if the SST
touches the part number-printed area on the back of the A/C drive belt, the SST
may not be able to slide smoothly and the A/C drive belt will be pulled inward excessively. This will make it impossible to correctly install the A/C drive belt to the groove of the A/C compressor pulley. To prevent this, adjust the A/C drive belt to the position shown in the figure, then start the procedure.
3. After setting the SST
, verify that the three parts of A/C drive belt shown in the figure are hung on each pulley.
4. Rotate the crankshaft pulley clockwise using a wrench and install the A/C drive belt.
CAUTION:
-
Remove the SST (49 B015 103) immediately after it reaches the lower side to prevent it from falling down and being damaged.
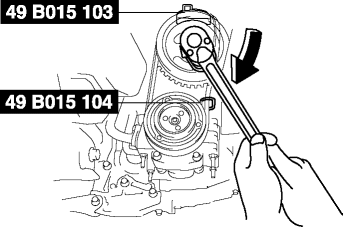
5. Remove the SST (49 B015 104)
.
6. Rotate the crankshaft pulley clockwise one time or more to verify that the A/C drive belt is installed correctly.
CAUTION:
-
Do not turn the crankshaft pulley counter clockwise, otherwise the crankshaft pulley bolt could loosen and the timing could change causing engine damage.
-
If the A/C belt is not seated properly, push/pull the belt with a suitable tool in the direction where it would be seated properly and then rotate the crank pulley clockwise until the belt is correctly seated. If this does not correct the problem, remove the belt and install it again.
7. Install the nut shown in the figure.
8. Install the aerodynamic under cover No.2 and splash shield as a single unit..
Generator drive belt removal
1. Remove the A/C drive belt..
2. Turn the center of the auto tensioner pulley counterclockwise to release tension to the drive belt tension.

3. Remove the generator drive belt.
Generator drive belt installation
1. Install a generator drive belt.
2. Install the A/C drive belt..
MZR 2.5
Removal
1. Remove the aerodynamic under cover No.2 and splash shield as a single unit..
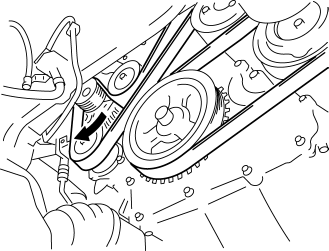
2. Rotate the drive belt auto tensioner in the direction shown in the figure and remove the drive belt.
Installation
1. Install the drive belt.
2. Install the aerodynamic under cover No.2 and splash shield as a single unit..
 Drive Belt Inspection [Skyactiv G 2.0]
Generator Drive Belt
NOTE:
The generator drive belt deflection/tension inspection is not necessary with
the adoption of the drive belt auto tensioner.
1. Verify that the indicator pa ...
 Drive Belt Removal/Installation [Mzr 2.3 Disi Turbo]
1. Remove the aerodynamic under cover No.2 and splash shield as a single unit..
2. Rotate the drive belt auto tensioner in the direction shown in the figure
and remove the drive belt.
3. In ...
Other materials:
Sirius Satellite Radio Antenna Feeder Removal/Installation
SIRIUS Satellite Radio Antenna Feeder No.1
NOTE:
SIRIUS satellite radio antenna feeder No.1 is integrated with the dashboard
wiring harness.
1. Refer to DASHBOARD DISASSEMBLY/ASSEMBLY.
SIRIUS Satellite Radio Antenna Feeder No.2
NOTE:
SIRIUS satellite radio antenna feeder ...
Light Switch Inspection
Vehicles Without Auto Light System
1. Disconnect the negative battery cable..
2. Remove the column cover..
3. Remove the light switch..
4. Verify that the continuity between the light switch terminals is as indicated
in the table.
If not as indicated in the table, replace the light ...
Basic Inspection [FS5 A EL]
STEP
INSPECTION
ACTION
1
Measure the battery voltage.
Is the battery voltage 10.0—14.0 V?
Yes
Go to the next step.
No
Replace or recharge the battery.
(See BATTERY RECHA ...
