Mazda 3 Owners Manual: Engine Coolant
Inspecting Coolant Level
| WARNING
Do not use a match or live fl ame in the
engine compartment. DO NOT ADD
COOLANT WHEN THE ENGINE IS HOT:
A hot engine is dangerous. If the
engine has been running, parts of the
engine compartment can become very
hot. You could be burned. Carefully
inspect the engine coolant in the
coolant reservoir, but do not open it.
|
 Switch the ignition to
 Do not remove either
NOTE Changing the coolant should be done by an Authorized Mazda Dealer.
Inspect the antifreeze protection and coolant level in the coolant reservoir at least once a year—at the beginning of the winter season—and before traveling where temperatures may drop below freezing.
Inspect the condition and connections of all cooling system and heater hoses.
Replace any that are swollen or deteriorated.
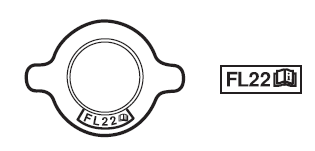
The coolant should be at full in the radiator and between the F and L marks on the coolant reservoir when the engine is cool.
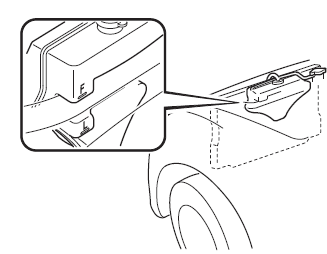
If it is at or near L, add enough coolant to the coolant reservoir to provide freezing and corrosion protection and to bring the level to F.
Securely tighten the coolant reservoir tank cap after adding coolant.
CAUTION
|
If the coolant reservoir is empty or new coolant is required frequently, consult an Authorized Mazda Dealer.
 Inspecting Engine Oil Level
Be sure the vehicle is on a level
surface.
Warm up the engine to normal
operating temperature.
Turn it off and wait at least 5 minutes
for the oil to return to the oil pan.
Pull out the ...
 Brake/Clutch Fluid
Inspecting Brake/Clutch Fluid Level
WARNING
If the brake/clutch fl uid level is low, have
the brakes inspected:
A low brake/clutch fl uid level is
dangerous.
A low level could i ...
Other materials:
If the electronic key does not operate properly
If communication between the electronic key and the Subaru Solterra
is disrupted, or if the key cannot be used due to a depleted battery, the smart
key system and wireless remote functions will be unavailable. In such situations,
the Subaru Solterra can still be accessed and started by followi ...
Climate Control Unit Removal/Installation [Full Auto Air Conditioner]
1. Disconnect the negative battery cable..
2. Remove the following parts:
a. Upper panel.
b. Shift lever knob (MTX).
c. Selector lever knob (ATX).
d. Shift panel.
e. Side wall.
f. Console.
g. Center panel.
h. Audio unit.
3. Remove in the order indicated in the table.
...
Using the interior lights
Interior lights list
Location of the interior lights
Outer foot lights (if equipped)
Inside door handle lights (if equipped)
Rear interior light
Footwell lights (if equipped)
Front interior lights/personal lights
Shift lights
Auxiliary box lights (if equipped)/Wireless charge ...
