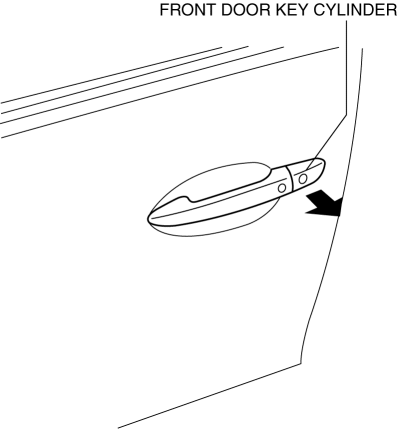
Mazda 3 Service Manual: Front Door Key Cylinder Removal/Installation
1. To access the glass installation bolt, position the front door glass so that the distance from the top of the front door glass to the upper part of the front beltline molding is approx. 80 mm {3.1 in}
.

2. Disconnect the negative battery cable..
3. Remove the following parts:
a. Inner garnish.
b. Front door trim.
c. Front door speaker.
d. Front door glass.
e. Front door module panel.
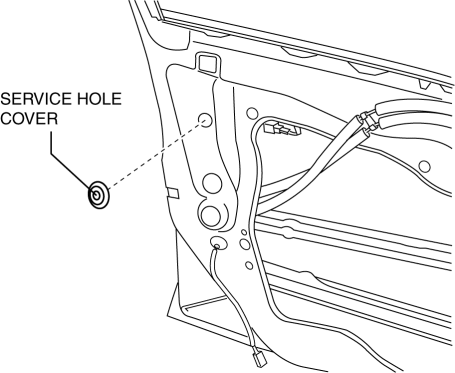
4. Remove the service hole cover.
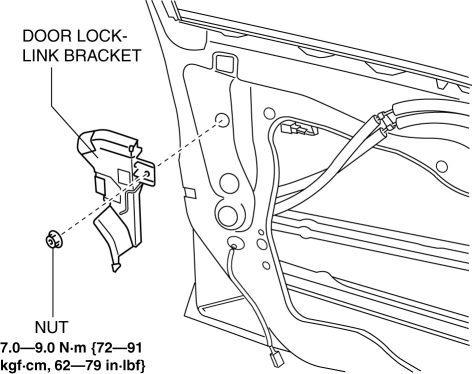
5. Remove the tab, then remove the door lock-link bracket.
6. Remove the service hole cover.

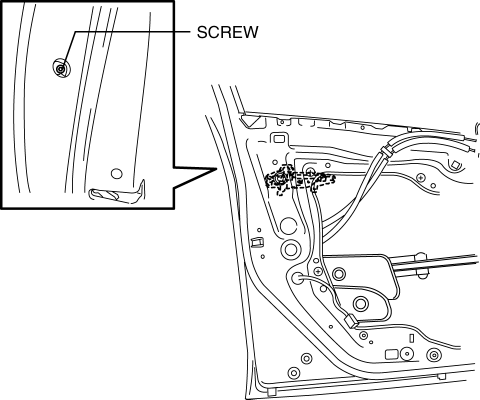
7. Remove the screw from the service hole.
NOTE:
-
The screw cannot be removed because of the stopper.
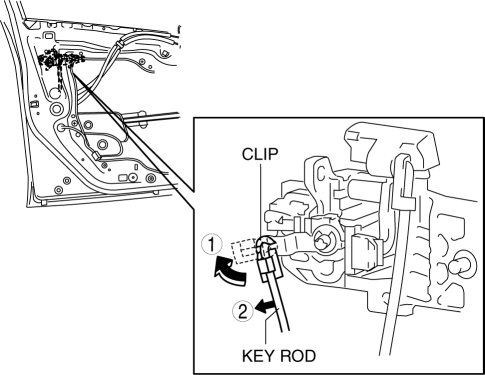
8. Lift the clip in the direction of the arrow (1), and pull out the key rod in the direction of the arrow (2).
9. Press the tab on the front outer handle bracket in the direction of the arrow.
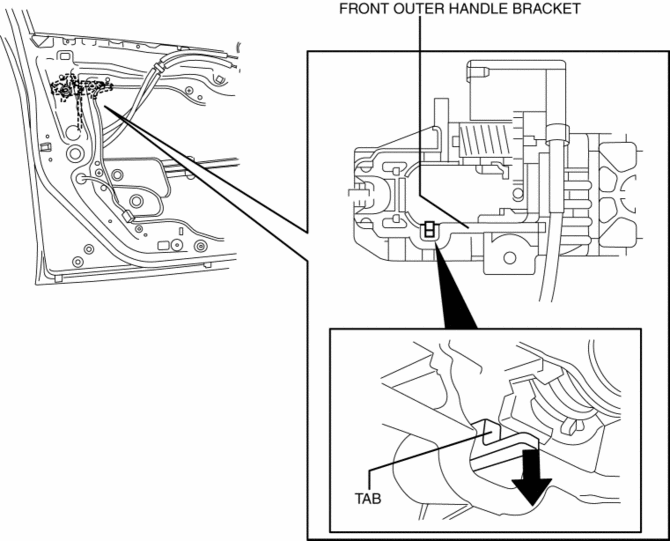
10. Maintaining the condition in Step 9, remove the front key cylinder.
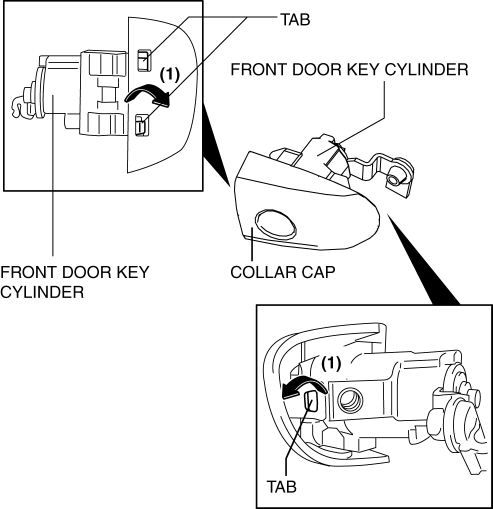
11. Using a tape-wrapped fastener remover, press up the collar cap in the direction of the arrow shown in the arrow, press aside the front door key cylinder tabs (1), and remove the collar cover from the front door key cylinder.
12. Install in the reverse order of removal.
 Keyless Control Module Removal/Installation
1. If the keyless control module is replaced, always perform the following procedure.
Vehicles with immobilizer system
Keyless Control Module Configuration.
Immobilize ...
 Front Door Key Cylinder Switch Inspection
1. To access the glass installation bolt, position the front door glass so that
the distance from the top of the front door glass to the upper part of the front
beltline molding is approx. 80 mm { ...
Other materials:
Map Light Bulb Removal/Installation
1. Disconnect the negative battery cable..
2. Insert a tape-wrapped fastener remover into the service hole and pry with
the screwdriver in the direction shown by the arrow to remove the lens.
3. Remove the map light bulb.
4. Install in the reverse order of removal. ...
Vehicle Speed Sensor (VSS) Removal/Installation [FS5 A EL]
CAUTION:
If foreign materials are stuck to the sensor, disturbance by magnetic flux
can cause sensor output to be abnormal and thereby negatively affect control.
Make sure that foreign materials such as iron filings are not stuck to the sensor
during installation.
1. Perform t ...
Console Removal/Installation
1. Disconnect the negative battery cable..
2. Remove the following parts:
a. Upper panel.
b. Shift knob (MTX).
c. Selector lever knob (ATX).
d. Shift panel.
e. Side wall.
3. Remove the bolts.
4. Remove the screws.
5. Pull the console in the direction of the arrow shown in t ...
