Mazda 3 Service Manual: Front Fog Light Removal/Installation
Except Mazdaspeed3
1. Disconnect the negative battery cable..
2. Remove the front bumper..
3. Pull the wiring harness from the hook in the direction of the arrow shown in the figure and remove it.
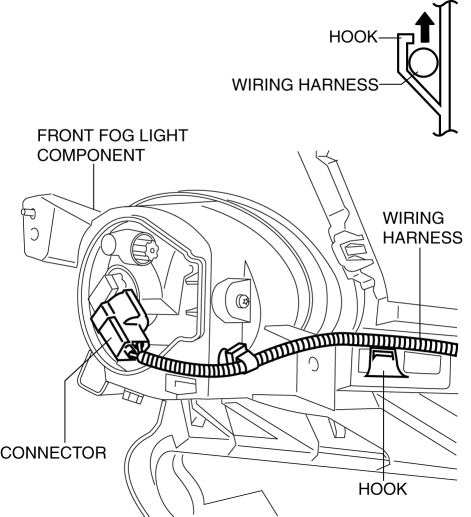
4. Disconnect the connector.
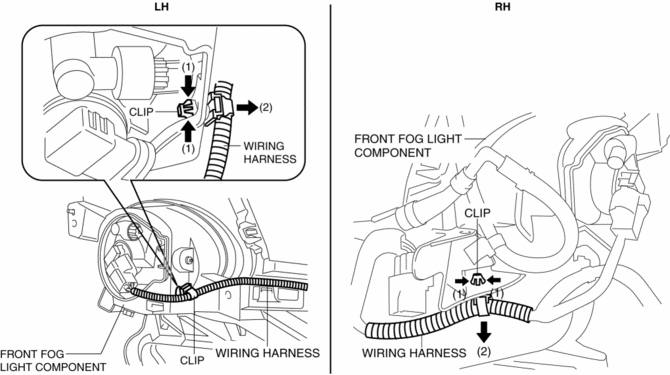
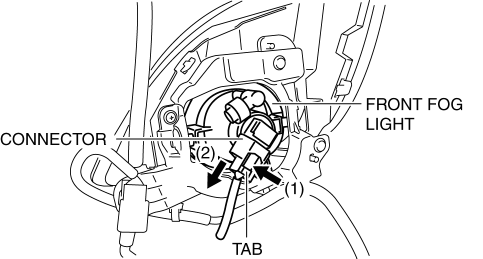
5. Pull the wiring harness in the direction of the arrow (2) shown in the figure and remove it while detaching clip in the direction of the arrow (1).
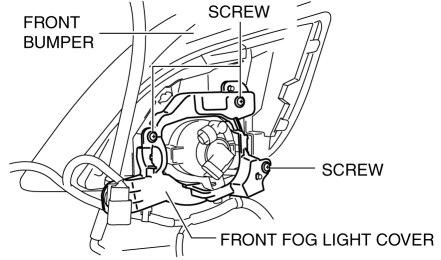
6. Remove the screw A.
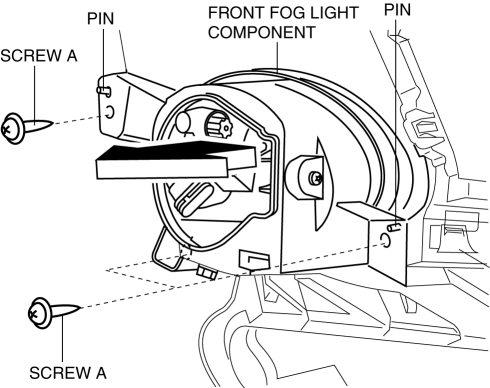
7. Pull the front fog light component in the direction of the arrow shown in the figure and remove it while remove the pins.
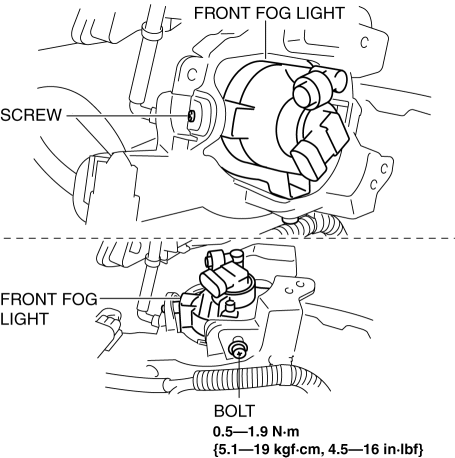
8. Remove the bolt.
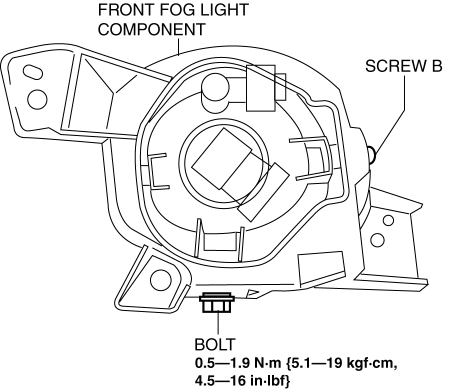
9. Remove the screw B.
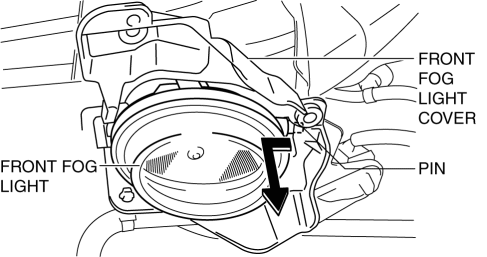
10. Pull the front fog light in the direction of the arrow shown in the figure and remove the pin from the front fog light cover.
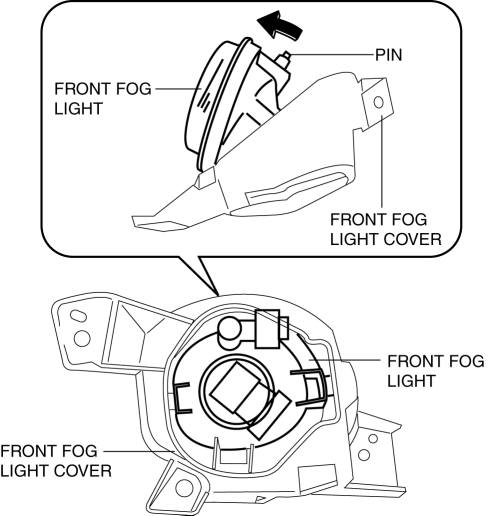
11. Remove the front fog light.
12. Install in the reverse order of removal.
13. Adjust the front fog light aiming..
Mazdaspeed3
1. Disconnect the negative battery cable..
2. Remove the fasteners and slightly bend back the mudguard.
3. While pressing the tab in the direction of arrow (1) shown in the figure, pull the connector in the direction of arrow (2) and disconnect it.
4. Remove the screws shown in the figure and remove the front fog light cover from the front bumper.
5. Remove the screw and bolt shown in the figure.
6. Pull the front fog light in the direction of the arrow shown in the figure and remove it from the front fog light cover.
7. Remove the front fog light.
8. Install in the reverse order of removal.
9. Adjust the front fog light aiming..
 Front Fog Light Relay Removal/Installation
1. Disconnect the negative battery cable..
2. Remove the front mudguard.(RH).
3. Remove the front fog light relay case.
4. Remove the cover.
5. Remove the front fog light relay.
6. Insta ...
 Front Side Marker/Front Turn Light Bulb Removal/Installation
1. Disconnect the negative battery cable..
2. Slightly bend back the front mudguard..
3. Rotate the front side marker/front turn light socket in the direction of the
arrow shown in the figure.
...
Other materials:
Adjuster Anchor Removal/Installation
WARNING:
The side air bag sensor is attached to the lower part of the B-pillar. When
working around the B-pillar, disconnect the negative battery cable or work carefully,
avoiding excessive impact to the lower part of the B-pillar.
1. Remove the following parts:
a. Front sc ...
Front Seat Belt Removal/Installation [Two Step Deployment Control System]
WARNING:
Handling the front seat belt (pre-tensioner seat belt) improperly can accidentally
deploy the pre-tensioner seat belt, which may seriously injure you. Read the
air bag system service warnings and cautions before handling the front seat
belt..
WARNING:
Th ...
Bluetooth ® Preparation (Type A)
Bluetooth ® Hands-Free Preparation
Pairing code setting
The 4-digit pairing code setting for
registration of your cell phone (pairing)
can be set beforehand.
NOTE
The initial setting value is “0000”.
Press the pick-up button or talk button
with a short press.
Say: [Beep] “Setupâ ...
