Mazda 3 Service Manual: Fuel Filler Lid Opener And Lever Removal/Installation
Fuel-filler Lid Opener
4SD
1. Open the fuel-filler lid.
2. Remove the following parts:
a. Trunk end trim.
b. Trunk side trim (RH).
3. Remove the nut.
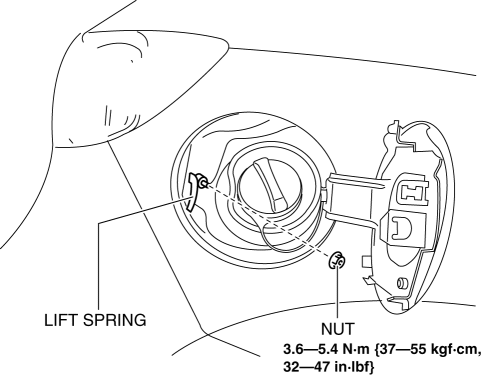
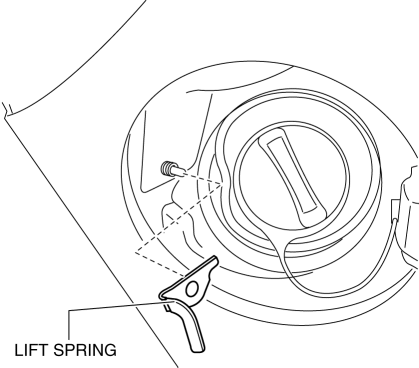
4. Remove the lift spring.
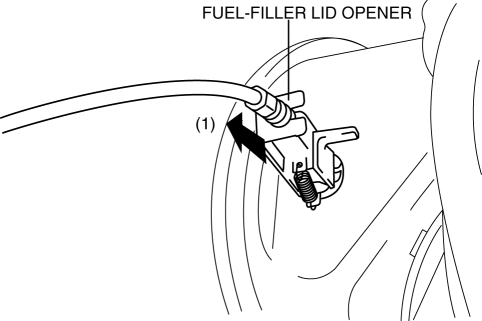
5. Pull out the fuel-filler lid opener in the direction of the arrow (1).
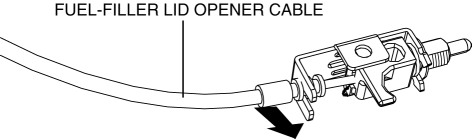
6. Disconnect the fuel-filler lid opener from the fuel-filler lid opener cable.
7. Install in the reverse order of removal.
5HB
1. Open the fuel-filler lid.
2. Remove the following parts:
a. Rear scuff plate (RH).
b. Rear seat cushion.
c. Rear seat back.
d. Tire house trim (RH).
e. Trunk side upper trim (RH).
f. Trunk end trim.
g. Trunk side trim (RH).
3. Remove the nut.

4. Remove the lift spring.
5. Pull out the fuel-filler lid opener in the direction of the arrow (1).
6. Disconnect the fuel-filler lid opener from the fuel-filler lid opener cable.
7. Install in the reverse order of removal.
Fuel-filler Lid Opener Lever
1. Remove the front scuff plate (LH)..
2. Remove the front side trim (LH)..
3. Remove the fuel-filler lid opener bezel..
4. Partially peel back the floor covering.
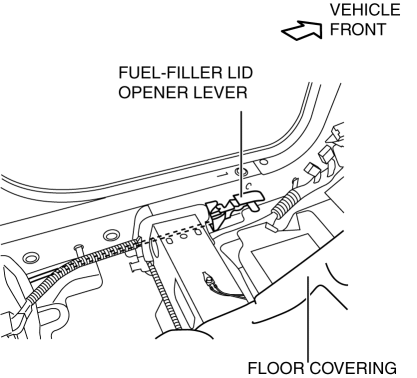
5. Remove the bolts.
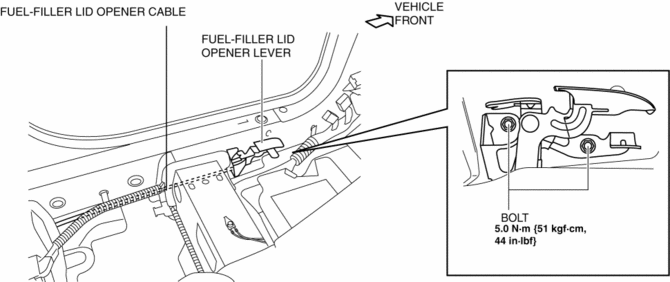
6. Disconnect the cable and fuel-filler lid opener lever.
7. Install in the reverse order of removal.
 Fuel Filler Lid Adjustment
1. Measure the gap and height difference between the fuel-filler lid and the
body.
2. Loosen the fuel-filler lid installation bolts, and adjust the fuel-filler
lid.
Standard clearance
...
 Fuel Filler Lid Opener Bezel Removal/Installation
1. Remove the screw.
2. Pull the fuel-filler lid opener bezel in the direction of the arrow (1) then
remove the tab.
3. Move the fuel-filler lid opener bezel in the direction of the arrow (2 ...
Other materials:
How to use USB mode (Type A)
Type
Playable data
USB mode
MP3/WMA/AAC file
This unit does not support a USB 3.0
device. In addition, other devices may not
be supported depending on the model or
OS version.
Playback
Switch the ignition to ACC or ON.
Press the power/volume dial to ...
Oil Cooler Flushing [FS5 A EL]
NOTE:
If the automatic transaxle is replaced, flush and inspect the oil cooler.
When replacing the automatic transaxle, inspect the oil cooler together with
flushing it using the following procedures, and with the oil cooler hose removed.
1. Disconnect the oil hose.
2. Set ...
Ignition Switch Removal/Installation [Without Advanced Keyless Entry And Push
Button Start System]
1. Disconnect the negative battery cable..
2. Remove the column cover..
3. Detach the tab.
4. Pull the pin in the direction of the arrow shown in the figure and release
the lock.
5. Disconnect the ignition switch connector and key interlock solenoid connector.
6. Remove the ...
