Mazda 3 Owners Manual: Head Restraints
Your vehicle is equipped with head restraints on all outboard seats and the rear center seat * . The head restraints are intended to help protect you and the passengers from neck injury.
| WARNING Always drive with the head restraints installed when seats are being used and make sure they are properly adjusted: Driving with the head restraints adjusted too low or removed is dangerous. With no support behind your head, your neck could be seriously injured in a collision. |
Height adjustment
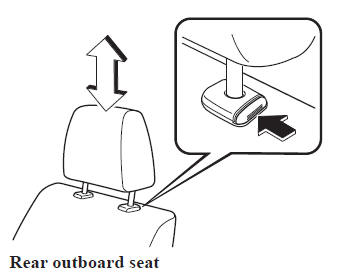
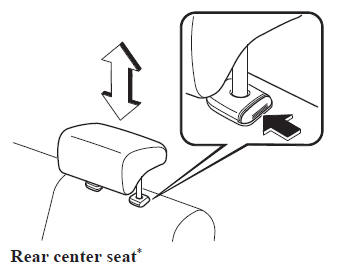
To raise a head restraint, pull it up to the desired position.
To lower the head restraint, press the stopcatch release, then push the head restraint down.
Adjust the head restraint so that the center is even with the top of the passenger's ears.
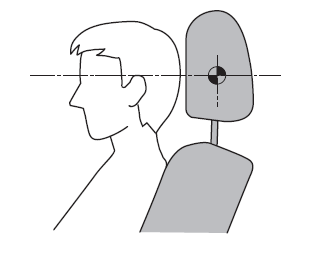
Front outboard seat
*Some models.
Removal/Installation
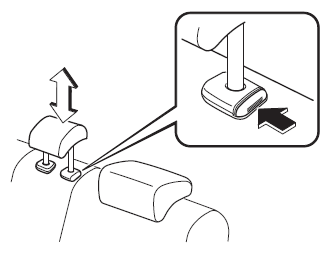
To remove the head restraint, pull it up while pressing the stop-catch.
To install the head restraint, insert the legs into the holes while pressing the stopcatch.
| WARNING Always drive with the head restraints installed when seats are being used and make sure they are properly installed: Driving with the head restraints not installed is dangerous. With no support behind your head, your neck could be seriously injured in a collision. |
 Armrest
The rear armrest in the center of the rear
seatback can be used (no occupant in the
center seat) or placed upright.
WARNING
Never put your hands and fi ngers
around the moving part ...

Other materials:
Trunk Lid Latch Switch Inspection
1. Disconnect the negative battery cable..
2. Remove the trunk lid trim..
3. Remove the trunk lid latch and lock actuator..
4. Press the latch in using a flathead screwdriver to inspect the latch lever
condition.
5. Verify that the continuity is as indicated in the table.
I ...
Rear Wiper And Washer Switch Inspection
1. Disconnect the negative battery cable..
2. Remove the following parts:
a. Front scuff plate (Driver‘s side).
b. Front side trim (Driver‘s side).
c. Hood release lever.
d. Lower panel.
e. Column cover.
f. Wiper and washer switch.
3. Verify that the continuity between the rear w ...
Checking tires
Regular inspection of the tires on your Subaru Solterra is essential for maintaining
safety, efficiency, and optimal driving performance. Begin by checking whether the
treadwear indicators are visible, as these serve as a clear signal of tire wear.
Additionally, carefully examine each tire for ...
