Mazda 3 Service Manual: Hood Removal/Installation
WARNING:
-
Removing the hood without supporting it could cause the hood to fall and cause serious injury. Always perform the procedure with at least another person to prevent the hood from falling.
1. Disconnect the negative battery cable..
2. Remove the following parts:
a. Front bumper.
b. Front combination light.
c. Front fender molding.
d. Side step molding.
e. Front fender panel.
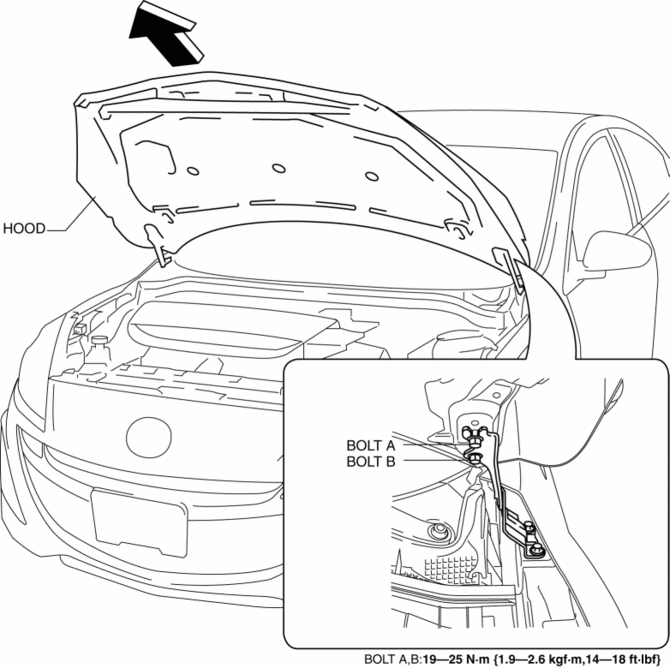
3. After loosening bolt A and removing bolt B, remove the hood in the direction of the arrow shown in the figure.
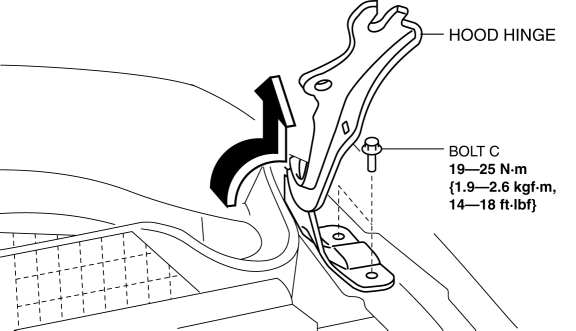
4. Remove bolt C, and remove the hood hinge in the direction of the arrow shown in the figure.
5. Install in the reverse order of removal.
6. When installing the hood, adjust the hood by moving the hood hinge..
 Hood Release Cable Removal/Installation
1. Disconnect the negative battery cable..
2. Remove the battery tray..
3. Remove the Front mudguard (LH)..
4. Remove the hood release cable from clips A.
5. Remove the clips B.
6. Disco ...
 Liftgate Adjustment
1. Measure the gap and height difference between the liftgate and the body.
2. Loosen the liftgate hinge installation bolts and adjust the gap by moving
the liftgate.
Standard clearance
...
Other materials:
Steering Wheel And Column Removal/Installation [Without Advanced Keyless Entry
And Push Button Start System]
WARNING:
Handling the air bag module improperly can accidentally operate (deploy)
the air bag module, which may seriously injure you. Read the service warnings
before handling the air bag module..
1. Remove the driver-side front scuff plate..
2. Remove the driver-side front sid ...
Afs (Adaptive Front Lighting System) Off Switch Inspection
1. Disconnect the negative battery cable..
2. Remove the AFS OFF switch..
3. Verify that the continuity between the AFS OFF switch terminals is as indicated
in the table.
If the continuity is not as indicated in the table, replace the AFS OFF switch.
4. Apply battery po ...
Cooling System Service Warnings [Mzr 2.0, Mzr 2.5]
WARNING:
Never remove the cooling system cap or loosen the radiator drain plug while
the engine is running, or when the engine and radiator are hot. Scalding engine
coolant and steam may shoot out and cause serious injury. It may also damage
the engine and cooling system.
Tu ...
